[TUTORIAL] How to set up Proxmox VE 7 on a laptop (workstation) with wifi (wlan)

Feb 1, 2021
2
4
8
53
Tested on a Lenovo Thinkpad P1 gen2 with the Proxmox 7.1-2 iso.
An ethernet connection to internet is required during the installation process (because iwd is not installed by default).

1. Plug the ethernet cable

2. Install Proxmox

3. Reboot and login with root

4. Update the Proxmox repository

Disable the enterprise repository
vi /etc/apt/sources.list.d/pve-enterprise.list
by commenting the line
#deb https://enterprise.proxmox.com/debian/pve bullseye pve-enterprise
and enable the "no-subscription" repository by creating a new file
vi /etc/apt/sources.list.d/pve-no-subscription.list
with
deb http://download.proxmox.com/debian/pve bullseye pve-no-subscription

5. Update the System
apt update && apt dist-upgrade

6. Install the Desktop Environment (or Windows Manager)
apt install -y task-kde-desktop (or task-xfce-desktop, task-gnome-desktop, i3, sway...)

7. Create a bridge for your VM and CT
The network address (10.0.0.1/16 here) must be different from the network address of your internet box.
Don't add anything to this file if you only use a wifi connection.
vi /etc/network/interfaces
Code:
auto lo
iface lo inet loopback

auto vmbr0
iface vmbr0 inet static
     address 10.0.0.1/16
     bridge-ports none
     bridge-stp off
     bridge-fd 0

8. Configure Nftables for NAT
echo net.ipv4.ip_forward=1 > /etc/sysctl.d/routing.conf sysctl -p --system systemctl enable nftables.service vi /etc/nftables.conf
Code:
#!/usr/sbin/nft -f
flush ruleset
table ip nat {
        chain postrouting {
                type nat hook postrouting priority 0; policy accept; masquerade
        }
}
systemctl start nftables.service

9. Configure iwd (optional)
Iwd (iNet wireless daemon) is required only if you don't want to use the wifi manager provided by your DE, or if you installed a WM.
Iwd is much easier to configure and use than wpa_supplicant.
apt install -y iwd systemctl --now enable iwd (don't mind the messages)
vi /etc/iwd/main.conf
Code:
[General]
EnableNetworkConfiguration=true
service iwd restart

10. Create your user
adduser [user]

11. Reboot and unplug the ethernet cable

12. Login with your user

13. Connect to the wifi network

Use your DE wifi manager.
Or iwd with iwctl (if installed and configured previously):
ip a (check the wlan interface name ; "wlan0" here)
iwctl station [wlan0] scan && iwctl station [wlan0] get-networks iwctl station [wlan0] connect [SSID]

14. Create a VM or CT and configure the network
Login to PVE at https://127.0.0.1:8006
Create a VM or CT and configure the IP address with 10.0.0.[100]/16 and gateway 10.0.0.1
 
  • Like
Reactions: isa and micash2137
Hey there, great guide. Really helped me out!

I'm attempting to achieve this setup and so far I've had partial success...
I can pass internet to a CT, but not to a VM. VM can ping host, as well as other resources (and vice-versa), but it can't get outside. Again, CT can get outside.

ip a on..

host:
Code:
1: lo: <LOOPBACK,UP,LOWER_UP> mtu 65536 qdisc noqueue state UNKNOWN group default qlen 1000
    link/loopback 00:00:00:00:00:00 brd 00:00:00:00:00:00
    inet 127.0.0.1/8 scope host lo
       valid_lft forever preferred_lft forever
    inet6 ::1/128 scope host
       valid_lft forever preferred_lft forever
2: enp60s0: <BROADCAST,MULTICAST> mtu 1500 qdisc noop state DOWN group default qlen 1000
    link/ether 10:65:30:f7:02:f2 brd ff:ff:ff:ff:ff:ff
4: wlan0: <BROADCAST,MULTICAST,UP,LOWER_UP> mtu 1500 qdisc noqueue state UP group default qlen 1000
    link/ether 9c:b6:d0:6b:44:a7 brd ff:ff:ff:ff:ff:ff
    inet 192.168.0.109/24 scope global wlan0
       valid_lft forever preferred_lft forever
    inet6 fe80::9eb6:d0ff:fe6b:44a7/64 scope link
       valid_lft forever preferred_lft forever
5: vmbr0: <BROADCAST,MULTICAST,UP,LOWER_UP> mtu 1500 qdisc noqueue state UP group default qlen 1000
    link/ether 7a:7b:e7:78:c8:e3 brd ff:ff:ff:ff:ff:ff
    inet 10.0.0.1/16 scope global vmbr0
       valid_lft forever preferred_lft forever
    inet6 fe80::787b:e7ff:fe78:c8e3/64 scope link
       valid_lft forever preferred_lft forever
6: tap101i0: <BROADCAST,MULTICAST,PROMISC,UP,LOWER_UP> mtu 1500 qdisc pfifo_fast master vmbr0 state UNKNOWN group default qlen 1000
    link/ether da:a7:8c:75:df:c7 brd ff:ff:ff:ff:ff:ff
7: veth100i0@if2: <BROADCAST,MULTICAST,UP,LOWER_UP> mtu 1500 qdisc noqueue master fwbr100i0 state UP group default qlen 1000
    link/ether fe:40:41:cd:77:28 brd ff:ff:ff:ff:ff:ff link-netnsid 0
8: fwbr100i0: <BROADCAST,MULTICAST,UP,LOWER_UP> mtu 1500 qdisc noqueue state UP group default qlen 1000
    link/ether 22:7e:13:c5:be:c8 brd ff:ff:ff:ff:ff:ff
9: fwpr100p0@fwln100i0: <BROADCAST,MULTICAST,UP,LOWER_UP> mtu 1500 qdisc noqueue master vmbr0 state UP group default qlen 1000
    link/ether 4a:44:2c:c3:f6:e5 brd ff:ff:ff:ff:ff:ff
10: fwln100i0@fwpr100p0: <BROADCAST,MULTICAST,UP,LOWER_UP> mtu 1500 qdisc noqueue master fwbr100i0 state UP group default qlen 1000
    link/ether 9e:31:50:c5:f9:0a brd ff:ff:ff:ff:ff:ff

CT:
Code:
1: lo: <LOOPBACK,UP,LOWER_UP> mtu 65536 qdisc noqueue state UNKNOWN qlen 1000
    link/loopback 00:00:00:00:00:00 brd 00:00:00:00:00:00
    inet 127.0.0.1/8 scope host lo
       valid_lft forever preferred_lft forever
    inet6 ::1/128 scope host
       valid_lft forever preferred_lft forever
2: eth0@if7: <BROADCAST,MULTICAST,UP,LOWER_UP,M-DOWN> mtu 1500 qdisc noqueue state UP qlen 1000
    link/ether da:4d:9c:e7:9c:76 brd ff:ff:ff:ff:ff:ff
    inet 10.0.0.7/16 scope global eth0
       valid_lft forever preferred_lft forever
    inet6 fe80::d84d:9cff:fee7:9c76/64 scope link
       valid_lft forever preferred_lft forever

VM:
Code:
1: lo: <LOOPBACK,UP,LOWER_UP> mtu 65536 qdisc noqueue state UNKNOWN qlen 1000
    link/loopback 00:00:00:00:00:00 brd 00:00:00:00:00:00
    inet 127.0.0.1/8 scope host lo
       valid_lft forever preferred_lft forever
    inet6 ::1/128 scope host
       valid_lft forever preferred_lft forever
2: eth0: <BROADCAST,MULTICAST,UP,LOWER_UP> mtu 1500 qdisc pfifo_fast state UP qlen 1000
    link/ether 7e:99:94:3e:6d:3e brd ff:ff:ff:ff:ff:ff
    inet 10.0.0.3/16 scope global eth0
       valid_lft forever preferred_lft forever
    inet6 fe80::7c99:94ff:fe3e:6d3e/64 scope link
       valid_lft forever preferred_lft forever

How do you get your VMs online?

Cheers!
Silly oversight. Turns out I COULD ping out if I used a public IP. The answer was that I did not set my DNS inside the VM (I actually thought that it would fallback to the host DNS if not set).
 
Silly oversight. Turns out I COULD ping out if I used a public IP. The answer was that I did not set my DNS inside the VM (I actually thought that it would fallback to the host DNS if not set).
Hi, I was set dns on nameserver 8.8.8.8 but still cannot connect to the internet. could you share ur config ? thanks
 
I followed the tutorial and now the proxmox has the Internet access, but VM doesn't.

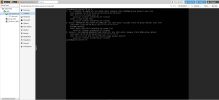
In the node System/Network i see 2 positions: eno1 - Network Device not active; and vmbr0 - Linux Bridge - CIDR 10.0.0.1/16

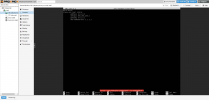
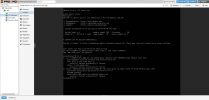
When I installed Ubuntu i doesnt get the proper IP address.

Anyone could help how to configure it?

Best!
 

Attachments

  • network1.png
    network1.png
    66.1 KB · Views: 144
  • ubuntu1.png
    ubuntu1.png
    120 KB · Views: 140
  • ubuntu2.png
    ubuntu2.png
    78.5 KB · Views: 123
  • ubuntu2ipa.png
    ubuntu2ipa.png
    165.5 KB · Views: 122
I followed the tutorial and now the proxmox has the Internet access, but VM doesn't.

In the node System/Network i see 2 positions: eno1 - Network Device not active; and vmbr0 - Linux Bridge - CIDR 10.0.0.1/16

When I installed Ubuntu i doesnt get the proper IP address.

Anyone could help how to configure it?

Best!
it looks you VMs were not property configured for static ip. Please check the below links (I did not check them but found relevant to your version of Ubuntu or google for other resources how to configure static ip for Ubuntu 22.04)
https://tecadmin.net/how-to-configure-static-ip-address-on-ubuntu-22-04/
https://linuxhint.com/setup_static_ip_address_ubuntu/
 
Hi

I have a problem with last part.
I have VM with Home Assistant and i dont have access to it from browser.
Where this part should be configured, in Proxmox somewhere or directly in VM (in my case HAOS)?
"Create a VM or CT and configure the IP address with 10.0.0.[100]/16 and gateway 10.0.0.1"
 
Hi!
Got an issue. Cannot access the internet from the VM. Also cannot access pve host from the VM and vice versa.
I cannot ping the internet from the host. (ping google.com)
Only can ping it when specifying the interface. (ping -I wlan0 google.com)

During my installation steps, I skipped step 6. (I'm just connecting to the laptop through the web interface, so I decided that I don't need any desktop environment).
Also, in step 9 I installed iwd and in step 13 I used it to connect to the wifi.

I want my existing home LAN, host, and VMs to be in the same network (192.168.0.xxx/24).
My home router is at 192.168.0.1.
Proxmox laptop is expected to be at 192.168.0.5.
And VM (ubuntu server 22.04) at 192.168.0.200.

Here are the /etc/network/interface from pve-host:
Code:
auto lo
iface lo inet loopback

auto vmbr0
iface vmbr0 inet static
        address 192.168.0.5/24
        gateway 192.168.0.1
        bridge-ports none
        bridge-stp off
        bridge-fd 0

And /etc/netplan/00-installer-config.yaml from ubuntu-server:
Code:
network:
  ethernets:
    ens18:
      dhcp4: false
      addresses: [192.168.0.200/24]
      routes:
        - to: default
          via: 192.168.0.5 #(I tried setting up gateway to both 192.168.0.1 (router) and 192.168.0.5 (pve host))
  version: 2


Also attaching the ip a && ip r results for proxmox host:

Code:
1: lo: <LOOPBACK,UP,LOWER_UP> mtu 65536 qdisc noqueue state UNKNOWN group default qlen 1000
    link/loopback 00:00:00:00:00:00 brd 00:00:00:00:00:00
    inet 127.0.0.1/8 scope host lo
       valid_lft forever preferred_lft forever
    inet6 ::1/128 scope host
       valid_lft forever preferred_lft forever
2: enp7s0: <BROADCAST,MULTICAST> mtu 1500 qdisc noop state DOWN group default qlen 1000
    link/ether b8:70:f4:13:xx:xx brd ff:ff:ff:ff:ff:ff
4: wlan0: <BROADCAST,MULTICAST,UP,LOWER_UP> mtu 1500 qdisc mq state UP group default qlen 1000
    link/ether c0:f8:da:62:xx:xx brd ff:ff:ff:ff:ff:ff
    inet 192.168.0.5/24 brd 192.168.0.255 scope global noprefixroute wlan0
       valid_lft forever preferred_lft forever
5: vmbr0: <BROADCAST,MULTICAST,UP,LOWER_UP> mtu 1500 qdisc noqueue state UP group default qlen 1000
    link/ether 6a:7c:ec:b2:xx:xx brd ff:ff:ff:ff:ff:ff
    inet 192.168.0.5/24 scope global vmbr0
       valid_lft forever preferred_lft forever
    inet6 fe80::687c:ecff:xxxx:xxxx/64 scope link
       valid_lft forever preferred_lft forever
6: tap100i0: <BROADCAST,MULTICAST,PROMISC,UP,LOWER_UP> mtu 1500 qdisc pfifo_fast master fwbr100i0 state UNKNOWN group default qlen 1000
    link/ether f2:11:73:68:xx:xx brd ff:ff:ff:ff:ff:ff
7: fwbr100i0: <BROADCAST,MULTICAST,UP,LOWER_UP> mtu 1500 qdisc noqueue state UP group default qlen 1000
    link/ether 56:96:b9:bb:xx:xx brd ff:ff:ff:ff:ff:ff
8: fwpr100p0@fwln100i0: <BROADCAST,MULTICAST,UP,LOWER_UP> mtu 1500 qdisc noqueue master vmbr0 state UP group default qlen 1000
    link/ether 46:e6:7e:c7:ba:8e brd ff:ff:ff:ff:ff:ff
9: fwln100i0@fwpr100p0: <BROADCAST,MULTICAST,UP,LOWER_UP> mtu 1500 qdisc noqueue master fwbr100i0 state UP group default qlen 1000
    link/ether 32:b3:ec:2c:54:4c brd ff:ff:ff:ff:ff:ff


default via 192.168.0.1 dev vmbr0 proto kernel onlink
default via 192.168.0.1 dev wlan0 proto dhcp metric 304
192.168.0.0/24 dev wlan0 proto dhcp scope link src 192.168.0.5

And for ubuntu server:
Code:
1: lo: <LOOPBACK,UP,LOWER_UP> mtu 65536 qdisc noqueue state UNKNOWN group default qlen 1000
    link/loopback 00:00:00:00:00:00 brd 00:00:00:00:00:00
    inet 127.0.0.1/8 scope host lo
       valid_lft forever preferred_lft forever
    inet6 ::1/128 scope host
       valid_lft forever preferred_lft forever
2: ens18: <BROADCAST,MULTICAST,UP,LOWER_UP> mtu 1500 qdisc fq_codel state UP group default qlen 1000
    link/ether 82:f0:2f:e7:xx:xx brd ff:ff:ff:ff:ff:ff
    altname enp0s18
    inet 192.168.0.200/24 brd 192.168.0.255 scope global ens18
       valid_lft forever preferred_lft forever
    inet6 fe80::80f0:2fff:xxxx:xxxx/64 scope link
       valid_lft forever preferred_lft forever

default via 192.168.0.5 dev ens18 proto static  #(I tried setting up gateway to both 192.168.0.1 (router) and 192.168.0.5 (pve host))
192.168.0.0/24 dev ens18 proto kernel scope link src 192.168.0.200


Thanks for any suggestions in advance!
 
I thought about that as well. :)
But i had few thoughts:
* I thought that step 8 is doing something smart about NAT already. :)
* Why should somebody post this tutorial if it's working only for proxmox and doesn't work for the VMs inside?

But thanks, I'll look at those pages again. :)
Just hoped this topic's solution will have some 'magic' inside. :)
 
I believe this can work with wlan or over cable and vm host from proxmox able to go outside (internet) here is the configuration i used:

as for my setup, i skip the step "8. Configure Nftables for NAT" as i i will just use simple IPTables.


Code:
auto lo
iface lo inet loopback

iface enp3s0 inet manual
iface wlan0 inet manual

#auto vmbr0
#iface vmbr0 inet static
#        address 192.168.0.201/24
#        gateway 192.168.0.1
#        bridge-ports enp3s0
#        bridge-stp off
#        bridge-fd 0

auto vmbr1
iface vmbr1 inet static
        address 10.10.100.1/24
        bridge-ports none
        bridge-stp off
        bridge-fd 0
        post-up echo 1 > /proc/sys/net/ipv4/ip_forward
        post-up iptables -t nat -A POSTROUTING -s '10.10.100.1/24' -o wlan0 -j MASQUERADE
        post-down iptables -t nat -D POSTROUTING -s '10.10.100.1/24' -o wlan0 -j MASQUERADE


Since I'm using the wifi - wlan0 I comment the part `vmbr0` that proxmox generated.

Check the part `vmbr1` this will make the vm host get the internet access.
Code:
post-up iptables -t nat -A POSTROUTING -s '10.10.100.1/24' -o wlan0 -j MASQUERADE
post-down iptables -t nat -D POSTROUTING -s '10.10.100.1/24' -o wlan0 -j MASQUERADE

You may need to modify the "wlan0" to which your connection interface name, as for me since im using wifi so that's why it's become "wlan0".

post-up iptables -t nat -A POSTROUTING -s '10.10.100.1/24' -o >>> wlan0 <<< -j MASQUERADE


Besides for the DHCP i used the dnsmasq on proxmox host, so it will distribute the IP for me.

You can easily setup as below:

First install the DNSMasq
Code:
sudo apt install dnsmasq dnsutils -y

Then open the `/etc/dnsmasq.conf`, at the bottom line add the following line:

Code:
domain=pv.local
interface=vmbr1
dhcp-range=10.10.100.10,10.10.100.200,24h
dhcp-option=vmbr1,3,10.10.100.1
server=1.1.1.1
server=8.8.8.8
dhcp-leasefile=/var/lib/misc/dnsmasq.leases

So by using this setup, your vm host will receive IP assignment automatically by DNSMasq and be able to communicate to the internet via the iptables NAT.

Yes, of course you can update and edit the configuration to suit your setup.

Here example my VM host able to ping to "8.8.8.8"
mkyCgEm.png
 
Last edited:
I believe this can work with wlan or over cable and vm host from proxmox able to go outside (internet) here is the configuration i used:
Excellent & simple guide by QUEBA. a couple of points that may be helpful during the initial setup i.e. prior to following the steps outlined by them

  • Please try using wpa_supplicant first to configure the wlan ( i.e. avoid using iwd ) : I used iwd and could not make this work. I suspect its because iwd configures the network outside of ifconfig
  • Once the setup is done, wpa_supplicant can be started automatically by activating the relevant systemd unit wpa_supplicant@[B]interface[/B].service. This reads its configuration from /etc/wpa_supplicant/wpa_supplicant-[B]interface[/B].conf. Replace the bolded text by the interface name e.g. wpa_supplicant@wlp1s0.service
  • Note that the systemd service will only start the supplicant. The etc/network/interfaces file must include instructions to start the interface automatically and specify a static or dynamic address for the wlan interface e.g. auto wlp1s0 iface wlp1s0 inet dhcp. else the interface will need to be bought up manually with ifup
  • Once everything is setup, and at the end of Qend of QUEBA's instructions, the bridge interface will be down intially but should come up once the VM/container is started. After the guests are started, check within the proxmox host that all interfaces are up ( i.e. wlan & bridge & that the wlan interface has a ip address) . rebooting may help at this stage. (to apply all configurations)
  • One final tip that may help is instead of starting directly with wlan, one can follow the NAT routing as explained in the official guide, assuming the ability to connect with ethernet exits. Once this is working with wired lan, the wireless network can be made to work on the proxmox host. Then it is as simple as switching the name of the wired interface with the wlan interface in the POSTROUTING section of the bridge interface. This is what I followed after trying various options. It gave me confidence that NAT rounting worked independently and WLAN worked independently before trying to combine them in a bridge and seeing the outcome in guest machines.
2023-09-17 01_37_14-[TUTORIAL] - How to set up Proxmox VE 7 on a laptop (workstation) with wif...png


Hope this further helps
 

Attachments

  • 2023-09-17 01_37_14-[TUTORIAL] - How to set up Proxmox VE 7 on a laptop (workstation) with wif...png
    2023-09-17 01_37_14-[TUTORIAL] - How to set up Proxmox VE 7 on a laptop (workstation) with wif...png
    61 KB · Views: 37
  • 2023-09-17 01_37_14-[TUTORIAL] - How to set up Proxmox VE 7 on a laptop (workstation) with wif...png
    2023-09-17 01_37_14-[TUTORIAL] - How to set up Proxmox VE 7 on a laptop (workstation) with wif...png
    61 KB · Views: 37
Last edited:
So I followed the tutorial and I have internet access on my vm, but how can I access services running on this vm from other devices on my network?
 
So I followed the tutorial and I have internet access on my vm, but how can I access services running on this vm from other devices on my network?
You can use IP tables to achive that
sudo iptables -t nat -A PREROUTING -p tcp --dport 2222 -j DNAT --to-destination 10.10.0.100:22
proxmox port: 2222, VM IP : port 10.10.0.100:22
 
If you are laxy just like me and don't wanna give static IPs everytime launching VM/CT inside NAT bridge, you can Setup DHCP

Me to Our beloved ChatGPT: I have a proxmox in which I am running vms and container and I have put these behind nat using nftables and its working fine, have created a bridge and network is 10.10.0.1/16, I have to assign ips to all vms and containers manually, is there any way I can run dhcp on this bridge


ChatGPT:
Yes, you can set up a DHCP server on your Proxmox host to automatically assign IP addresses to the VMs and containers connected to the bridge network. Here's a general guide on how you can achieve this:

Install DHCP Server:​

  1. Update Package Lists:
    bashCopy code
    sudo apt-get update
  2. Install DHCP Server:
    bashCopy code
    sudo apt-get install isc-dhcp-server

Configure DHCP Server:​

  1. Edit DHCP Configuration File:
    bashCopy code
    sudo nano /etc/dhcp/dhcpd.conf
  2. Sample DHCP Configuration:Replace the contents with a configuration suitable for your network. Below is a basic example:
    confCopy code
    option domain-name "example.com";
    option domain-name-servers 8.8.8.8, 8.8.4.4;

    default-lease-time 600;
    max-lease-time 7200;

    subnet 10.10.0.0 netmask 255.255.0.0 {
    range 10.10.1.10 10.10.1.50;
    option routers 10.10.0.1;
    option subnet-mask 255.255.0.0;
    option broadcast-address 10.10.255.255;
    }
    Adjust the subnet, range, option routers, and other parameters according to your network setup.

Configure Network Interface:​

  1. Edit Network Interface Configuration:
    bashCopy code
    sudo nano /etc/default/isc-dhcp-server
  2. Set DHCPD_INTERFACE:Uncomment the line and set the DHCPD_INTERFACE to your bridge interface:
    confCopy code
    INTERFACESv4="br0"

Restart Services:​

  1. Restart DHCP Server:
    bashCopy code
    sudo systemctl restart isc-dhcp-server
  2. Enable DHCP Server on Boot:
    bashCopy code
    sudo systemctl enable isc-dhcp-server

Firewall Configuration:​

If you are using nftables, make sure to allow DHCP traffic on your bridge interface. For example:
bashCopy code
sudo nft add rule ip filter input iifname "br0" udp dport 67 accept
sudo nft add rule ip filter output oifname "br0" udp sport 67 accept

Test:​

  1. Restart VMs/Containers or Renew IP:Once the DHCP server is configured and running, restart your VMs or containers, or renew their IP addresses to trigger DHCP assignment.
  2. Check DHCP Server Logs:You can check the DHCP server logs for any potential issues:
    bashCopy code
    sudo journalctl -xe | grep dhcpd
Make sure to adapt the configuration details according to your network setup. This is a basic guide, and your specific requirements or network configuration might need additional adjustments.

sudo nft add rule ip filter input iifname "vmbr1" udp dport 67 acceptError: Could not process rule: No such file or directoryadd rule ip filter input iifname vmbr1 udp dport 67 accept ^^^^^^root@pm:~#


ChatGPT
The error you're encountering, "No such file or directory," might be related to the fact that the filter table might not exist in the ip family. Before adding rules, it's a good idea to create the necessary table and chain.
Try the following commands to create the filter table and the input chain:
bashCopy code
sudo nft add table ip filter
sudo nft add chain ip filter input { type filter hook input priority 0 \; }
After that, you can try adding the rule again:
bashCopy code
sudo nft add rule ip filter input iifname "vmbr1" udp dport 67 accept
This should create the required table and chain if they don't exist, and then add the rule to allow DHCP traffic on the specified interface. If you encounter any errors or if the issue persists, please let me know, and I'll be happy to assist you further.


You to beloved ChatGPT:
dhcp is working, now how do I check dhcp leases and other info


ChatGPT
Great to hear that DHCP is working! To check DHCP leases and other information, you can use the dhcpd.leases file and also utilize DHCP server management tools. Here's how you can check DHCP leases using the dhcpd.leases file:

Method 1: Check dhcpd.leases File​

The DHCP server maintains a lease file to keep track of assigned IP addresses. The location of this file may vary depending on your DHCP server configuration. The default location on many systems is /var/lib/dhcp/dhcpd.leases.
bashCopy code
cat /var/lib/dhcp/dhcpd.leases
This command will display the contents of the lease file, showing information about leased IP addresses, associated MAC addresses, lease duration, and more.

Method 2: Use dhcp-lease-list Tool​

Another way to check DHCP leases is to use a tool like dhcp-lease-list. You may need to install it first:
bashCopy code
sudo apt-get install dhcping
After installation, you can use it to list DHCP leases:
bashCopy code
sudo dhcp-lease-list --lease PATH_TO_LEASE_FILE
Replace PATH_TO_LEASE_FILE with the actual path to your dhcpd.leases file.

Method 3: Use dhcpd Command​

You can use the dhcpd command to query the DHCP server for lease information. For example:
bashCopy code
sudo dhcpd -q -lf /var/lib/dhcp/dhcpd.leases
This command queries the DHCP server for lease information and displays it.
Choose the method that works best for you based on your system and preferences. The dhcpd.leases file is the most direct way to view lease information, while tools like dhcp-lease-list provide a more structured and human-readable format.

1705832201712.png
 
Last edited:

About

The Proxmox community has been around for many years and offers help and support for Proxmox VE, Proxmox Backup Server, and Proxmox Mail Gateway.
We think our community is one of the best thanks to people like you!

Get your subscription!

The Proxmox team works very hard to make sure you are running the best software and getting stable updates and security enhancements, as well as quick enterprise support. Tens of thousands of happy customers have a Proxmox subscription. Get yours easily in our online shop.

Buy now!