A little back story I have had many issues with setting up noVNC after countless hours of research I finally got everything working as designed. I would like to post a quick walkthrough of how I did this so people in the future will have less issues.
I am using the following API Wrapper for this: https://github.com/zzantares/ProxmoxVE
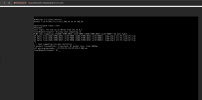
Here is a high-level overview of what we are going to do:
This set up may not work for you, if this is the case then reply in this thread and I will help you out. There may need to be a few changes that you need to make for your particular set up.
Here is how to create a new user with the perms needed for VNC: ( click on the datacenter and then click on users )

Add user by clicking here:


We then need to make sure there is a password for this new user that we created so here is what I personally like to do for that:

Then we can just add a new user here with a strong password ( be mindful of special chars as this proxmox wrapper does not like these chars: '&$'. )
Then we need to replicate this on the datacenter:

Click on the new user that was created and then click on password:

Make sure you enter the same password that you entered in the host systems shell prompt.
Then we need to make sure that this new user has the perms needed for this:
( create a resource pool for our resources we want to give to the api user )

Then we just need to name it you can name it anything you want.
Once we have this then we can add resources to this pool:

Click virtual machines so we can add single machines in bulk:

Then just simply add the machines you want the Api user to be able to access
Lastly, we can add the proper perms to the user:

File system structure:
--- VNC_API:
- vm_functions.php
- preview_vnc.php
Wrapper Install:
FILE: vm_functions.php
FILE: preview_vnc.php
If all goes well you should now have a VNC instance running on preview_vnc.php
I am using the following API Wrapper for this: https://github.com/zzantares/ProxmoxVE
Here is a high-level overview of what we are going to do:
- install the Api wrapper on our host system.
- add an Api user and make sure this user has the proper permissions.
- create functions to preview your VNC on pages of your choice.
- Iframe the VNC instance on the web application
This set up may not work for you, if this is the case then reply in this thread and I will help you out. There may need to be a few changes that you need to make for your particular set up.
Here is how to create a new user with the perms needed for VNC: ( click on the datacenter and then click on users )
Add user by clicking here:
We then need to make sure there is a password for this new user that we created so here is what I personally like to do for that:
Then we can just add a new user here with a strong password ( be mindful of special chars as this proxmox wrapper does not like these chars: '&$'. )
Bash:
adduser apiThen we need to replicate this on the datacenter:
Click on the new user that was created and then click on password:
Make sure you enter the same password that you entered in the host systems shell prompt.
Then we need to make sure that this new user has the perms needed for this:
( create a resource pool for our resources we want to give to the api user )
Then we just need to name it you can name it anything you want.
Once we have this then we can add resources to this pool:
Click virtual machines so we can add single machines in bulk:
Then just simply add the machines you want the Api user to be able to access
Lastly, we can add the proper perms to the user:
File system structure:
--- VNC_API:
- vm_functions.php
- preview_vnc.php
Wrapper Install:
Bash:
composer require zzantares/proxmoxve ~4.0FILE: vm_functions.php
PHP:
require 'vendor/autoload.php';

use ProxmoxVE\Proxmox;
use GuzzleHttp\Client;

function PreviewVnc($vmID, $nodeid) {
    // pass in the vmid and nodeid from the functions above
    $node = $nodeid;
    $vmid = $vmID;

    // set up the proxmox creds and login
    $credentials = [
        'hostname' => 'proxmox-domain', // Also can be an IP
        'username' => 'api',
        'password' => 'password',
    ];

    $host = $credentials['hostname'];

    $proxmox = new Proxmox($credentials);

    if ($login = $proxmox->login()) {

        $ticket = $login->getTicket();

        $config = $proxmox->create("/nodes/$node/qemu/$vmid/vncproxy", [
            'websocket' => 1, // Start websocket proxy
        ]);


        $websock = $proxmox->get("/nodes/$node/qemu/$vmid/vncwebsocket", [

            'vncticket' => $config['data']['ticket'],
            'port' => $config['data']['port']
        ]);


        $src_href = 'https://'.$host.':8006/?console=kvm&novnc=1&node='.$node.'&resize=1&vmid='.$vmid.'&path=api2/json/nodes/'.$node.'/qemu/'.$vmid.'/vncwebsocket/port/'.$config['data']['port'].'"/vncticket/"'.$ticket;
        echo '<iframe src="'.$src_href.'" frameborder="0" scrolling="no" width="100%" height="100%"></iframe>';
    }
}

?>
FILE: preview_vnc.php
Code:
require 'vm_functions.php';

$vmid = 100;
$node = 'proxmox';

PreviewVnc($vmid, $node);
If all goes well you should now have a VNC instance running on preview_vnc.php
Attachments

Last edited:


")