Aim:
To host a headless VM with full access to a modern GPU, in order to stream games from.
Assumptions:
1) Enable in BIOS: UEFI, VT-d, Multi-monitor mode
This is done via the BIOS. Can be confirmed using dmesg (search for efi strings), or the existence of /sys/firmware/efi on the filesystem and "vmx" in /proc/cpuinfo. Multi Monitor mode had to be enabled in my bios otherwise the card wasn't detected at all (even by the host using lspci).
2) Enable IOMMU via grub (Repeat post upgrade!)
edit /etc/default/grub and change
GRUB_CMDLINE_LINUX_DEFAULT="quiet"
to
GRUB_CMDLINE_LINUX_DEFAULT="quiet intel_iommu=on video=efifb ff"
ff"
then run update-grub
Confirm using dmesg | grep -e DMAR -e IOMMU - this should produce output.
As of PVE 5, I had to also disable efifb.
3) Blacklist nvidia/nouveu so that Proxmox doesn't load the card (Repeat post upgrade!)
echo "blacklist radeon" >> /etc/modprobe.d/blacklist.conf
echo "blacklist nouveau" >> /etc/modprobe.d/blacklist.conf
echo "blacklist nvidia" >> /etc/modprobe.d/blacklist.conf
Run update-initramfs -u to apply the above. Confirm using lspci -v - this will tell you if a driver has been loaded or not by the VGA adaptor.
4) Load kernel modules for virtual IO
Add to /etc/modules the following:
vfio
vfio_iommu_type1
vfio_pci
vfio_virqfd
I'm not sure how to confirm the above.
5) Get GPU IDs and addresses
Run lspci -v to list all the devices in your PC. Find the relevant VGA card entry. For example:
01:00.0 VGA compatible controller: NVIDIA Corporation GP104 [GeForce GTX 1070] (rev a1) (prog-if 00 [VGA controller])
You may also have an audio device (probably for HDMI sound):
01:00.1 Audio device: NVIDIA Corporation GP104 High Definition Audio Controller (rev a1)
Take note of the numbers at the front, in this case 01:00.0 and 01:00.1.
Using this number run lspci -n -s 01:00. This will give you the vendor ids. For example:
01:00.0 0000: 10de:1b81 (rev a1)
01:00.1 0000: 10de:10f0 (rev a1)
Take note of these vendor IDs, in this case 10de:1b81 and 10de:10f0.
6) Assign GPU to vfio
Use this to create the file that assigns the HW to vfio:
echo "options vfio-pci ids=10de:1b81,10de:10f0" > /etc/modprobe.d/vfio.conf
After rebooting, running lspci -v will confirm that the GPU and Audio device are using the vfio driver:
Kernel driver in use: vfio-pci
7) Create VM (but do not start it!)
Do this as normal, using SCSI VirtIO, VirtIO net and balloon virtual hardware. Also add the following to the vm's conf file (/etc/pve/qemu-server/<vmid>.conf):
bios: ovmf
machine: q35
8) Install Windows 10 in the VM
You can now install Win10, with it being aware of the UEFI bios. You may (will) need to provide VirtIO drivers during install.
Once up and running, TURN ON REMOTE DESKTOP. Passing through the GPU will disable the virtual display, so you will not be able to access it via Proxmox/VNC. Remote desktop will be handy if you don't have a monitor connected or keyboard passed through.
9) Pass through the GPU!
This is the actual installing of the GPU into the VM. Add the following to the vm's conf file:
hostpci0: <device address>,x-vga=on,pcie=1
In the examples above, using 01:00 as the address will pass through both 01:00.0 and 01:00.1, which is probably what you want. x-vga will do some compatibility magic, as well as disabling the basic VGA adaptor.
You can verify the passthrough by starting the VM and entering info pci into the respective VM monitor tab in the Proxmox webui. This should list the VGA and audio device, with an id of hostpci0.0 and hostpci0.1.
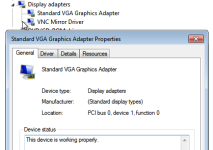
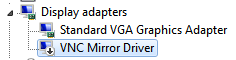
Windows should automatically install a driver. You can allow this and confirm in device manager that the card is loaded correctly (ie without any "code 43" errors). Once that's done continue to set up the card (drivers etc).
To host a headless VM with full access to a modern GPU, in order to stream games from.
Assumptions:
- Recent CPU and motherboard that supports VT-d, interrupt mapping.
- Recent GPU that has a UEFI bios.
1) Enable in BIOS: UEFI, VT-d, Multi-monitor mode
This is done via the BIOS. Can be confirmed using dmesg (search for efi strings), or the existence of /sys/firmware/efi on the filesystem and "vmx" in /proc/cpuinfo. Multi Monitor mode had to be enabled in my bios otherwise the card wasn't detected at all (even by the host using lspci).
2) Enable IOMMU via grub (Repeat post upgrade!)
edit /etc/default/grub and change
GRUB_CMDLINE_LINUX_DEFAULT="quiet"
to
GRUB_CMDLINE_LINUX_DEFAULT="quiet intel_iommu=on video=efifb
ff"then run update-grub
Confirm using dmesg | grep -e DMAR -e IOMMU - this should produce output.
As of PVE 5, I had to also disable efifb.
3) Blacklist nvidia/nouveu so that Proxmox doesn't load the card (Repeat post upgrade!)
echo "blacklist radeon" >> /etc/modprobe.d/blacklist.conf
echo "blacklist nouveau" >> /etc/modprobe.d/blacklist.conf
echo "blacklist nvidia" >> /etc/modprobe.d/blacklist.conf
Run update-initramfs -u to apply the above. Confirm using lspci -v - this will tell you if a driver has been loaded or not by the VGA adaptor.
4) Load kernel modules for virtual IO
Add to /etc/modules the following:
vfio
vfio_iommu_type1
vfio_pci
vfio_virqfd
I'm not sure how to confirm the above.
5) Get GPU IDs and addresses
Run lspci -v to list all the devices in your PC. Find the relevant VGA card entry. For example:
01:00.0 VGA compatible controller: NVIDIA Corporation GP104 [GeForce GTX 1070] (rev a1) (prog-if 00 [VGA controller])
You may also have an audio device (probably for HDMI sound):
01:00.1 Audio device: NVIDIA Corporation GP104 High Definition Audio Controller (rev a1)
Take note of the numbers at the front, in this case 01:00.0 and 01:00.1.
Using this number run lspci -n -s 01:00. This will give you the vendor ids. For example:
01:00.0 0000: 10de:1b81 (rev a1)
01:00.1 0000: 10de:10f0 (rev a1)
Take note of these vendor IDs, in this case 10de:1b81 and 10de:10f0.
6) Assign GPU to vfio
Use this to create the file that assigns the HW to vfio:
echo "options vfio-pci ids=10de:1b81,10de:10f0" > /etc/modprobe.d/vfio.conf
After rebooting, running lspci -v will confirm that the GPU and Audio device are using the vfio driver:
Kernel driver in use: vfio-pci
7) Create VM (but do not start it!)
Do this as normal, using SCSI VirtIO, VirtIO net and balloon virtual hardware. Also add the following to the vm's conf file (/etc/pve/qemu-server/<vmid>.conf):
bios: ovmf
machine: q35
8) Install Windows 10 in the VM
You can now install Win10, with it being aware of the UEFI bios. You may (will) need to provide VirtIO drivers during install.
Once up and running, TURN ON REMOTE DESKTOP. Passing through the GPU will disable the virtual display, so you will not be able to access it via Proxmox/VNC. Remote desktop will be handy if you don't have a monitor connected or keyboard passed through.
9) Pass through the GPU!
This is the actual installing of the GPU into the VM. Add the following to the vm's conf file:
hostpci0: <device address>,x-vga=on,pcie=1
In the examples above, using 01:00 as the address will pass through both 01:00.0 and 01:00.1, which is probably what you want. x-vga will do some compatibility magic, as well as disabling the basic VGA adaptor.
You can verify the passthrough by starting the VM and entering info pci into the respective VM monitor tab in the Proxmox webui. This should list the VGA and audio device, with an id of hostpci0.0 and hostpci0.1.
Windows should automatically install a driver. You can allow this and confirm in device manager that the card is loaded correctly (ie without any "code 43" errors). Once that's done continue to set up the card (drivers etc).
Last edited:


") - I'll try to passthrough the device to my antegos install to see if its the VM or the setup.
- I'll try to passthrough the device to my antegos install to see if its the VM or the setup.