Disclaimer:
!!! This is NOT ment for production use and is NOT official supported !!!
and
Huge Thanks to Tim Wilkinson who made this possible!
more details and sources can be found @ https://github.com/pimox
I will devide this Tutorial in 2 Parts. The first part will only cover a very basic and fast step by step instalation just to show it is running.
In the second part I will show you a more feature ritch advanced instalation and tell you about some tipps and tricks.
Okay lets start right away with the first bit, what you need:
- Raspberry Pi ( 4B recommended )
- SD Card ( USB-SSD recommended )
- Ethernet connection
- RPi-OS-64bit ( https://downloads.raspberrypi.org/r...5-28/2021-05-07-raspios-buster-arm64-lite.zip )
- knowledge how to flash this Image (Win: RasPiImager, balenaetcher, Win32DiskImager Linux: dd)...
- knowledge how to connect to your RPi via ssh.
- around 30min - 2h ( depending on the RPi type, clock, disk and network speed )
The first step after booting up the Raspberry Pi should be as always get it up to date and install the needed dependencies and some tools if needed, whitch can be done with the following command:
Bash:
sudo apt update && sudo apt upgrade -y && sudo apt install -y gnupg curl #nmon #screenI've you have taken a close look to the terminal you've seen that we are still on debian 10 buster. Lets take care of that first by removing all extra repolists, just type:
Bash:
sudo rm /etc/apt/sources.list.d/*.listOkay add the new Debian 11 bullseye repos and while we are at it, add all the other needed repos. Use your favorite editor to do this, I do this with:
Bash:
sudo nano /etc/apt/sources.listDelete everthing in this file and make sure it conatins the following:
Code:
# Raspberry Pi Bullseye Repo
deb http://archive.raspberrypi.org/debian/ bullseye main
# Pimox7 Repo
deb https://raw.githubusercontent.com/pimox/pimox7/master/ dev/
# Debian Reop
deb http://deb.debian.org/debian bullseye main contrib non-free
# Security Updates
deb http://security.debian.org/debian-security bullseye-security main contrib non-free
Since we have added the Pimox7 repo we allso need to get the key witch can be done with:
Bash:
curl https://raw.githubusercontent.com/pimox/pimox7/master/KEY.gpg | sudo apt-key add -Now we are ready to update to Debian 11 bullseye and all so get the matching kernel headers afterwards:
Bash:
sudo apt update && sudo apt dist-upgrade -y && sudo apt install -y raspberrypi-kernel-headersNo we are not ready yet... We have to assing a static IP address to the RPi, witch we will do by editing the interfaces file, again I do this with nano:
Bash:
sudo nano /etc/network/interfacesDelete everything and make sure it contains the following (of course addjust the IP to your needs):
Code:
 auto lo
iface lo inet loopback
auto eth0
iface eth0 inet static
address 192.168.xxx.xxx/24
gateway 192.168.xxx.1
Okay the IP configuration is done lets move on with the hostname configuration:
Bash:
sudo hostnamectl set-hostname RPi4-PVE-01Check if everything worked well and disable all IPv6, since we don't need it, lets open the hosts file:
Bash:
sudo nano /etc/hostsDelete all lines IPv6 related and you should be left with, if not correct it:
Bash:
192.168.xxx.xxx RPi4-PVE-01
127.0.0.1       localhost
We will get a static IP next time the network is reset or the Pi is rebooted, so we will uninstall the dhcpclient and while we are at it we remove all unessesary left over:
Code:
sudo apt purge -y dhcpcd5 && sudo apt autoremove -yBefore we are going to install PVE on the RPi it is now a good time to set a root password type in:
Bash:
sudo -u root passwdFinaly we are ready to install PVE on the RPi. I run the installation process inside a screen so it dosen't mather if the network is reset or disconnected during instalation:
Bash:
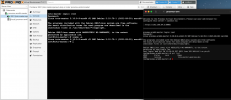
screen -S pveinst sudo apt install -y proxmox-ve && sudo systemctl rebootYes you will see some errors but there are fine, since some services might not run during instalation or some symlinks are not pressent on the RPiOS.
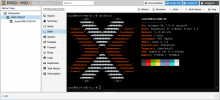
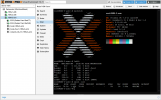
When your RPi is finished it should reboot automaticaly and you can browse to your PVE instance via a web browser, login as root.

Bonus
You are really, really lazy follow the 10 steps for the RPiOS64 autoinstallation and enjoy your free time. https://github.com/TuxfeatMac/pimox7
Last edited:


