Thank you, follow the instructions and I have installed windows 11 without any issues.
my configuration below.

but I run in the issue with the network driver, the windows was able to see my network but because of not having DHCP it didn't allowed me to continue, so I have used.
(Image credit: Tom's Hardware)
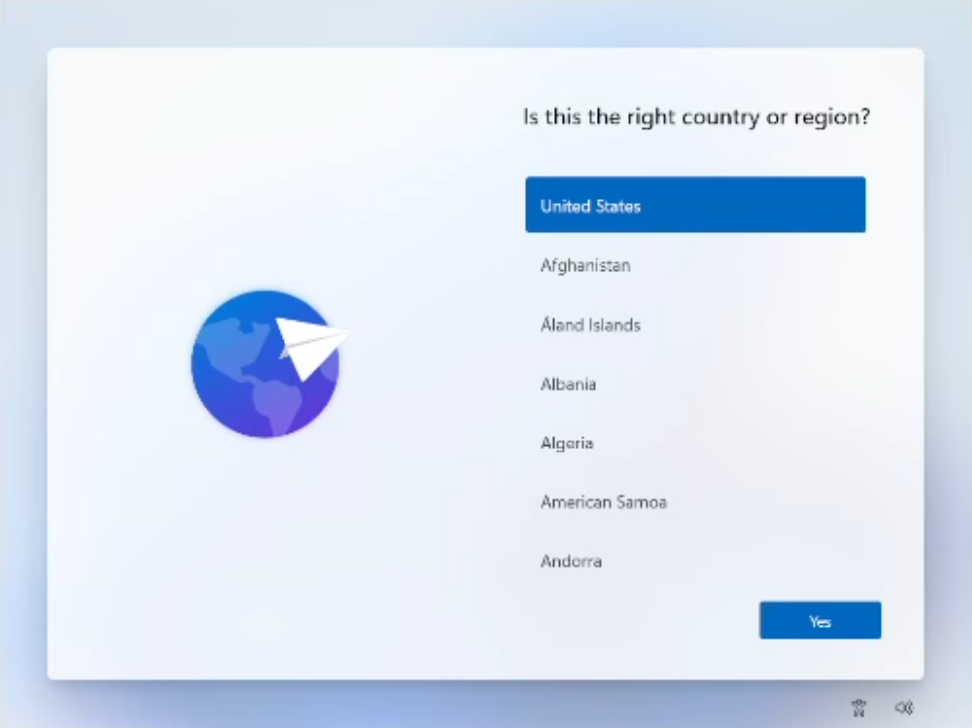
Now's the time to cut off the Internet. However, before you do, you need to issue a command that prevents Windows 11 from forcing you to have an Internet connection.
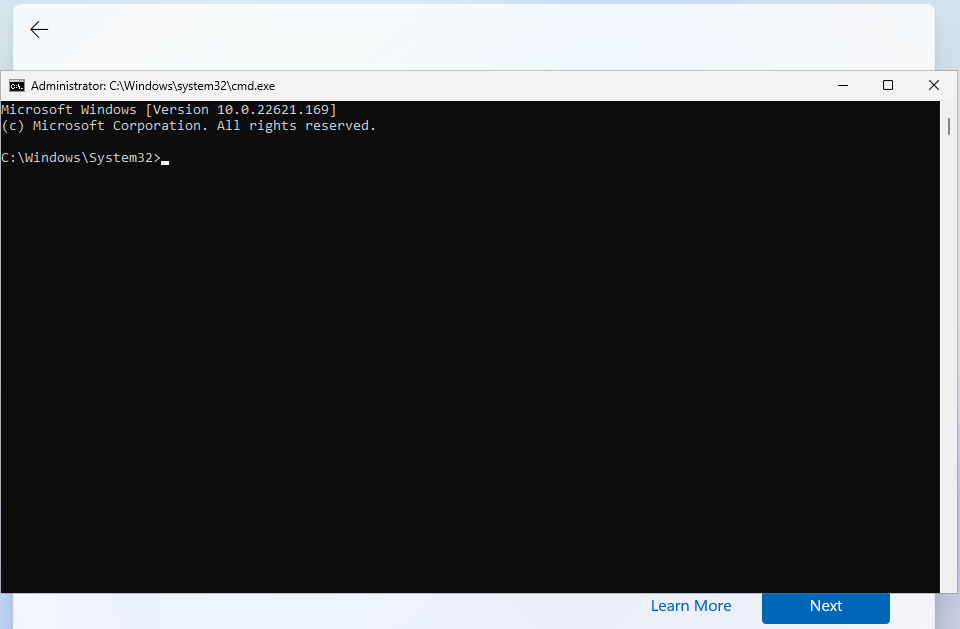
2. Hit Shift + F10. A command prompt appears.
(Image credit: Future)
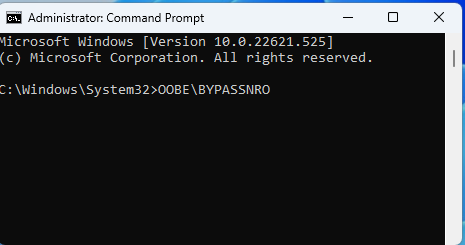
3. Type OOBE\BYPASSNRO to disable the Internet connection requirement.
(Image credit: Tom's Hardware)
The computer will reboot and return you to this screen.
Note: if OOBE\BYPASSNRO returns a "command not found" error, skip ahead to the next method in this how-to.
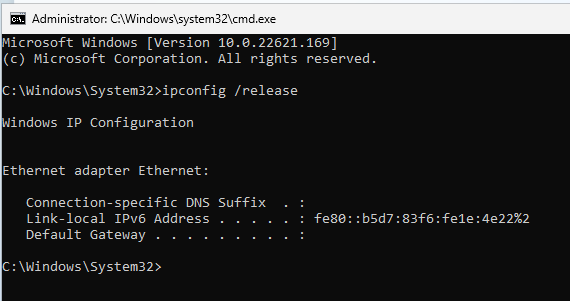
4. Hit Shift + F10 again and this time Type ipconfig /release. Then hit Enter to disable the Internet. This effectively disconnects your computer from the Internet. If you're on Ethernet, you could just disconnect the plug, but this is just as easy if not easier.
(Image credit: Tom's Hardware)
5. Close the command prompt.
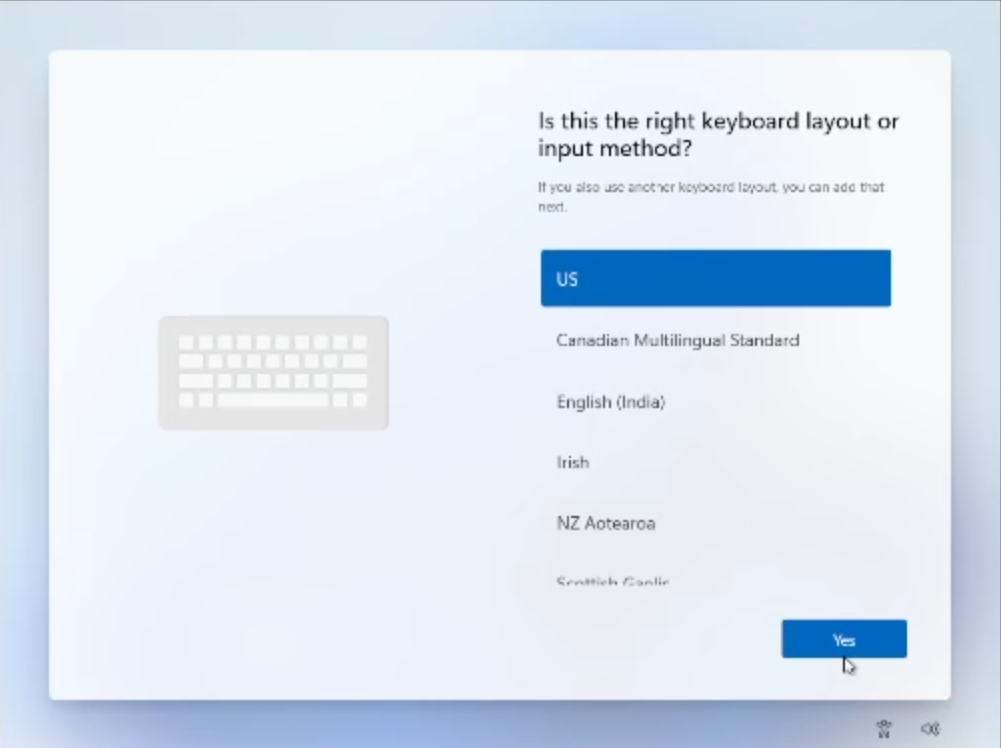
6. Continue with the installation, choosing the region. keyboard and second keyboard option.
(Image credit: Tom's Hardware)
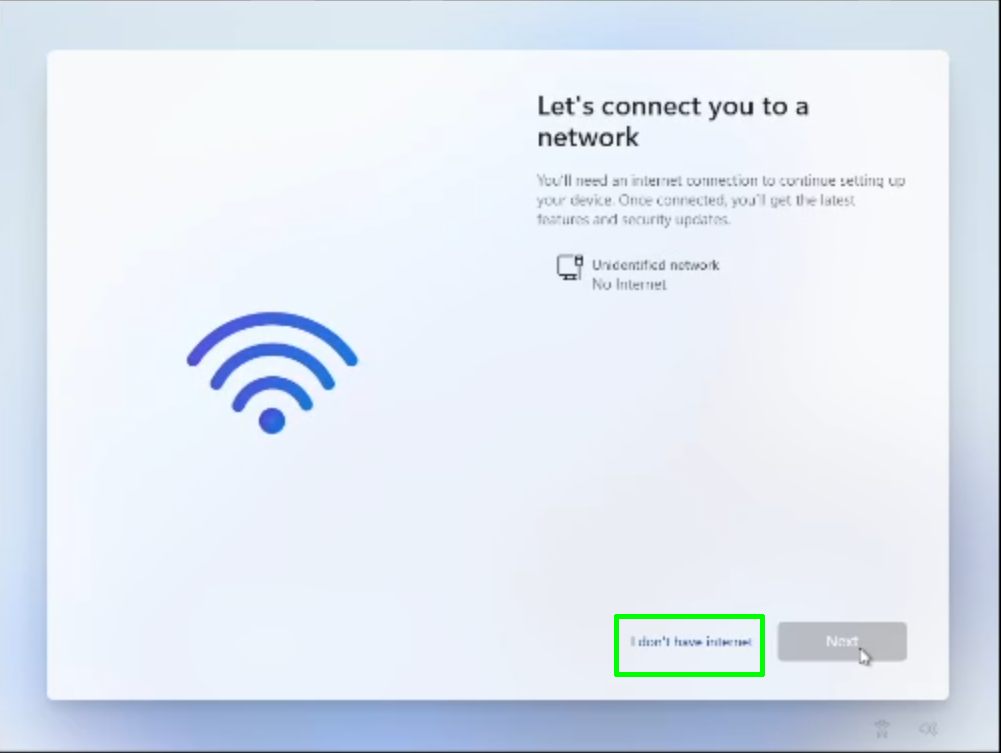
A screen saying "Let's connect you to a network" appears, warning you that you need Internet.
7. Click "I don't have Internet" to continue.
(Image credit: Tom's Hardware)
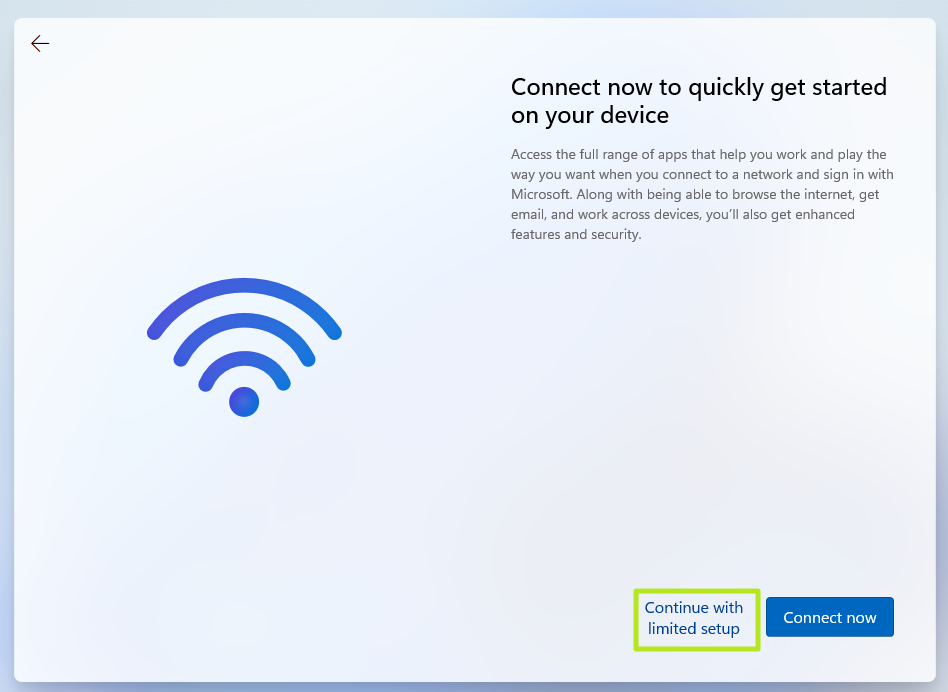
8. Click Continue with limited setup if prompted. The OOBE may skip this screen and take you straight to the next step.
(Image credit: Tom's Hardware)
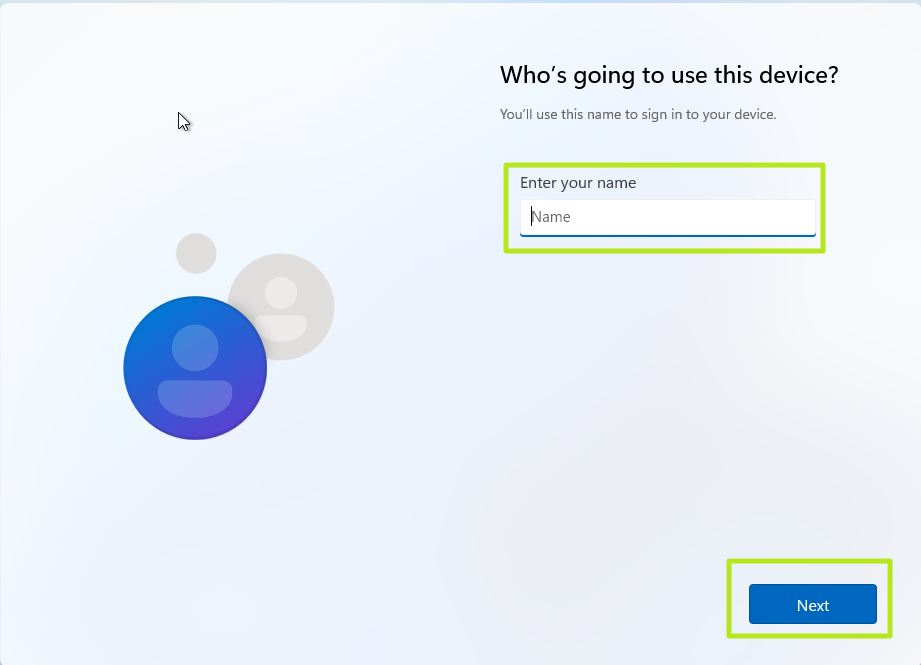
A new login screen appears asking "Who's going to use this device?"
9. Enter a username you want to use for your local Windows 11 account and click Next.
(Image credit: Tom's Hardware)
10. Enter a password you would like to use and click Next. You can also leave this field blank and have no password, but that's not recommended.
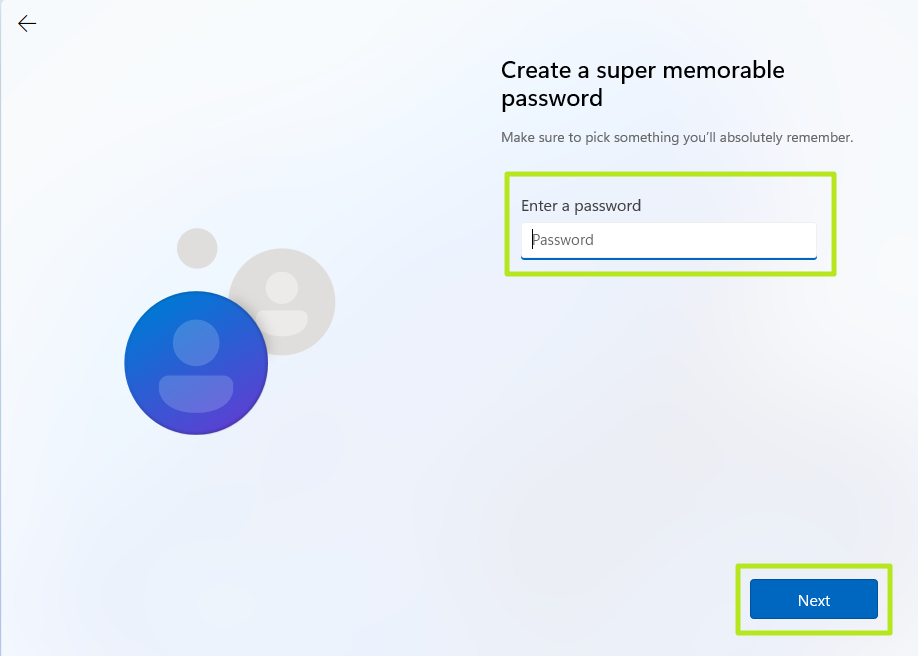
(Image credit: Tom's Hardware)
11. Complete the rest of the install process as you normally would.
and then I was able to setup network.
my configuration below.

but I run in the issue with the network driver, the windows was able to see my network but because of not having DHCP it didn't allowed me to continue, so I have used.

(Image credit: Tom's Hardware)
Now's the time to cut off the Internet. However, before you do, you need to issue a command that prevents Windows 11 from forcing you to have an Internet connection.
2. Hit Shift + F10. A command prompt appears.

(Image credit: Future)
3. Type OOBE\BYPASSNRO to disable the Internet connection requirement.

(Image credit: Tom's Hardware)
The computer will reboot and return you to this screen.
Note: if OOBE\BYPASSNRO returns a "command not found" error, skip ahead to the next method in this how-to.
4. Hit Shift + F10 again and this time Type ipconfig /release. Then hit Enter to disable the Internet. This effectively disconnects your computer from the Internet. If you're on Ethernet, you could just disconnect the plug, but this is just as easy if not easier.

(Image credit: Tom's Hardware)
5. Close the command prompt.
6. Continue with the installation, choosing the region. keyboard and second keyboard option.

(Image credit: Tom's Hardware)
A screen saying "Let's connect you to a network" appears, warning you that you need Internet.
7. Click "I don't have Internet" to continue.

(Image credit: Tom's Hardware)
8. Click Continue with limited setup if prompted. The OOBE may skip this screen and take you straight to the next step.

(Image credit: Tom's Hardware)
A new login screen appears asking "Who's going to use this device?"
9. Enter a username you want to use for your local Windows 11 account and click Next.

(Image credit: Tom's Hardware)
10. Enter a password you would like to use and click Next. You can also leave this field blank and have no password, but that's not recommended.

(Image credit: Tom's Hardware)
11. Complete the rest of the install process as you normally would.
and then I was able to setup network.

