To get started, we need:
As usual, go through all the steps to the disk selection window.
Next step: “Load Drive” We are looking for CD virtio-win. Open folder viostore > w11 > amd64.
We continue with the usual installation.
But, I faced the following problem.
In the network device selection window, but a network was detected and could not be skipped this step.
My network device received IPv6 settings for DHCP.
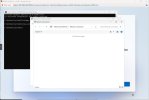
Open Shift+F10 console. Open taskmgr to stop network connection flow service.
We can open Special features and change network setting on Windows. I set my current IPv4 parameter, and again stop network connection flow service.
Hooray, everything should go smoothly from here on out) But this is win11
- virtio-win ISO
- win11 ISO
- OS — use w11 image
- System — use SCSI controller — VirtIO SCSI | Bios OVMF (UEFI) and add TPM
- Disk — VirtIO Block and minimal disk size 64 Gb
As usual, go through all the steps to the disk selection window.
Next step: “Load Drive” We are looking for CD virtio-win. Open folder viostore > w11 > amd64.
We continue with the usual installation.
But, I faced the following problem.
In the network device selection window, but a network was detected and could not be skipped this step.
My network device received IPv6 settings for DHCP.
Open Shift+F10 console. Open taskmgr to stop network connection flow service.
We can open Special features and change network setting on Windows. I set my current IPv4 parameter, and again stop network connection flow service.
Hooray, everything should go smoothly from here on out) But this is win11

")