[SOLVED] how do i replace a hard drive in a healthy ZFS raid?

maxprox

Renowned Member
Aug 23, 2011
423
57
93
Germany - Nordhessen
fair-comp.de
Hi,

I've read a lot about replacing a hard drive in a ZFS raid, but most of the time is about replacing a failed hard drive.
(like: https://pve.proxmox.com/wiki/ZFS:_Tips_and_Tricks#Replacing_a_failed_disk_in_the_root_pool)
Followed by the commands:

Code:
zpool status
zpool offline rpool /dev/source # (=failed disk)
## shutdown install the new disk or replace the disks
sgdisk --replicate=/dev/target /dev/source
sgdisk --randomize-guids /dev/target
zpool replace rpool /dev/source /dev/target
zpool status  # => resilvering is working

But my ZFS Raid (raidz) has neither an error nor a failed hard drive.
my question is whether changing a healthy (very old) hard drive with a new one also requires all of these commands?
Or whether a single command is enough in this case, like:

Code:
zpool replace rpool /dev/disk/by-id/old-disk /dev/disk/by-id/ata-WDC_WD60EZRZ-00GZ5B1_WD-WX44D55N
where ata-WDC_WD60EZRZ-00GZ5B1_WD-WX44D55N' is the brand new hard drive

can you tell me which of the above commands are also required here?
For example is the creation of the same partition table needed in this scenario?

regards,
maxprox
 
Last edited:
I think this is the right solution for replacing a healthy (old) hard drive,

always have a look at the serialnummber(s)
Code:
ls -la /dev/disk/by-id
Takes the specified device offline.
Code:
zpool offline rpool /dev/source
shutdown install or replace the disk ( I have no hat-swap and no hot-spare)
only create an empty GPT Partition Table on the new hdd with parted:
Code:
parted /dev/new-disk
(parted)# print
(parted)# mklabel GPT
(parted)# Yes
(parted)# q
there are no additional partitions needed, and I found no reason for replicate the partitions form old disk to the new one.
(afaik this is only needed for a disk in a ZFS-root pool, like descriped in the proxmox wiki)
Only zpool replace is needed:
Code:
zpool replace rpool /dev/source /dev/target
( in this case this command should also work without the source parameter)

If you like to replace perhaps with a larger disk, than you have to set 'autoexpand on' at the first step:
Code:
root@server:~# zpool set autoexpand=on rpool

regards,
 
Last edited:
It is done :cool:
in fact, changing a hard drive in a ZFS raid is very easy:
Scenario:
no root and no grub on it, only a ZFS raidz1 pool, and in my scenario both disks has exactly the same capacity old/new and the same sector size 512/4096. Because of the ashift value per zpool, you have to look, that your new disk has a suitable sector size value. If you have like me an old disk with 512/4096 and an ashift property value of 12, than the new disk can have also 512/4096 or 4096/4096 Sector size (logical/physical).
With "smartctl" you can get the sector size, with " zdb | grep ashift" the ashift property value.

1: have a look what is there:
Code:
ls -alh /dev/disk/by-id/
zpool status
zpool list -v

2: set the hard drive you want to change offline:
Code:
zpool offline "POOLNAME"  "HARD-DRIVE-ID or the whole path"
## example:
zpool offline r5pool ata-TOSHIBA_MG05ACA800E_12GGK34JFUU5

3: change the hard drives physically
shutdown and replace the disk (no hot-swap)

4: create an empty GPT Partition Table on the new hdd with parted:
Code:
parted /dev/new-disk
(parted)# print
(parted)# mklabel GPT
(parted)# Yes
(parted)# q

5: replace them in the ZFS Pool:
Code:
zpool replace "POOLNAME" "HARD-DRIVE-ID or the whole path old hard drive"  "HARD-DRIVE-ID or the whole path NEW hard drive"
## example:
zpool replace r5pool ata-TOSHIBA_MG05ACA800E_12GGK34JFUU5  ata-WDC_WD8004FRYZ-04VAEB3_VDH0ABCD

6: have a look what's going on:
Code:
zpool status
....
resilver in progress since Sat Feb 29 11:43:52 2020
328G scanned at 3,77G/s, 75,5G issued at 888M/s, 328G total
  8,83G resilvered, 23,01% done, 0 days 00:04:51 to go
....

regards,
maxprox
 
Last edited:
there are no additional partitions needed, and I found no reason for replicate the partitions form old disk to the new one.


It is a very good reason for them, at least for the 8 Mb size partition. Sometime despite of the same size hdd you could get a new hdd with a very small difference compared with the old hdd.
.... and if your new hdd it is smaller then the old hdd(few Mb difference ) then you CAN NOT replace the old hdd.

Good luck / Bafta.

Hello guletz,

good to know.
But the partition layout is exactly the same on the new disk like bevor on the old one,
without creating or copy any partition:


NEW Disk:
Code:
root@fcpro:~# parted /dev/sdc
GNU Parted 3.2
Using /dev/sdc
Welcome to GNU Parted! Type 'help' to view a list of commands.
(parted) print                                                        
Model: ATA WDC WD8004FRYZ-0 (scsi)
Disk /dev/sdc: 8002GB
Sector size (logical/physical): 512B/4096B
Partition Table: gpt
Disk Flags:
Number  Start   End     Size    File system  Name                  Flags
1      1049kB  8002GB  8002GB  zfs          zfs-73a14fe59307faf7
9      8002GB  8002GB  8389kB

one other Disk in the same ZFS Raid and the same layout as the old one:
Code:
root@fcpro:~# parted /dev/sdk
GNU Parted 3.2
Using /dev/sdk
Welcome to GNU Parted! Type 'help' to view a list of commands.
(parted) print
Model: ATA TOSHIBA MG05ACA8 (scsi)
Disk /dev/sdk: 8002GB
Sector size (logical/physical): 512B/4096B
Partition Table: gpt
Disk Flags:
Number  Start   End     Size    File system  Name                  Flags
1      1049kB  8002GB  8002GB  zfs          zfs-f79b6624be24cb64
9      8002GB  8002GB  8389kB
and:
Code:
ls -alh /dev/disk/by-id/

## NEW disk
lrwxrwxrwx 1 root root    9 Feb 29 12:41 ata-WDC_WD8004FRYZ-01VAEB0_VDH0HHSK -> ../../sdc
lrwxrwxrwx 1 root root   10 Feb 29 12:41 ata-WDC_WD8004FRYZ-01VAEB0_VDH0HHSK-part1 -> ../../sdc1
lrwxrwxrwx 1 root root   10 Feb 29 12:41 ata-WDC_WD8004FRYZ-01VAEB0_VDH0HHSK-part9 -> ../../sdc9

## OLD / other one
lrwxrwxrwx 1 root root    9 Feb 29 12:41 ata-TOSHIBA_MG05ACA800E_58M9K66TFUUD -> ../../sdk
lrwxrwxrwx 1 root root   10 Feb 29 12:41 ata-TOSHIBA_MG05ACA800E_58M9K66TFUUD-part1 -> ../../sdk1
lrwxrwxrwx 1 root root   10 Feb 29 12:41 ata-TOSHIBA_MG05ACA800E_58M9K66TFUUD-part9 -> ../../sdk9

But smartctl -a says that the disks has exactly the same capacity (old/new):
''User Capacity: 8.001.563.222.016 bytes [8,00 TB]''
and that is certainly helpful ;-)
 
Last edited:
thank you Maxprox, this helped me a lot. easy peasy and my machine is now re-silvering.
 
Hello,

How do you get the old disk id when the disk is complet dead ? the server dosent even see it any more :D

I dont get this, 1 of my disk is dead the server dosent even see it any more
Hi Bidi,

then the "zpool offline" is not mandatory needed. As far as I know you can the command reduce to this minimum, to give the command only the new disk, if you have no root "/" and no boot drive (after the change):
Bash:
zpool replace <poolname> <new-disk-id>
#for example
zpool replace r5pool ata-TOSHIBA_MG05ACA800E_12GGK34JFUU5

like here: https://docs.oracle.com/cd/E19253-01/819-5461/gazgd/index.html

regards,
maxprox
 
Last edited:
Hi Bidi,

then the "zpool offline" is not mandatory needed. As far as I know you can the command reduce to this minimum, to give the command only the new disk, if you have no root "/" and no boot drive (after the change):
Bash:
zpool replace <poolname> <new-disk-id>
#for example
zpool replace r5pool ata-TOSHIBA_MG05ACA800E_12GGK34JFUU5

like here: https://docs.oracle.com/cd/E19253-01/819-5461/gazgd/index.html

regards,
maxprox

Thank you, did the work :D

But i`m still thinkg about where ar the VMs disk files located on the server in case i have to take them manualy and move to another node, like the server brake, install an fresh proxmox server and after ?! if i take the disk the one used for storage and add it to the new server how to recover them.

Ower proxmox is on seprate disk, zfs storage another 2 disk
 
hello @maxprox ,
you say 'As far as I know you can the command reduce to this minimum, to give the command only the new disk, if you have no root "/" and no boot drive (after the change)'

does it mean in order to replace a disk with root and Grub on ZFS, I have to give the command ?

if so, what happen if the disk totally failed ? do I have to reboot in recovery mode in order to edit Grub or something similar ?
 
hello @maxprox ,
does it mean in order to replace a disk with root and Grub on ZFS, I have to give the command ?

if so, what happen if the disk totally failed ? do I have to reboot in recovery mode in order to edit Grub or something similar ?
I can not exactly explain the solution for it, because I've never been affected by this before.
But I would try this:
either what is in the wiki:
https://pve.proxmox.com/wiki/ZFS:_Tips_and_Tricks#Replacing_a_failed_disk_in_the_root_pool
under: "Grub boot ZFS problem" and:
https://pve.proxmox.com/wiki/ZFS_on_Linux#sysadmin_zfs_change_failed_dev
Changing a failed bootable device
or -if it was a Raid1- completely different: with an other (restor-) Proxmox System, and the command "zpool import"
put the working hard-drive in this working Proxmox-System, and work with "zpool import"
(https://www.thegeekdiary.com/solaris-zfs-how-to-import-2-pools-that-have-the-same-names/)
now I get to the VMs and can do for example a vzdump, with this scenario I can migrate to a new server and so on...
hop it helps a little bit
regards
maxprox
 
Last edited:
  • Like
Reactions: markusPLA
I can not exactly explain the solution for it, because I've never been affected by this before.
But I would try this:
either what is in the wiki:
https://pve.proxmox.com/wiki/ZFS:_Tips_and_Tricks#Replacing_a_failed_disk_in_the_root_pool
under: "Grub boot ZFS problem" and:
https://pve.proxmox.com/wiki/ZFS_on_Linux#sysadmin_zfs_change_failed_dev
Changing a failed bootable device
or -if it was a Raid1- completely different: with an other (restor-) Proxmox System, and the command "zpool import"
put the working hard-drive in this working Proxmox-System, and work with "zpool import"
(https://www.thegeekdiary.com/solaris-zfs-how-to-import-2-pools-that-have-the-same-names/)
now I get to the VMs and can do for example a vzdump, with this scenario I can migrate to a new server and so on...
hop it helps a little bit
regards
maxprox
ok thanks for that clarifications, i'll change my servers boot with Proxmox boot tool soon.
 
Hallo @maxprox,
many thanks for your post and tutorial! :)
Me - quite a hardware noob - easily managed to replace a degraded HD in rpool following your notes - wouldn't have even guessed where to start without it! :rolleyes:
Again, many thanks!
Vielen Dank, Kollege! :)
~R.
1: have a look what is there:
Code:
ls -alh /dev/disk/by-id/
zpool status
zpool list -v

2: set the hard drive you want to change offline:
Code:
zpool offline "POOLNAME"  "HARD-DRIVE-ID or the whole path"
## example:
zpool offline r5pool ata-TOSHIBA_MG05ACA800E_12GGK34JFUU5

3: change the hard drives physically
shutdown and replace the disk (no hot-swap)

4: create an empty GPT Partition Table on the new hdd with parted:
Code:
parted /dev/new-disk
(parted)# print
(parted)# mklabel GPT
(parted)# Yes
(parted)# q

5: replace them in the ZFS Pool:
Code:
zpool replace "POOLNAME" "HARD-DRIVE-ID or the whole path old hard drive"  "HARD-DRIVE-ID or the whole path NEW hard drive"
## example:
zpool replace r5pool ata-TOSHIBA_MG05ACA800E_12GGK34JFUU5  ata-WDC_WD8004FRYZ-04VAEB3_VDH0ABCD

6: have a look what's going on:
Code:
zpool status
....
resilver in progress since Sat Feb 29 11:43:52 2020
328G scanned at 3,77G/s, 75,5G issued at 888M/s, 328G total
  8,83G resilvered, 23,01% done, 0 days 00:04:51 to go
....
 
  • Like
Reactions: markusPLA
only create an empty GPT Partition Table on the new hdd with parted:
Can t this be done from gui as well by initializing the disk and create GPT partition (2 simple clikcs)
Also why only a single partition, while all the disks have a separate one as well?

New edit: since I ve tested the procedure you don t need to create anything. Just wipe the disk and replace command will create it for (of course we are talking about non bootable disks)
 
Last edited:
  • Like
Reactions: Riesling.Dry
Thanks @maxprox ,

I have 3pcs of HDD for ZFS called "storage" - for VM's only, 1HDD for backups, and 1SSD for proxmox system.
Week ago one of three disk on my storage was damaged.

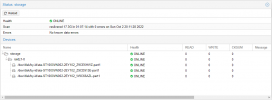
before_afs.PNG

reklamacja1.PNG

After my degraded zpool (storage) I pulled out damaged HDD form server (after shutdown - I have not hotswap hdd) and turn on without it. It works normal - I have 3x1TB in RAID => 296.00 GB used of 1.93 TB.
I sent it for guarantee. After a few days I received a new one.

I check the numer of drive in web GUI, after that:
Code:
root@myserver:sudo fdisk /dev/sdb
type d, type p, type w, and type q

Next step
Bash:
root@myserver:/dev/disk/by-id# ls
And find the ID of new drive

ata-ST1000VN002-2EY102_Z9CD913E

Next step
Bash:
root@myserver:/# sudo zpool status
  pool: storage
 state: DEGRADED
status: One or more devices could not be used because the label is missing or
        invalid.  Sufficient replicas exist for the pool to continue
        functioning in a degraded state.
action: Replace the device using 'zpool replace'.
   see: https://openzfs.github.io/openzfs-docs/msg/ZFS-8000-4J
  scan: scrub repaired 0B in 00:03:30 with 0 errors on Sun Aug 14 00:27:31 2022
config:

        NAME                                 STATE     READ WRITE CKSUM
        storage                              DEGRADED     0     0     0
          raidz1-0                           DEGRADED     0     0     0
            ata-ST1000VN002-2EY102_Z9CE6HWZ  ONLINE       0     0     0
            15585475720075329188             UNAVAIL      0     0     0  was /dev/disk/by-id/ata-ST1000VN002-2EY102_Z9CBVN0S-part1
            ata-ST1000VN002-2EY102_W9C66AZL  ONLINE       0     0     0

And the final:
Bash:
root@myserver:/dev/disk/by-id# sudo zpool replace zpool_name old_disk_ID new_disk_ID
example:
root@myserver:/dev/disk/by-id# sudo zpool replace storage ata-ST1000VN002-2EY102_Z9CBVN0S ata-ST1000VN002-2EY102_Z9CD913E

That's all, you can check the status of resilvered typing zpool status

Bash:
root@myserver:/dev/disk/by-id# sudo zpool status
  pool: storage
 state: DEGRADED
status: One or more devices is currently being resilvered.  The pool will
        continue to function, possibly in a degraded state.
action: Wait for the resilver to complete.
  scan: resilver in progress since Sun Oct  2 19:04:14 2022
        62.5G scanned at 112M/s, 14.7G issued at 26.4M/s, 62.6G total
        2.81G resilvered, 23.50% done, 00:30:58 to go
config:

        NAME                                   STATE     READ WRITE CKSUM
        storage                                DEGRADED     0     0     0
          raidz1-0                             DEGRADED     0     0     0
            ata-ST1000VN002-2EY102_Z9CE6HWZ    ONLINE       0     0     0
            replacing-1                        DEGRADED     0     0     0
              15585475720075329188             UNAVAIL      0     0     0  was /dev/disk/by-id/ata-ST1000VN002-2EY102_Z9CBVN0S-part1
              ata-ST1000VN002-2EY102_Z9CD913E  ONLINE       0     0     0  (resilvering)
            ata-ST1000VN002-2EY102_W9C66AZL    ONLINE       0     0     0

ZFS.PNG

Hope this help.
 
Last edited:
Thank you @maxprox :) Of course, probably I need not use the sudo when I've been root ;-)
The new one hdd I mean that I received the new hdd from guarantee:)
I sent Seagate Ironwolf 3,5" 1TB on Monday to Polish center and they sent new from Netherlands center on Wednesday. I received it on Friday. Express.
 
Last edited:
hdd from guarantee
Seagate Ironwolf 3,5" 1TB on Monday to Polish center and they sent new from Netherlands center on Wednesday
Welcome to the club of Seagate-Victims.
I lost too much data trusting Seagate and will NEVER (!) buy Seagate again. :mad:
Had no issues with WD (and/or HGST/Hitachi, which is now WD too) :)
 
  • Like
Reactions: markusPLA
Hi
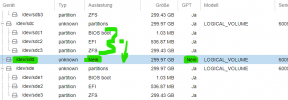
I have similar situation. I have installed proxmox with zfs by setup. So now, I have to replace a disk (/dev/sdd). How can I add the new disk with all partition safely? Have do I part it manually before zpool replace?
The Old disk is no more in system. Do I need zpool replace?
Tanks.

1667917381130.png
 
Hi
I have similar situation. I have installed proxmox with zfs by setup. So now, I have to replace a disk (/dev/sdd). How can I add the new disk with all partition safely? Have do I part it manually before zpool replace?
The Old disk is no more in system. Do I need zpool replace?
Tanks.

View attachment 43028
Read my reply. I did basic command in fdisk.
Be shure of driver's (HDD) sign (ie. sda, sdb...) than do the basic fdisk commands.
Good luck :)
 
Last edited:

About

The Proxmox community has been around for many years and offers help and support for Proxmox VE, Proxmox Backup Server, and Proxmox Mail Gateway.
We think our community is one of the best thanks to people like you!

Get your subscription!

The Proxmox team works very hard to make sure you are running the best software and getting stable updates and security enhancements, as well as quick enterprise support. Tens of thousands of happy customers have a Proxmox subscription. Get yours easily in our online shop.

Buy now!