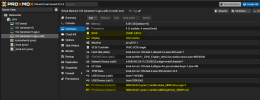
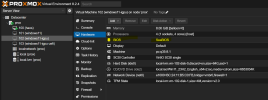
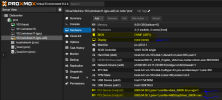
[Guide] Ryzen 5800H IGPU Passthrough HDMI Windows11 HTPC

jun3280

New Member
Aug 25, 2024
24
16
3
Hello there,

I'm completely new to the world of Proxmox. While the experience has been exciting , it has been alot of trial by fire.

I was able to follow youtube guides and install Proxmox easily on a Beelink SER 5 - Ryzen 7 5800H. I successfully installed and migrated Home Assistant. I was able to install Windows 11 and access it via RDP.

I was hoping to connect the mini pc to a monitor and have it display and run Windows 11 - with Proxmox operating in the background. Am I correct in thinking if I have the IGPU blacklisted from running in Proxmox, and passing it through it to the Windows 11 virtual machine, then I could achieve this?

I figured I would give this a shot to see what the end result would be. I can't seem to find a concrete step by step guide for the 5800H, so my hope is by posting here, I can consolidate the findings here by updating the original post with with the outputs. This could serve as a useful reference for new users like myself.

I followed the guide here : https://github.com/isc30/ryzen-7000-series-proxmox
and referenced :
https://forum.proxmox.com/threads/amd-ryzen-5700u-7735hs-igpu-passthrough-windows-11.142811/
https://forum.proxmox.com/threads/amd-igpu-passthrough-wont-work.143044/
https://forum.proxmox.com/threads/h...-the-igpu-amd-radeon-680m-to-vm.119178/page-2
https://forum.proxmox.com/threads/windows-11-vm-for-gaming-setup-guide.137718/

=================================================================================================

ONCE PROXMOX VE HAS BEEN INSTALLED

I executed the commands highlighted below (but I'm not sure what they do) :

Update Proxmox VE
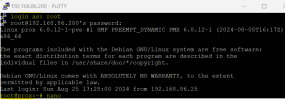
-Install PUTTY and SSH into your Proxmox machine's IP (eg 192.168.86.200)
1724789845976.png

7.
Code:
bash -c "$(wget -qLO - https://github.com/tteck/Proxmox/raw/main/misc/post-pve-install.sh)"
1724625817214.png

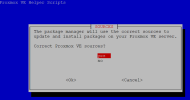
select "yes" and "Ok" to everything
1724625844874.png

changes committed to Proxmox
1724625968661.png

8.
Code:
bash -c "$(wget -qLO - https://github.com/tteck/Proxmox/raw/main/misc/microcode.sh)"
1724626359641.png

I selected (the newest file) : amd64-microcode_3.20240820.1~deb12u1_amd64.deb
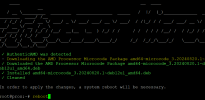
1724626498782.png


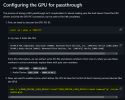
Configure GPU for Passthrough
1724626701782.png

1.
Code:
lspci -nn | grep -e 'AMD/ATI'

04:00.0 VGA compatible controller [0300]: Advanced Micro Devices, Inc. [AMD/ATI] Cezanne [Radeon Vega Series / Radeon Vega Mobile Series][1002:1638] (rev c5)
04:00.1 Audio device [0403]: Advanced Micro Devices, Inc. [AMD/ATI] Renoir Radeon High Definition Audio Controller [1002:1637]
1724627288662.png

2.
Code:
sed -i 's/GRUB_CMDLINE_LINUX_DEFAULT="quiet"/GRUB_CMDLINE_LINUX_DEFAULT="quiet iommu=pt"/g' /etc/default/grub
update-grub

1724627474917.png

3.
Code:
echo "vfio" >> /etc/modules
echo "vfio_iommu_type1" >> /etc/modules
echo "vfio_pci" >> /etc/modules
echo "vfio_virqfd" >> /etc/modules

1724627603195.png
 
Last edited:
  • Like
Reactions: thebigbo
ONGOING PROCESS CON'T
4.
Code:
echo "options vfio-pci ids=1002:1638,1002:1637" >> /etc/modprobe.d/vfio.conf
1724627885411.png

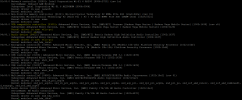
4b. checking the "Kernel driver in Use"
Code:
lspci -nnk
1724628109010.png

5.
Code:
echo "softdep radeon pre: vfio-pci" >> /etc/modprobe.d/vfio.conf
echo "softdep amdgpu pre: vfio-pci" >> /etc/modprobe.d/vfio.conf
echo "softdep snd_hda_intel pre: vfio-pci" >> /etc/modprobe.d/vfio.conf
1724628203485.png
6.
Code:
update-initramfs -u -k all
shutdown -r now
Did something go wrong here?
1724628388524.png
7.
Code:
lspci -nnk

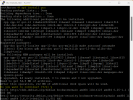
root@prox:~# lspci -nnk
00:00.0 Host bridge [0600]: Advanced Micro Devices, Inc. [AMD] Renoir/Cezanne Root Complex [1022:1630]
Subsystem: Advanced Micro Devices, Inc. [AMD] Renoir/Cezanne Root Complex [1022:1630]
00:00.2 IOMMU [0806]: Advanced Micro Devices, Inc. [AMD] Renoir/Cezanne IOMMU [1022:1631]
Subsystem: Advanced Micro Devices, Inc. [AMD] Renoir/Cezanne IOMMU [1022:1631]
00:01.0 Host bridge [0600]: Advanced Micro Devices, Inc. [AMD] Renoir PCIe Dummy Host Bridge [1022:1632]
00:01.2 PCI bridge [0604]: Advanced Micro Devices, Inc. [AMD] Renoir/Cezanne PCIe GPP Bridge [1022:1634]
Subsystem: Advanced Micro Devices, Inc. [AMD] Renoir/Cezanne PCIe GPP Bridge [1022:1453]
Kernel driver in use: pcieport
00:01.3 PCI bridge [0604]: Advanced Micro Devices, Inc. [AMD] Renoir/Cezanne PCIe GPP Bridge [1022:1634]
Subsystem: Advanced Micro Devices, Inc. [AMD] Renoir/Cezanne PCIe GPP Bridge [1022:1453]
Kernel driver in use: pcieport
00:02.0 Host bridge [0600]: Advanced Micro Devices, Inc. [AMD] Renoir PCIe Dummy Host Bridge [1022:1632]
00:02.1 PCI bridge [0604]: Advanced Micro Devices, Inc. [AMD] Renoir/Cezanne PCIe GPP Bridge [1022:1634]
Subsystem: Advanced Micro Devices, Inc. [AMD] Renoir/Cezanne PCIe GPP Bridge [1022:1453]
Kernel driver in use: pcieport
00:08.0 Host bridge [0600]: Advanced Micro Devices, Inc. [AMD] Renoir PCIe Dummy Host Bridge [1022:1632]
00:08.1 PCI bridge [0604]: Advanced Micro Devices, Inc. [AMD] Renoir Internal PCIe GPP Bridge to Bus [1022:1635]
Subsystem: Advanced Micro Devices, Inc. [AMD] Renoir Internal PCIe GPP Bridge to Bus [1022:1635]
Kernel driver in use: pcieport
00:14.0 SMBus [0c05]: Advanced Micro Devices, Inc. [AMD] FCH SMBus Controller [1022:790b] (rev 51)
Subsystem: Advanced Micro Devices, Inc. [AMD] FCH SMBus Controller [1022:790b]
Kernel driver in use: piix4_smbus
Kernel modules: i2c_piix4, sp5100_tco
00:14.3 ISA bridge [0601]: Advanced Micro Devices, Inc. [AMD] FCH LPC Bridge [1022:790e] (rev 51)
Subsystem: Advanced Micro Devices, Inc. [AMD] FCH LPC Bridge [1022:790e]
00:18.0 Host bridge [0600]: Advanced Micro Devices, Inc. [AMD] Cezanne Data Fabric; Function 0 [1022:166a]
00:18.1 Host bridge [0600]: Advanced Micro Devices, Inc. [AMD] Cezanne Data Fabric; Function 1 [1022:166b]
00:18.2 Host bridge [0600]: Advanced Micro Devices, Inc. [AMD] Cezanne Data Fabric; Function 2 [1022:166c]
00:18.3 Host bridge [0600]: Advanced Micro Devices, Inc. [AMD] Cezanne Data Fabric; Function 3 [1022:166d]
Kernel driver in use: k10temp
Kernel modules: k10temp
00:18.4 Host bridge [0600]: Advanced Micro Devices, Inc. [AMD] Cezanne Data Fabric; Function 4 [1022:166e]
00:18.5 Host bridge [0600]: Advanced Micro Devices, Inc. [AMD] Cezanne Data Fabric; Function 5 [1022:166f]
00:18.6 Host bridge [0600]: Advanced Micro Devices, Inc. [AMD] Cezanne Data Fabric; Function 6 [1022:1670]
00:18.7 Host bridge [0600]: Advanced Micro Devices, Inc. [AMD] Cezanne Data Fabric; Function 7 [1022:1671]
01:00.0 Ethernet controller [0200]: Realtek Semiconductor Co., Ltd. RTL8111/8168/8411 PCI Express Gigabit Ethernet Controller [10ec:8168] (rev 15)
Subsystem: Realtek Semiconductor Co., Ltd. RTL8111/8168/8211/8411 PCI Express Gigabit Ethernet Controller [10ec:0123]
Kernel driver in use: r8169
Kernel modules: r8169
02:00.0 Network controller [0280]: Intel Corporation Wi-Fi 6 AX200 [8086:2723] (rev 1a)
DeviceName: Onboard LAN Brodcom
Subsystem: Intel Corporation Wi-Fi 6 AX200NGW [8086:0084]
Kernel driver in use: iwlwifi
Kernel modules: iwlwifi
03:00.0 Non-Volatile memory controller [0108]: Micron/Crucial Technology P2 NVMe PCIe SSD [c0a9:540a] (rev 01)
Subsystem: Micron/Crucial Technology P2 [Nick P2] / P3 / P3 Plus NVMe PCIe SSD (DRAM-less) [c0a9:5021]
Kernel driver in use: nvme
Kernel modules: nvme
04:00.0 VGA compatible controller [0300]: Advanced Micro Devices, Inc. [AMD/ATI] Cezanne [Radeon Vega Series / Radeon Vega Mobile Series] [1002:1638] (rev c5)
Subsystem: Advanced Micro Devices, Inc. [AMD/ATI] Cezanne [Radeon Vega Series / Radeon Vega Mobile Series] [1002:0123]
Kernel driver in use: vfio-pci
Kernel modules: amdgpu
04:00.1 Audio device [0403]: Advanced Micro Devices, Inc. [AMD/ATI] Renoir Radeon High Definition Audio Controller [1002:1637]
Subsystem: Advanced Micro Devices, Inc. [AMD/ATI] Renoir Radeon High Definition Audio Controller [1002:1637]
Kernel driver in use: vfio-pci
Kernel modules: snd_hda_intel
04:00.2 Encryption controller [1080]: Advanced Micro Devices, Inc. [AMD] Family 17h (Models 10h-1fh) Platform Security Processor [1022:15df]
Subsystem: Advanced Micro Devices, Inc. [AMD] Family 17h (Models 10h-1fh) Platform Security Processor [1022:15df]
Kernel driver in use: ccp
Kernel modules: ccp
04:00.3 USB controller [0c03]: Advanced Micro Devices, Inc. [AMD] Renoir/Cezanne USB 3.1 [1022:1639]
Subsystem: Advanced Micro Devices, Inc. [AMD] Renoir/Cezanne USB 3.1 [1022:1639]
Kernel driver in use: xhci_hcd
Kernel modules: xhci_pci
04:00.4 USB controller [0c03]: Advanced Micro Devices, Inc. [AMD] Renoir/Cezanne USB 3.1 [1022:1639]
Subsystem: Advanced Micro Devices, Inc. [AMD] Renoir/Cezanne USB 3.1 [1022:1639]
Kernel driver in use: xhci_hcd
Kernel modules: xhci_pci
04:00.5 Multimedia controller [0480]: Advanced Micro Devices, Inc. [AMD] ACP/ACP3X/ACP6x Audio Coprocessor [1022:15e2] (rev 01)
Subsystem: Advanced Micro Devices, Inc. [AMD] ACP/ACP3X/ACP6x Audio Coprocessor [1022:15e2]
Kernel driver in use: snd_rn_pci_acp3x
Kernel modules: snd_pci_acp3x, snd_rn_pci_acp3x, snd_pci_acp5x, snd_pci_acp6x, snd_acp_pci, snd_rpl_pci_acp6x, snd_pci_ps, snd_sof_amd_renoir, snd_sof_amd_rembrandt, snd_sof_amd_vangogh, snd_sof_amd_acp63
04:00.6 Audio device [0403]: Advanced Micro Devices, Inc. [AMD] Family 17h/19h HD Audio Controller [1022:15e3]
DeviceName: HD Audio Controller
Subsystem: Advanced Micro Devices, Inc. [AMD] Family 17h/19h HD Audio Controller [1022:d270]
Kernel driver in use: snd_hda_intel
Kernel modules: snd_hda_intel
 
Last edited:
  • Like
Reactions: thebigbo
ONGOING PROCESS CON'T
Create Windows 11 VM
1724628836411.png

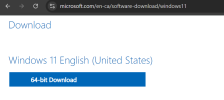
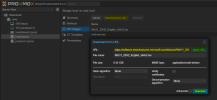
1. Upload Windows 11 ISO from https://www.microsoft.com/en-ca/software-download/windows11

Right Click > Copy Link Address (from 64-bit Download) > Get URL
1724629422369.png


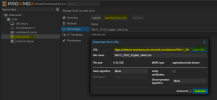
Select local (prox) > Download from URL > Paste URL from above link > Query URL > Download
1724629316426.png

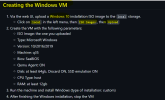
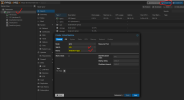
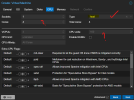
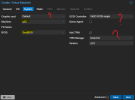
2. Build VM

Create the VM with the following parameters:
  • ISO Image: the one you uploaded
  • Type: Microsoft Windows
  • Version: 10/2016/2019 (Use Windows 11)
  • Machine: q35
  • Bios: SeaBIOS (Use UEFI)
  • Qemu Agent: ON
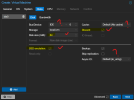
  • Disk: at least 64gb, Discard ON, SSD emulation ON
  • CPU Type: host
  • RAM: at least 12gb (Use 8gb)
Node
1724650980184.png

Windows Version
1724651131066.png

System
1724651360339.png

Disks
1724651621703.png

CPU
1724651747820.png
 

Attachments

  • 1724629290147.png
    1724629290147.png
    130.1 KB · Views: 37
  • 1724651260436.png
    1724651260436.png
    54.6 KB · Views: 39
Last edited:
  • Like
Reactions: thebigbo
ONGOING PROCESS CON'T 2

Memory
1724651855546.png

Network
1724651954894.png

Confirmation
1724652019629.png
1724652068270.png


3.
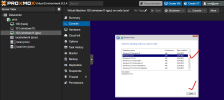
Run the machine and install Windows (type of installation: custom)
1724652198965.png
1724652260056.png
1724652306665.png
1724652368595.png
1724652432906.png

Using UEFI you can get to this screen (SeaBIOS will result in Windows 11 Invalid Hardware)

1724726616305.png
 
Last edited:
  • Like
Reactions: thebigbo
ONGOING PROCESS CON'T

Bypass Microsoft Sign In During Installation

-Shift + F10
-Command Prompt > ncpa.cpl
Code:
ncpa.cpl
1724726762504.png

Disable Internet

-right click > Disable
1724726828088.png

Restart Windows Installation

Code:
oobe\bypassnro
1724726897706.png

Limited Setup
1724726931455.png

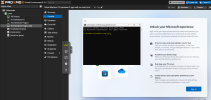
Windows 11 Installed
1724726957967.png
 
Last edited:
  • Like
Reactions: thebigbo
ONGOING PROCESS CON'T
Configuring GPU in Windows VM

1. Create vbios.c file in the Proxmox host
-SSH into Proxmox as root
-open text editor by typing nano
-paste contents below into text editor


Code:
#include <stdint.h>
#include <stdio.h>
#include <stdlib.h>

typedef uint32_t ULONG;
typedef uint8_t UCHAR;
typedef uint16_t USHORT;

typedef struct {
    ULONG Signature;
    ULONG TableLength; // Length
    UCHAR Revision;
    UCHAR Checksum;
    UCHAR OemId[6];
    UCHAR OemTableId[8]; // UINT64  OemTableId;
    ULONG OemRevision;
    ULONG CreatorId;
    ULONG CreatorRevision;
} AMD_ACPI_DESCRIPTION_HEADER;

typedef struct {
    AMD_ACPI_DESCRIPTION_HEADER SHeader;
    UCHAR TableUUID[16]; // 0x24
    ULONG VBIOSImageOffset; // 0x34. Offset to the first GOP_VBIOS_CONTENT block from the beginning of the stucture.
    ULONG Lib1ImageOffset; // 0x38. Offset to the first GOP_LIB1_CONTENT block from the beginning of the stucture.
    ULONG Reserved[4]; // 0x3C
} UEFI_ACPI_VFCT;

typedef struct {
    ULONG PCIBus; // 0x4C
    ULONG PCIDevice; // 0x50
    ULONG PCIFunction; // 0x54
    USHORT VendorID; // 0x58
    USHORT DeviceID; // 0x5A
    USHORT SSVID; // 0x5C
    USHORT SSID; // 0x5E
    ULONG Revision; // 0x60
    ULONG ImageLength; // 0x64
} VFCT_IMAGE_HEADER;

typedef struct {
    VFCT_IMAGE_HEADER VbiosHeader;
    UCHAR VbiosContent[1];
} GOP_VBIOS_CONTENT;

int main(int argc, char** argv)
{
    FILE* fp_vfct;
    FILE* fp_vbios;
    UEFI_ACPI_VFCT* pvfct;
    char vbios_name[0x400];

    if (!(fp_vfct = fopen("/sys/firmware/acpi/tables/VFCT", "r"))) {
        perror(argv[0]);
        return -1;
    }

    if (!(pvfct = malloc(sizeof(UEFI_ACPI_VFCT)))) {
        perror(argv[0]);
        return -1;
    }

    if (sizeof(UEFI_ACPI_VFCT) != fread(pvfct, 1, sizeof(UEFI_ACPI_VFCT), fp_vfct)) {
        fprintf(stderr, "%s: failed to read VFCT header!\n", argv[0]);
        return -1;
    }

    ULONG offset = pvfct->VBIOSImageOffset;
    ULONG tbl_size = pvfct->SHeader.TableLength;

    if (!(pvfct = realloc(pvfct, tbl_size))) {
        perror(argv[0]);
        return -1;
    }

    if (tbl_size - sizeof(UEFI_ACPI_VFCT) != fread(pvfct + 1, 1, tbl_size - sizeof(UEFI_ACPI_VFCT), fp_vfct)) {
        fprintf(stderr, "%s: failed to read VFCT body!\n", argv[0]);
        return -1;
    }

    fclose(fp_vfct);

    while (offset < tbl_size) {
        GOP_VBIOS_CONTENT* vbios = (GOP_VBIOS_CONTENT*)((char*)pvfct + offset);
        VFCT_IMAGE_HEADER* vhdr = &vbios->VbiosHeader;

        if (!vhdr->ImageLength)
            break;

        snprintf(vbios_name, sizeof(vbios_name), "vbios_%x_%x.bin", vhdr->VendorID, vhdr->DeviceID);

        if (!(fp_vbios = fopen(vbios_name, "wb"))) {
            perror(argv[0]);
            return -1;
        }

        if (vhdr->ImageLength != fwrite(&vbios->VbiosContent, 1, vhdr->ImageLength, fp_vbios)) {
            fprintf(stderr, "%s: failed to dump vbios %x:%x\n", argv[0], vhdr->VendorID, vhdr->DeviceID);
            return -1;
        }

        fclose(fp_vbios);

        printf("dump vbios %x:%x to %s\n", vhdr->VendorID, vhdr->DeviceID, vbios_name);

        offset += sizeof(VFCT_IMAGE_HEADER);
        offset += vhdr->ImageLength;
    }

    return 0;
}

SAVE the file as vbios.c
1724729603273.png

2. Check file is saved by typing ls
1724730034004.png


3. Install gcc to compile vbios.c

Code:
apt install gcc
1724730218046.png
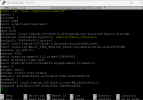
4-5. Compile vbios.c and execute

Code:
gcc vbios.c -o vbios
./vbios

1724730446210.png
6.

Move the vbios_*.bin vbios file to /usr/share/kvm/vbios_7xxx.bin:
Code:
mv vbios_*.bin /usr/share/kvm/vbios_5800h.bin
1724731012864.png

7.

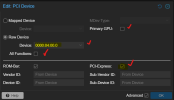
Proxmox>Select Windows 11 VM > Hardware > Add > PCI Device:
Add IGPU
  • Raw device: pick the PCI ID identified earlier in Step 4 of Configure GPU for Passthrough 0000:04:00.0
  • All Functions: OFF
  • Primary GPU: OFF
  • PCI-Express: ON
1724731763235.png

8.
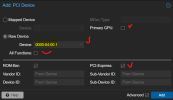
Proxmox>Select Windows 11 VM > Hardware > Add > PCI Device:
Add Audio Device
  • Raw device: pick the PCI ID identified earlier in Step 4 of Configure GPU for Passthrough 0000:04:00.0
  • All Functions: OFF
  • Primary GPU: OFF
  • PCI-Express: ON
1724732364328.png
 
Last edited:
  • Like
Reactions: thebigbo
ONGOING PROCESS CON'T
Configuring GPU in Windows VM

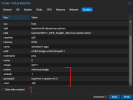
9. Set correct BIOS for GPU

  • Edit /etc/pve/qemu-server/<VM_ID>.conf
Code:
nano /etc/pve/qemu-server/103.conf
1724733574968.png

Make following highlighted edits and SAVE

Code:
args: -cpu 'host,-hypervisor,kvm=off'

Code:
hostpci0: 0000:04:00.0,pcie=1,romfile=vbios_5800h.bin
1725723436410.png

10. Run Windows 11 VM

Download and install latest VirtIO drivers from here : https://fedorapeople.org/groups/virt/virtio-win/direct-downloads/archive-virtio/?C=M;O=D (virtio-win-geuest-tools.exe)
1724735036039.png

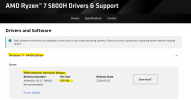
Download and install latest AMD Radeon Drivers
https://www.amd.com/en/support/down...yzen/ryzen-5000-series/amd-ryzen-7-5800h.html
1724790475770.png

Install RadeonResetBugFix (RadeonResetBugFixService.exe)
https://oomza.cutegay.software/inga-lovinde/RadeonResetBugFix/releases

download the file
Put RadeonResetBugFixService.exe in a permanent location (eg) C:\AMDResetBugFix
run CMD as Administrator
1724791489241.png

type cd \ to get to root directory
Code:
cd \

navigate to folder
Code:
cd C:\AMDResetBugFix

install program
Code:
RadeonResetBugFixService install
1724792061820.png

Setup Remote Desktop
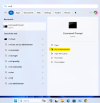
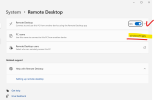
  • Start > Type "Remote desktop settings"
1724735340119.png

Reboot the Windows
11. RDP into your Windows 11 Virtual Machine
1724735887207.png


12. Notice Proxmox Console shows Windows lock screen while Remote Desktop is logged in
1724735808561.png


13. Check IGPU Is Passed Through

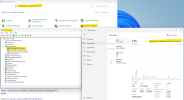
Control Panel > Device Manager > Display Adapters > AMD Radeon Graphics

Is this working???
Update : No it is not. GPU should show up in the Task Manager>Performance
AMD Radeon Graphics in Device Manager would show ERROR 43 later

1724736195529.png
 
Last edited:
  • Like
Reactions: thebigbo
FINAL STEPS!!!
Address Error 43
Download
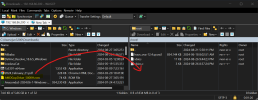
AMDGopDriver_5800H.rom
Use WinSCP to transfer the file over to Proxmox by dragging the file over Proxmox window
1724792847116.png

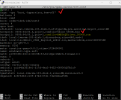
-In Putty check that the file transferred over by typing ls
-Move the file from root directory to /user/share/kvm/
Code:
mv AMDGopDriver_5800H.rom /usr/share/kvm/AMDGopDriver_5800H.rom
1724793308713.png

Assign AMDGopDriver_5800H.rom to the Audio PCI Device
Code:
nano /etc/pve/qemu-server/103.conf

save the changes
1724794175310.png

Working !!!!
=========================================================================================

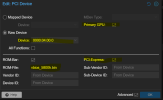
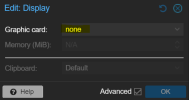
Update IGPU PCI Device and Display

-under Hardware>PCI Device (hostpci0)
-check ON Primary GPU
1724995122141.png

-under Hardware>Display
-set Graphic card to none

1724995356700.png

Hardware Of Windows VM

1724817870192.png

Netflix and X265 File Running
1724791245073.png

Beelink SER 5 HDMI Output To Monitor With Proxmox Running In Background
The end goal is to have a dedicated Windows HTPC (Chrome, KODI, Netflix, Disney, etc) hooked up to a TV, with Proxmox running in the background to manage various VMs like Home Assistant, Adguard, etc.

1724793494221.png


Passthrough USB (Keyboard & Mouse) to Windows VM

https://pve.proxmox.com/wiki/USB_Devices_in_Virtual_Machines

1. SSH to Proxmox using Putty
type lsusb to see what USB ports are being used
Code:
lsusb
1724814780323.png

Assign Lenovo Optical Mouse to the VM (103)
Code:
qm set 103 -usb0 host=17ef:608d

Assign Telink 2.4G Receiver Keyboard to the VM (103)
Code:
qm set 103 -usb1 host=320f:50c3

Congrats! You now have a fully functional Windows 11 HTPC connected to a TV/Monitor via HDMI that you can operate with mouse and keyboard. Proxmox operates in the background with other VMs initialized (eg Home Assistant).
 
Last edited:
@aschrijver and @_gabriel thank you both for your contributions. I will update my prior posts with the correct changes once there is certainty regarding next steps.

@_gabriel, I'll probably reach out to the OP who created the thread you referenced. It looks like he was successful with the setup using Windows 10. Perhaps that might be the difference between Windows 11 and Windows 10 regarding UEFI vs Seabios.

That said :

Does NOT Install Windows 11
1724701686791.png

Windows 11 Installs
-SeaBIOS changed to UEFI
1724701847808.png


Last edited:
One configuration issue has come up. The Windows 11 VM is setup with Display = None. This allows the HDMI to passthrough to the Windows 11 VM, when the IGPU PCI device is set to Primary GPU. Performance is great.

However if you step away from the machine for 10 minutes, the Proxmox will suspend the Windows 11 VM. Conversely, if you RDP into the Windows 11 VM, Proxmox will NOT suspend it.

I've set all the Windows 11 Power Management settings to Performance Mode. Display, Sleep, and Hard Disk are set to NEVER turn off. Any ideas on how to address this issue?

Thanks in advance.
 
disable hibernation with admin cmd powercfg -h off, which disable Fast Startup too.
Thanks @_gabriel. I will give that a try and report back.

Update : Thanks @_gabriel, the command prevents Proxmox from suspending the Windows 11 VM now. I set the screen to shut off after 10 minutes, and it now locks/turns on screensaver when the Windows session is inactive.
 
Last edited:
Thank you for this. I have followed your guide successfully, unfortunately in the process I have broken my Plex LXC install. I'm now getting that
Code:
/dev/dri/card1
and
Code:
/dev/dri/renderD128
don't exist. Is there anyway to make it run again, or enable igpu passthrough to it as well?
 
Last edited:
@daemmon, I'm sorry to hear of your issues. I'm new to Proxmox, but as I understand it, this configuration only allows the igpu passthrough to one VM. As this process assigns the igpu to Windows, have you tried going through the process in reverse?

-Delete the hostpci0 and hostpci1 from your Windows Hardware
-Set Display to Default

Hopefully that releases the igpu back to Proxmox for use by the other vms.

1727618017328.png
 
As this process assigns the igpu to Windows, have you tried going through the process in reverse?
I have managed to reverse all changes and got control back to the containers. I will just skip all the igpu passthrough stuff for now. Thank you
 
Last edited:
Hello there,

I'm completely new to the world of Proxmox. While the experience has been exciting , it has been alot of trial by fire.

I was able to follow youtube guides and install Proxmox easily on a Beelink SER 5 - Ryzen 7 5800H. I successfully installed and migrated Home Assistant. I was able to install Windows 11 and access it via RDP.

I was hoping to connect the mini pc to a monitor and have it display and run Windows 11 - with Proxmox operating in the background. Am I correct in thinking if I have the IGPU blacklisted from running in Proxmox, and passing it through it to the Windows 11 virtual machine, then I could achieve this?

I figured I would give this a shot to see what the end result would be. I can't seem to find a concrete step by step guide for the 5800H, so my hope is by posting here, I can consolidate the findings here by updating the original post with with the outputs. This could serve as a useful reference for new users like myself.

I followed the guide here : https://github.com/isc30/ryzen-7000-series-proxmox
and referenced :
https://forum.proxmox.com/threads/amd-ryzen-5700u-7735hs-igpu-passthrough-windows-11.142811/
https://forum.proxmox.com/threads/amd-igpu-passthrough-wont-work.143044/
https://forum.proxmox.com/threads/h...-the-igpu-amd-radeon-680m-to-vm.119178/page-2
https://forum.proxmox.com/threads/windows-11-vm-for-gaming-setup-guide.137718/

=================================================================================================

ONCE PROXMOX VE HAS BEEN INSTALLED

I executed the commands highlighted below (but I'm not sure what they do) :

Update Proxmox VE
-Install PUTTY and SSH into your Proxmox machine's IP (eg 192.168.86.200)
View attachment 73789

7.
Code:
bash -c "$(wget -qLO - https://github.com/tteck/Proxmox/raw/main/misc/post-pve-install.sh)"
View attachment 73631

select "yes" and "Ok" to everything
View attachment 73632

changes committed to Proxmox
View attachment 73633

8.
Code:
bash -c "$(wget -qLO - https://github.com/tteck/Proxmox/raw/main/misc/microcode.sh)"
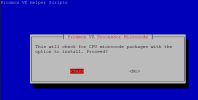
View attachment 73634

I selected (the newest file) : amd64-microcode_3.20240820.1~deb12u1_amd64.deb

View attachment 73635


Configure GPU for Passthrough
View attachment 73636

1.
Code:
lspci -nn | grep -e 'AMD/ATI'

04:00.0 VGA compatible controller [0300]: Advanced Micro Devices, Inc. [AMD/ATI] Cezanne [Radeon Vega Series / Radeon Vega Mobile Series][1002:1638] (rev c5)
04:00.1 Audio device [0403]: Advanced Micro Devices, Inc. [AMD/ATI] Renoir Radeon High Definition Audio Controller [1002:1637]
View attachment 73637

2.
Code:
sed -i 's/GRUB_CMDLINE_LINUX_DEFAULT="quiet"/GRUB_CMDLINE_LINUX_DEFAULT="quiet iommu=pt"/g' /etc/default/grub
update-grub

View attachment 73638

3.
Code:
echo "vfio" >> /etc/modules
echo "vfio_iommu_type1" >> /etc/modules
echo "vfio_pci" >> /etc/modules
echo "vfio_virqfd" >> /etc/modules

View attachment 73639
Thank you very much @jun3280, you are a star!
I've spent days trying different things and I did everything even following this Guide
https://github.com/isc30/ryzen-7000-series-proxmox?tab=readme-ov-file
Which is almost identical to yours, but it still didn't work. I think my issue was with the AMDGopDriver_5800H.rom file.
I've used this one: https://github.com/isc30/ryzen-7000-series-proxmox/blob/main/AMDGopDriver_5800H.rom
Another thing I did, was install the AMD drivers while using the Windows RDP app instead of using the Console VNC (I am not sure if this makes a difference)
And it didn't work for me.
 
Last edited:
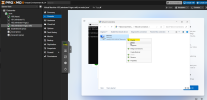
  • Like
Reactions: jun3280
First of all, wonderful guide and thank you for all your work (and the work of all those referenced)...

I ran into a snag on the vbios dump script, which gives me a file or directory does not exist error (even though the script certainly does). I believe it is because the location /sys/firmware/acpi/tables/VFCT does not exist.

In the meantime, I've got error 43 with the resetbugfix running, the Rom referenced in the audio device, and I've been using a 5700U vbios for lack of the knowledge to get the one from my own system.

I am very novice with Proxmox, trying to get a 5500GT running directly to an attached monitor so I can use it to connect to other headless servers when I need to and not have my whole gaming rig running just to use a browser.

Edit: I was never able to extract the vbios with the script above as it assumes a file exists that I don't have...

However, I was able to get the igpu passthrough working and thanks again for the help!

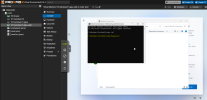
The issue was that I did not have the correct vbios for the vga and audio, and could not use the vbios script. Instead, I followed the method in https://github.com/isc30/ryzen-7000-series-proxmox/discussions/18 that uses UEFI bios updater to extract the vbios from the mobo bios update file from Asus (prime b350 plus in my case):
1730062590165.png
 
Last edited:
About

The Proxmox community has been around for many years and offers help and support for Proxmox VE, Proxmox Backup Server, and Proxmox Mail Gateway.
We think our community is one of the best thanks to people like you!

Get your subscription!

The Proxmox team works very hard to make sure you are running the best software and getting stable updates and security enhancements, as well as quick enterprise support. Tens of thousands of happy customers have a Proxmox subscription. Get yours easily in our online shop.

Buy now!