Upgrade issue: error: file 'vmlinuz-5.11.22-3-pve' not found

Scotty

Member
Jul 15, 2021
25
2
8
54
UK
Hi All,

Bit of an issue here. I performed an upgrade via the GUI yesterday but upon rebooting the system I now get:

Loading Linux 5.11.22-3-pve ...
issue: error: file 'vmlinuz-5.11.22-3-pve' not found
Loading initial ramdisk ...
error: you need to load the kernel first.
Press any key to continue...


If I select advanced options I get two options:

Proxmox VE GNU/Linux, with Linux 5.11.22-3-pve
Proxmox VE GNU/Linux, with Linux 5.11.22-1-pve


If I select the first option I get the error above, if I select the second I get a few ACPI BIOS errors (bug) which I think are to do with the intel protection and then:

Found volume group "SSD" using metadata type lvm2
Found volume group "pve" using metadata type lvm2
3 logical volume(s) in volume group "SSD" now active
4 logical volume(s) in volume group "pve" now active

Command: /sbin/zpool import -N 'rpool'
Message: cannot import 'pool' : pool was previously in use from another system.
Last accessed by Proxy (hosted-bf41c0aa) at Sun Aug 8 23:00:18 2021
The pool can be imported, use 'zpool import -f' to import the pool.
Error: 1

Failed to import pool 'rpool'.
Manually import the pool and exit.

BusyBox v1.30.1 (Debian 1:1.30.1-6+b2) built-in shell (ash)

(initramfs)


What have I done?
How do I start troubleshooting this?

Regards,

Scott
 
I certainly hope I haven't just cocked it up...

I just typed in the zpool import as suggested about but had to use -f to force it.

It's now booted up but it's obviously at some previous state with without my VM's listed.

Ops...what now?
 
it shouldn't be at a previous state (unless the rpool is an older install and your actual system was supposed to boot from LVM?)

could you provide the output of pveversion -v, proxmox-boot-tool status and systemctl status?
 
Hi,

By previous state I mean it doesn't appear to know about the VM's I had.

output:

root@Proxy:~# pveversion -v
proxmox-ve: 7.0-2 (running kernel: 5.11.22-1-pve)
pve-manager: 7.0-8 (running version: 7.0-8/b1dbf562)
pve-kernel-5.11: 7.0-3
pve-kernel-helper: 7.0-3
pve-kernel-5.11.22-1-pve: 5.11.22-2
ceph-fuse: 15.2.13-pve1
corosync: 3.1.2-pve2
criu: 3.15-1+pve-1
glusterfs-client: 9.2-1
ifupdown2: 3.0.0-1+pve5
ksm-control-daemon: 1.4-1
libjs-extjs: 7.0.0-1
libknet1: 1.21-pve1
libproxmox-acme-perl: 1.1.1
libproxmox-backup-qemu0: 1.2.0-1
libpve-access-control: 7.0-4
libpve-apiclient-perl: 3.2-1
libpve-common-perl: 7.0-4
libpve-guest-common-perl: 4.0-2
libpve-http-server-perl: 4.0-2
libpve-storage-perl: 7.0-7
libspice-server1: 0.14.3-2.1
lvm2: 2.03.11-2.1
lxc-pve: 4.0.9-2
lxcfs: 4.0.8-pve1
novnc-pve: 1.2.0-3
proxmox-backup-client: 2.0.1-1
proxmox-backup-file-restore: 2.0.1-1
proxmox-mini-journalreader: 1.2-1
proxmox-widget-toolkit: 3.2-4
pve-cluster: 7.0-3
pve-container: 4.0-5
pve-docs: 7.0-5
pve-edk2-firmware: 3.20200531-1
pve-firewall: 4.2-2
pve-firmware: 3.2-4
pve-ha-manager: 3.3-1
pve-i18n: 2.4-1
pve-qemu-kvm: 6.0.0-2
pve-xtermjs: 4.12.0-1
qemu-server: 7.0-7
smartmontools: 7.2-1
spiceterm: 3.2-2
vncterm: 1.7-1
zfsutils-linux: 2.0.4-pve1
root@Proxy:~#
root@Proxy:~#
root@Proxy:~#
root@Proxy:~# proxmox-boot-tool status
Re-executing '/usr/sbin/proxmox-boot-tool' in new private mount namespace..
E: /etc/kernel/proxmox-boot-uuids does not exist.
root@Proxy:~#
root@Proxy:~#
root@Proxy:~#
root@Proxy:~# systemctl status
● Proxy
State: degraded
Jobs: 0 queued
Failed: 1 units
Since: Tue 2021-08-10 12:09:37 BST; 1h 19min ago
CGroup: /
├─3124 bpfilter_umh
├─user.slice
│ └─user-0.slice
│ ├─session-1.scope
│ │ ├─ 6853 /bin/login -f
│ │ ├─ 6878 -bash
│ │ ├─37308 systemctl status
│ │ └─37309 pager
│ └─user@0.service
│ └─init.scope
│ ├─6859 /lib/systemd/systemd --user
│ └─6860 (sd-pam)
├─init.scope
│ └─1 /sbin/init
└─system.slice
├─systemd-udevd.service
│ └─907 /lib/systemd/systemd-udevd
├─cron.service
│ └─3315 /usr/sbin/cron -f
├─pve-firewall.service
│ └─3400 pve-firewall
├─pve-lxc-syscalld.service
│ └─2923 /usr/lib/x86_64-linux-gnu/pve-lxc-syscalld/pve-lxc-syscalld --system /run/pve/lxc-syscalld.sock
├─spiceproxy.service
│ ├─3500 spiceproxy
│ └─3501 spiceproxy worker
├─pve-ha-crm.service
│ └─3434 pve-ha-crm
├─pvedaemon.service
│ ├─3425 pvedaemon
│ ├─3426 pvedaemon worker
│ ├─3427 pvedaemon worker
│ ├─3428 pvedaemon worker
│ ├─6845 task UPID:Proxy:00001ABD:0000ACFB:6112601A:vncshell::root@pam:
│ └─6846 /usr/bin/termproxy 5900 --path /nodes/Proxy --perm Sys.Console -- /bin/login -f root
├─systemd-journald.service
│ └─853 /lib/systemd/systemd-journald
├─ssh.service
│ └─3172 sshd: /usr/sbin/sshd -D [listener] 0 of 10-100 startups
├─qmeventd.service
│ └─2941 /usr/sbin/qmeventd /var/run/qmeventd.sock
├─rrdcached.service
│ └─3302 /usr/bin/rrdcached -B -b /var/lib/rrdcached/db/ -j /var/lib/rrdcached/journal/ -p /var/run/rrdcached.pid -l uni>
├─watchdog-mux.service
│ └─2929 /usr/sbin/watchdog-mux
├─pvefw-logger.service
│ └─2909 /usr/sbin/pvefw-logger
├─rsyslog.service
│ └─2925 /usr/sbin/rsyslogd -n -iNONE
├─pveproxy.service
│ ├─ 3447 pveproxy
│ ├─17133 pveproxy worker
│ ├─25864 pveproxy worker
│ ├─35989 pveproxy worker (shutdown)
│ └─35990 pveproxy worker
├─ksmtuned.service
│ ├─ 2937 /bin/bash /usr/sbin/ksmtuned
│ └─37018 sleep 60
├─lxc-monitord.service
│ └─3080 /usr/libexec/lxc/lxc-monitord --daemon
├─rpcbind.service
│ └─2907 /sbin/rpcbind -f -w
├─chrony.service
│ ├─3165 /usr/sbin/chronyd -F 1
│ └─3169 /usr/sbin/chronyd -F 1
├─lxcfs.service …
│ └─2922 /usr/bin/lxcfs /var/lib/lxcfs
├─system-postfix.slice
│ └─postfix@-.service
│ ├─3298 /usr/lib/postfix/sbin/master -w
│ ├─3299 pickup -l -t unix -u -c
│ └─3300 qmgr -l -t unix -u
├─smartmontools.service
│ └─2927 /usr/sbin/smartd -n
├─iscsid.service
│ ├─3166 /sbin/iscsid
│ └─3167 /sbin/iscsid
├─zfs-zed.service
│ └─2931 /usr/sbin/zed -F
├─pve-cluster.service
│ └─3310 /usr/bin/pmxcfs
├─dbus.service
│ └─2918 /usr/bin/dbus-daemon --system --address=systemd: --nofork --nopidfile --systemd-activation --syslog-only
├─pve-ha-lrm.service
│ └─3503 pve-ha-lrm
├─system-getty.slice
│ └─getty@tty1.service
│ └─3212 /sbin/agetty -o -p -- \u --noclear tty1 linux
├─pvestatd.service
│ └─3408 pvestatd
├─dm-event.service
│ └─864 /sbin/dmeventd -f
└─systemd-logind.service
└─2928 /lib/systemd/systemd-logind

[1]+ Stopped systemctl status
root@Proxy:~#
 
a zpool import like that doesn't revert to an old state - did you install PVE multiple times on the disks you currently have installed?
 
I did have an issue early on when trying to mirror the two disks during the initial install process and have installed twice. However I thought everything had been removed when I did the second installation.

The system has been rebooting happily for over a month. This only seems to have occurred due to me selecting upgrade from the GUI and rebooting.

The VM's disks are still on the SSD drive as I can see them listed.

root@Proxy:~# lvs -aH
LV VG Attr LSize Pool Origin Data% Meta% Move Log Cpy%Sync Convert
SSD SSD twi-aotz-- <228.11g 44.75 2.90
[SSD_tdata] SSD Twi-ao---- <228.11g
[SSD_tmeta] SSD ewi-ao---- <2.33g
[lvol0_pmspare] SSD ewi------- <2.33g
vm-100-disk-0 SSD Vwi-a-tz-- 60.00g SSD 51.42
vm-101-disk-0 SSD Vwi-a-tz-- 100.00g SSD 71.24
data pve twi-aotz-- <273.91g 10.81 1.13
[data_tdata] pve Twi-ao---- <273.91g
[data_tmeta] pve ewi-ao---- <2.80g
[lvol0_pmspare] pve ewi------- <2.80g
root pve -wi-a----- 96.00g
swap pve -wi-a----- 8.00g
vm-100-disk-0 pve Vwi-a-tz-- 30.00g data 98.73
root@Proxy:~#

But the system that is now booted isn't as it was configured before the upgrade. I've just had to recreate my network bridge as it had dropped on of the cards of the bridge and of course the VM's aren't listed.

I thought the two disk in bold below were in the rpool:

root@Proxy:~# ls /dev/disk/by-id
ata-Hitachi_HDS723020BLA642_MN1220F31KD27D
ata-Hitachi_HDS723020BLA642_MN1220F31KD27D-part1
ata-Hitachi_HDS723020BLA642_MN1220F31KD27D-part9
ata-Hitachi_HDS723020BLA642_MN1220F31P7NPD
ata-Hitachi_HDS723020BLA642_MN1220F31P7NPD-part1
ata-Hitachi_HDS723020BLA642_MN1220F31P7NPD-part9
ata-Hitachi_HDS723020BLA642_MN1220F31PXKKD
ata-Hitachi_HDS723020BLA642_MN1220F31PXKKD-part1
ata-Hitachi_HDS723020BLA642_MN1220F31PXKKD-part9
ata-Hitachi_HDS723020BLA642_MN1220F31PY7KD
ata-Hitachi_HDS723020BLA642_MN1220F31PY7KD-part1
ata-Hitachi_HDS723020BLA642_MN1220F31PY7KD-part9
ata-Hitachi_HDS723020BLA642_MN1220F31R1G6D
ata-Hitachi_HDS723020BLA642_MN1220F31R1G6D-part1
ata-Hitachi_HDS723020BLA642_MN1220F31R1G6D-part9
ata-Hitachi_HDS723020BLA642_MN1220F31R2MBD
ata-Hitachi_HDS723020BLA642_MN1220F31R2MBD-part1
ata-Hitachi_HDS723020BLA642_MN1220F31R2MBD-part9
ata-Hitachi_HDS723020BLA642_MN1220F327N6JG
ata-Hitachi_HDS723020BLA642_MN1220F327N6JG-part1
ata-Hitachi_HDS723020BLA642_MN1220F327N6JG-part9
ata-Hitachi_HDS723020BLA642_MN1220F32E470D
ata-Hitachi_HDS723020BLA642_MN1220F32E470D-part1
ata-Hitachi_HDS723020BLA642_MN1220F32E470D-part9
ata-SAMSUNG_HD103SJ_S2C8JD2Z901273
ata-SAMSUNG_HD103SJ_S2C8JD2Z901273-part1
ata-SAMSUNG_HD103SJ_S2C8JD2Z901273-part2
ata-SAMSUNG_HD103SJ_S2C8JD2Z901273-part3
ata-SAMSUNG_HD103SJ_S2C8JD2Z901274
ata-SAMSUNG_HD103SJ_S2C8JD2Z901274-part1
ata-SAMSUNG_HD103SJ_S2C8JD2Z901274-part2
ata-SAMSUNG_HD103SJ_S2C8JD2Z901274-part3

ata-Samsung_SSD_850_EVO_250GB_S21PNSAFC22489N
dm-name-pve-root
dm-name-pve-swap
dm-name-pve-vm--100--disk--0
dm-name-SSD-vm--100--disk--0
dm-name-SSD-vm--101--disk--0
dm-uuid-LVM-cUyqcYYcWtTFm8ZtE2QKCF8zRMG7q7v45khTukELvVNHt0e3cuDV1emTXFMcIvYP
dm-uuid-LVM-cUyqcYYcWtTFm8ZtE2QKCF8zRMG7q7v4XqX7b7AVhnKQnfecTKKuCHw4V0imFVZX
dm-uuid-LVM-RwdII7J11igEzaHoswdeTTr1870dh8gDThcqeswqJodxfFikcxR39uvsefH9fCOb
dm-uuid-LVM-RwdII7J11igEzaHoswdeTTr1870dh8gDY9zk6RWhAYs5VM3tCcSNIX0UHecHPImd
dm-uuid-LVM-RwdII7J11igEzaHoswdeTTr1870dh8gDZ2XfJd1rncgA27UDho5OC1HL1KTVc7ks
lvm-pv-uuid-ooc89C-0ws7-Ns7g-sKg6-F2ET-sEj2-XWFdLF
lvm-pv-uuid-uDnTn8-XwyK-wQ1P-jvfU-8KfY-NjP6-gf4eE1
wwn-0x5000cca369d5ff21
wwn-0x5000cca369d5ff21-part1
wwn-0x5000cca369d5ff21-part9
wwn-0x5000cca369d7c014
wwn-0x5000cca369d7c014-part1
wwn-0x5000cca369d7c014-part9
wwn-0x5000cca369d80e88
wwn-0x5000cca369d80e88-part1
wwn-0x5000cca369d80e88-part9
wwn-0x5000cca369d81113
wwn-0x5000cca369d81113-part1
wwn-0x5000cca369d81113-part9
wwn-0x5000cca369d81d24
wwn-0x5000cca369d81d24-part1
wwn-0x5000cca369d81d24-part9
wwn-0x5000cca369d82185
wwn-0x5000cca369d82185-part1
wwn-0x5000cca369d82185-part9
wwn-0x5000cca369dfa979
wwn-0x5000cca369dfa979-part1
wwn-0x5000cca369dfa979-part9
wwn-0x5000cca369e227b2
wwn-0x5000cca369e227b2-part1
wwn-0x5000cca369e227b2-part9
wwn-0x50024e90040945b6
wwn-0x50024e90040945b6-part1
wwn-0x50024e90040945b6-part2
wwn-0x50024e90040945b6-part3
wwn-0x50024e90040945bc
wwn-0x50024e90040945bc-part1
wwn-0x50024e90040945bc-part2
wwn-0x50024e90040945bc-part3
wwn-0x5002538da00153cd
root@Proxy:~#

However it appears the volume is degraded
 
Last edited:
root@Proxy:~# zpool status
pool: rpool
state: DEGRADED
status: One or more devices could not be used because the label is missing or
invalid. Sufficient replicas exist for the pool to continue
functioning in a degraded state.
action: Replace the device using 'zpool replace'.
see: https://openzfs.github.io/openzfs-docs/msg/ZFS-8000-4J
config:

NAME STATE READ WRITE CKSUM
rpool DEGRADED 0 0 0
mirror-0 DEGRADED 0 0 0
10925241938798056718 UNAVAIL 0 0 0 was /dev/disk/by-id/ata-SAMSUNG_HD103SJ_S2C8JD2Z901273-part3
ata-SAMSUNG_HD103SJ_S2C8JD2Z901274-part3 ONLINE 0 0 0

errors: No known data errors
root@Proxy:~#


Sorry, I'm at a loss as to what has happened. Is there a way to re-build the VM's or do I create new ones and point them at the vm-100-disk-0 and vm-101-disk-0 disks?
 
Last edited:
yeah, this sounds like you are booting from half of your first installation attempt instead of the correct disk(s).
 
I think I'll bite the bullet and unplug all the disks, the SAS controller connected disks (the large ZFS volume), the SSD (where the 2 VM's sit), the samsung 1GB's and then plug the others in one at a time (oh...and label them this time!!) until I figure what is what.

I'm guessing that as long as the SAS controller connected disks (the large ZFS volume), the SSD (where the 2 VM's sit) are unplugged, the worst I have to do is reinstall Proxmox and then re-create the VM configuration and attach the vm-XXX-X disks. The Proxmox installation is very simple (or I thought it was) as the complexity is in one of the VM's which is TrueNas...that took be ages to get working.
 
Please forgive my ignorance here, but could I have been booting and using an LVM?

I've unplugged all the disks and I have 2 disks that are 1GB Samsung disks. One I can boot from and gets to me where I am. This shows as a zfs volume in a degraded state with one volume. I can boot from this but it appears un-configured or at least, not how it was. This volume seems fine and I've just gone into the GUI and performed an upgrade and it works.

I have another 1GB samsung disk which was in a previous attempt at installing proxmox a mirrored pair. After it had failed, I reinstalled but think I didn't use mirroring because I was having issues. I used this disk and also ISO's etc for my VM's. However the volume layout is the same as the disk I'm booting from. Confused...I am.

So this second disk has a BIOS boot, EFI and LVM on it which just happen to be exactly the same size partitions as the disk I'm booting from which also has BIOS boot, EFI and ZFS.

So I wondering if I was booting from the LVM before the upgrade and are my configuration changes on there?
 

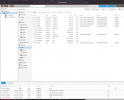
Attachments

  • Screenshot 2021-08-10 at 17.07.04.png
    Screenshot 2021-08-10 at 17.07.04.png
    584.8 KB · Views: 4
sounds like a valid theory. if you unplug the one disk that boots ZFS (or even better - all disks except the LVM one), and just leave the other one (I assume you meant 1TB, not 1GB ;)) - what happens if you try to boot?
 
Thats exactly what I tried but the system won't boot. The cursor (white underline) moves from the top left of a blank screen and moves inwards slightly but then does nothing. No errors, no grub, menu...just stops.
 
you can try booting into a live cd with just that disk connected, and then try reinstalling grub (activate LVM, mount / and /boot somewhere, chroot, then grub-install - there are more complete howtos available via google ;))
 
Seems like that was the device I was booting from. I've just booted (not from that disk) and mounted /dev/pve/root and then checked the grub file on that volume and that contains the GRUB_CMDLINE_LINUX_DEFUALT values I had before i.e. iommu etc. So I assume everything else is there. On a positive note...it's still there :)
 
Hi,

Sorry my head is spinning here...

I've given up trying to get the original disk to work, I've followed lots of guides on google and got nowhere.

So I would like to try and start again but hopefully without losing any of the vm's.

Current situation is I'm booted up and can create new VM's but I can't for the life of me figure out how to use the /dev/sdc device which is my SSD with the VM's on it. Nodename/Disks shows along with my boot device, /dev/sdc ,type=SSD, Usage=LVM

My logic was to create a new VM and then change the disk to the original one. However I can't select the SSD, it's not an option. From shell, lsblk lists

root@Proxy:~/test# lsblk
NAME MAJ:MIN RM SIZE RO TYPE MOUNTPOINT
sda 8:0 0 931.5G 0 disk
├─sda1 8:1 0 1007K 0 part
├─sda2 8:2 0 512M 0 part
└─sda3 8:3 0 399.5G 0 part
├─pve-swap 253:2 0 8G 0 lvm
├─pve-root 253:3 0 96G 0 lvm /mnt
├─pve-data_tmeta 253:4 0 2.8G 0 lvm
│ └─pve-data-tpool 253:10 0 273.9G 0 lvm
│ ├─pve-data 253:11 0 273.9G 1 lvm
│ └─pve-vm--100--disk--0 253:12 0 30G 0 lvm
└─pve-data_tdata 253:5 0 273.9G 0 lvm
└─pve-data-tpool 253:10 0 273.9G 0 lvm
├─pve-data 253:11 0 273.9G 1 lvm
└─pve-vm--100--disk--0 253:12 0 30G 0 lvm
sdb 8:16 0 931.5G 0 disk
├─sdb1 8:17 0 1007K 0 part
├─sdb2 8:18 0 512M 0 part
└─sdb3 8:19 0 399.5G 0 part
sdc 8:32 0 232.9G 0 disk
├─SSD-SSD_tmeta 253:0 0 2.3G 0 lvm
│ └─SSD-SSD-tpool 253:6 0 228.1G 0 lvm
│ ├─SSD-SSD 253:7 0 228.1G 1 lvm
│ ├─SSD-vm--101--disk--0 253:8 0 100G 0 lvm
│ └─SSD-vm--100--disk--0 253:9 0 60G 0 lvm
└─SSD-SSD_tdata 253:1 0 228.1G 0 lvm
└─SSD-SSD-tpool 253:6 0 228.1G 0 lvm
├─SSD-SSD 253:7 0 228.1G 1 lvm
├─SSD-vm--101--disk--0 253:8 0 100G 0 lvm
└─SSD-vm--100--disk--0 253:9 0 60G 0 lvm
zd0 230:0 0 2G 0 disk

(sda is the problem disk, so ignore that).

How do I have sdc available so I can use the original vm disks?

I'm going around in circles and if you haven't guessed by now...well out of my depth.

Scott
 
Last edited:
you mean you cannot select the SSD/SSD thinpool as storage? you need to add an entry for it to storage.cfg (on the GUI: datacenter -> Storage -> Add -> LVMThin)
 
you mean you cannot select the SSD/SSD thinpool as storage? you need to add an entry for it to storage.cfg (on the GUI: datacenter -> Storage -> Add -> LVMThin)
My hero!...

I'm now back up and running. I did what you suggested, created a dummy vm and edited the .conf file to point to the original VM disks. A few tweaks later and both the TrueNAS and Win10 VM's are up and running.

Wow...I must find out more about the disk/volume structures. What with physical disks, LVM's, LVMThin, VM disks, grub, efi...I have a bit more reading to do.

Thank you for you help and patience.
 

About

The Proxmox community has been around for many years and offers help and support for Proxmox VE, Proxmox Backup Server, and Proxmox Mail Gateway.
We think our community is one of the best thanks to people like you!

Get your subscription!

The Proxmox team works very hard to make sure you are running the best software and getting stable updates and security enhancements, as well as quick enterprise support. Tens of thousands of happy customers have a Proxmox subscription. Get yours easily in our online shop.

Buy now!