qcow2 shrinking?

d3dl3g

New Member
Sep 10, 2023
23
2
3
kinda feels like this has been done to death but im struggling to find my EXACT issue, so if ive missed a post that fixes this, sorry...

my proxmox is BTRFS (ext4) disk setup (no LVM, no ZFS, which a lot of the posts seem to be).
i have a Debian VM running my docker build, i initially set this up with a 128Gb scsi0 disk (why 128Gb i do not know)
i want to shrink this to 32gb. i currently have the qcow2 on my BTRFS pool storage which is a spinning platter RAID Array of HDDs, id like it on my `local-btrfs` SSD for obvious reasons. my ssd is only 256Gb, so this one VM alone would use 50% of available.

`ls -lah` of dir gives 18Gb file size after following `fstrim -av` from within running VM, `dd if=/dev/zero of=/mytempfile && rm -f /mytempfile` and the `qemu-img convert...` commands listed at https://pve.proxmox.com/wiki/Shrink_Qcow2_Disk_Files
1724599693591.png

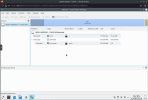
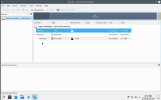
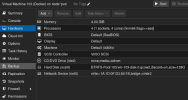
VM quite happily boots from this qcow2 file and acts "normally", however, VM > Hardware tab and disk from within running VM shows disk size to be 128Gb.
1724599849212.png

1724600140797.png

Any advice warmly recieved it may be a case of user error. im happy to accept that.

my other options are to attempt clonezilla, again, to attempt from large disk to small disk.
and my least favoured... rebuild the vm with fresh debian, and either `cp` file across or start from scratch with docker... :(
i have a lot of it documented so wouldnt be hard, just time consuming.
 
my proxmox is BTRFS (ext4) disk setup
VM quite happily boots from this qcow2 file
Why are you using your btrfs backing store as a filestore? create a btrfs store instead, and move your disk over. After which, ask yourself what problem you're trying to solve- its a thin provisioned file system; what's the harm of leaving the logical fs at 128GB?
 
Thanks for your reply , Alex,
i am unfamiliar with the terms BTRFS Store and BTRFS Backing Store, and the differences between them.

the problem i am trying to solve is available free space on my `local-btrfs` storage. i wanted to make it as user friendly as possible at the UI to save confusion in 8 months when i look at it and forgot what i did this week
iirc, if i move qcow2 file to `local-btrfs` it changes to a .raw are .raw still thin provisioned, am i remembering wrong?
 
Last edited:
iirc, if i move qcow2 file to `local-btrfs` it changes to a .raw are .raw still thin provisioned, am i remembering wrong?
Yes, local-btrfs is thin provisioned (and it shows as raw). Shrinking drives is always a chore. I don't think you can shrink a qcow2 in-place nor by moving it.
I think the simplest approach might be to create a new virtual disk on your local-btrfs (which will be thin and smaller) and copy your partitions inside the VM to the new disk using GParted Live (boot the VM from the ISO).
 
  • Like
Reactions: d3dl3g and _gabriel
i shall try with gparted thank you for the suggestion, in the mean time i am still open to suggestions for further playing. its all experience i am happy to absorb.
 
sadly no joy with gparted...

if i resize sda1 to my desired 32G then this will ensure the OS doesnt write anything over that... regardless of if it sees a 128G drive.1724616041297.png

this will basically ensure that my `local-btrfs` wont show 128G used,
 
sadly no joy with gparted...
You cannot shrink your existing virtual disk. My suggestion was to create a second/new/extra virtual disk (of 32GB) and use GParted Live to copy the partitions from the 128GB to the 32GB (but not delete them). And then see if you can boot the VM from the new smaller virtual disk (and only remove the large disk when successful). You might need to GRUB boot fix to make it work on the new virtual disk.
I see only one device instead of the two I would expect. Are you trying to do what I suggested or are you doing something else?
this will basically ensure that my `local-btrfs` wont show 128G used,
I don't know how to read this sentence. Does this mean that you resolved your issue? Or is this still a wish?
 
You cannot shrink your existing virtual disk. My suggestion was to create a second/new/extra virtual disk (of 32GB) and use GParted Live to copy the partitions from the 128GB to the 32GB (but not delete them). And then see if you can boot the VM from the new smaller virtual disk (and only remove the large disk when successful). You might need to GRUB boot fix to make it work on the new virtual disk.

I see only one device instead of the two I would expect. Are you trying to do what I suggested or are you doing something else?
attempted manual setup of 2nd disk, got all the partitions made and flagged, couldnt figure out how to get gparted to copy the data over...
attempted DD but "ran out of space". i just dont have the 2nd drive mounted in above screenshot. sorry for the confusion

I don't know how to read this sentence. Does this mean that you resolved your issue? Or is this still a wish?
for me, its a possible work around, VM wont write anything past 32gb if i resize, which solves the issue of balooning into the 128G it currently is.
because its thin provisioned it wont show as the full 128G on `local-btrfs` capacity.

@LnxBil yep qemuing was the last thing i did after all the trimming and backing up.
 
Last edited:
attempted manual setup of 2nd disk, got all the partitions made and flagged, couldnt figure out how to get gparted to copy the data over...
Don't make partitions except for Create Partition Table. Shrink the partition to fit within the new space. And then se Copy on the original partition and Paste on the new drive. Since you use MBR, it's a bit of a hassle with the "Extended partition". Make sure the original partitions are not mounted.
 
Ok so working with G-Parted...
- 32G virtual disk created within proxmox
- Boot into G-Parted
- Shrink partition on 128G disk to <30G,
- Copy EXT4 from 128G disk to 32G disk,
- Create extended partition on 32G disk,
- Copied swap partition from 128G disk to 32G disk,
- Exit G-Parted, adjust boot order to 32G disk
- Result = no boot.
- Return to G-Parted Set "boot" flag for ext4
- Exit and adjust boot order,
- Result = no boot.

2nd attempt but with G-Parted & CloneZilla
- Scrap and remake 32G disk
- Use G-Parted to set partitions and required sizing
- Enter CloneZilla
- Clone partitions EXT4 and Swap from 128G disk to 32G disk
- Exit CloneZilla, adjust boot order to 32G disk
- Result = no boot.
- Return to G-Parted Set "boot" flag for ext4
- Exit and adjust boot order,
- Result = no boot.

Whenever i get "no boot" Console window shows

1724851686982.png

128G disk boots just fine, even with adjusted EXT4 size to <30G.
Unable to get 32G Disk to boot.

I'm beginning to wonder if its a disk UUID or similar set somewhere within Proxmox that G-Parted and/or CloneZilla isnt transferring across.

Either way, im kinda happy to put it to bed now, knowing what ive learned from you guys. ive ploughed enough hours into not finding an "easy" solution. i could have just put the time into building it from scratch. but whats the fun in that, right?

The "workaround/solution" for me is to have the 128G disk partitioned in a way that the VM OS only sees 32G of drive space. Therefore actual disk usage will be capped as such. Due to thin provisioning proxmox disk usage counters wont ever go over 32G for this VM.
The ONLY minor negative i can see at the moment is that the Hardware tab shows
1724852641772.png
and the Summary tab shows
1724852690939.png

if i add notes to said VM, i shouldn't get too confused in the mean time.
Im probably just confirming what you guys already knew but thanks all for your input.
 
Last edited:
Ok so working with G-Parted...
- 32G virtual disk created within proxmox
- Boot into G-Parted
- Shrink partition on 128G disk to <30G,
- Copy EXT4 from 128G disk to 32G disk,
- Create extended partition on 32G disk,
- Copied swap partition from 128G disk to 32G disk,
- Exit G-Parted, adjust boot order to 32G disk
- Result = no boot.
Boot the VM from an Linux ISO (like GParted Live) and chroot into it to re-install GRUB and fix boot. Search the internet for "GRUB rescue chroot" for examples and guides for your Linux distribution inside the VM.
 
ok so after much head scratching, and due to me using seaBIOS (Legacy) over OVMF (EFI). attempting to reinstall GRUB using the search results from your search term resulted in a lot of confusion. a lot of results always came back and pointed to https://wiki.debian.org/GrubEFIReinstall

this was useless in my case because im using seaBIOS (non-EFI setup)
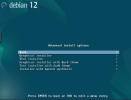
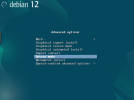
my fix was to attempt reinstall via the rescue option on debian install media. something i found was that the "Live" variant does not have the "rescue" option in <advanced>
1724924513208.png

However the "netinst" version does...
1724924824658.png

following the instructions through this section allowed me to "reinstall grub" for `/dev/sda`

32G now boots as it should. thank you @leesteken
 

About

The Proxmox community has been around for many years and offers help and support for Proxmox VE, Proxmox Backup Server, and Proxmox Mail Gateway.
We think our community is one of the best thanks to people like you!

Get your subscription!

The Proxmox team works very hard to make sure you are running the best software and getting stable updates and security enhancements, as well as quick enterprise support. Tens of thousands of happy customers have a Proxmox subscription. Get yours easily in our online shop.

Buy now!