Hello, I have 2 intel 226 2.5Gb ports passed through in my appliance to my OpenWRT LXC on Proxmox VE 8.0.4
Before I share my cobbled results (hopefully they help you) let me say I too wish the great Dev team would put more weight into getting this built into the gui.
I understand the container vs VM and resource pass-through subject but it is clearly possible and there are valid use cases. Unfortunately the documentation is scattered.
Anyway, I just got mine working in the last 45 minutes and is now backing the home network in over the weekend. Will see how the stability and performance go. Typically I have been running a VM pfSense on this 6 port appliance. With 2 ports for pfSense, 1 for Proxmox Mgmt I had 3 more to mess with this until I got it working. I was about to go back to the OpenWRT VM and may still but it is network baking time.
I have 1g fiber internet.
I get 940+/- up/down which aligns with "sense".
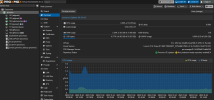
CPU utilization stays under 3%.
I have 4 cores assigned to OpenWRT of the 12 (4 perf & 8 efficiency) of the 12th gen i5-1235u.
I currently run 3 LXC - OpenWRT (23.05.0 r23497), Uptime Kuma, adguard
The OpenWRT configuration is half-ish complete. Missing the wireguard and a few misc configs like hairpin nat but mostly built.
Some early observations from accomplishing hardware passthrough in an LXC.
Proxmox - You lose visibility to the NICs in the gui & command prompt. When you shut the LXC down, at command prompt run "ip linl" and you will at least see the quirky name your VE gives the NIC. The LXC keeps the NIC like it should but be prepared to lose visibility to all passed hardware at the container level.
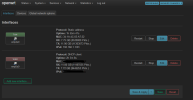
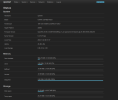
OpenWRT - Similarly it does not show the little gui icon on the status>overview like it does for veth nics. I am only seeing data in a network field and the port status is basically stuck on the new removed veth. Weird behavior but terrible. No one goes to OpenWRT for the gui over pfSense or the other modern looking FWs right.

Besides the data is still there in the gui and command line. "ifconfig" works just fine.
As a container, sharing host resources it reports the whole system so thats odd.
Here are the steps I performed (sorry for the sloppy notes, its been a trial-n-error journey).
1) CT Templates > Download from URL >
https://images.linuxcontainers.org/images/openwrt/ <-- grab whichever, I get the latest amd64.
Here is the latest at the time I posted.
https://images.linuxcontainers.org/images/openwrt/23.05/amd64/default/20231103_11:57/rootfs.tar.xz
The hash is optional, I do it but not strictly needed. I won't worry about explaining how other than to say sha-265 as it is documented elsewhere.
Give it a name that reflects what/when ie.. openwrt-20231103_11-rootfs.tar.xz this helps when you dl more. You can tell which is newer.
2) Creating the LXC from the template you downloaded. Create your command syntax as it will likely need to be adjusted for your env.
Here is mine:
pct create 110 local:vztmpl/openwrt-20231030-rootfs.tar.xz --rootfs SiliconPower:0.512 --ostype unmanaged --hostname openwrt --arch amd64 --cores 4 --memory 1024 --swap 0 --unprivileged 1
The above syntax creates a container #110 source:local/FileName destination: LVM_VolumeName :size of partition in Gb, swap is 100% optional.
Items you are likely to change. LXC #, Source_Filename, Destination_LVM_name, Cores, Memory.
2a) If you did the syntax correctly you will succeed increating a new LXC. We won't pass the NICs through till later. I did it much later but you can do it after some basic config. If you do get errors with creating the container, read what it is saying. Probably a typo or some other error with your understanding of what you are telling the system. Took me about 5 minutes staring at the screen to understand the command someone shared to translate it to my system.
2b) I used this url & post #8 was very helpful. My above #2 & radumamy (he deserves a lot of credit for his post) sort of duplicate but follow his steps just past his first code box. Where I deviated from his steps is LAN configuration. You are going to be blowing the veth out anyway so its pointless.
https://forum.proxmox.com/threads/h...rsion-of-openwrt-and-run-it-on-proxmox.64786/
3) I started updating systems, installing packages I knew I needed but you can skip that and go right to the good stuff.
You will need at least two free NIC interfaces WAN & LAN. Make sure they are free (not in use) and the names.
At this point it might be a good idea to right click on your newly created LXC and create either a template or at least a clone. Your choice.
4) Make sure you have access to your new OpenWRT instance. It should have a WAN interface and IP with a FW rule that allows you into LUCI as well as command line access through Proxmox.
If its all good time to do the modify a config file. This is where the magic happens.
Whatever your container # is, thats what we will be using. Mine was 110 so in my case from the VE command I grabbed a copy of the existing config (copy/paste) into notepad++ then made these changes for the LAN interface I was adding.
Code:
root@proxmox:~# nano /etc/pve/lxc/110.conf
arch: amd64
cores: 4
hostname: openwrt
memory: 1024
net0: name=eth0,bridge=vmbr0,firewall=1,hwaddr=D6:A8:ED:F8:96:A8,ip=dhcp,type=veth
ostype: unmanaged
rootfs: SiliconPower:vm-111-disk-0,size=524M
swap: 0
unprivileged: 1
Insert the following 3 lines at the bottom of the above file (your file name will depend upone your LXC name).
<-- ADD Unique for LAN NIC. Name can be anything, just unique.
<-- ADD Unique for LAN NIC. Saying the interface is a physical interface
<-- ADD Unique for LAN NIC. This is the name of the NIC in Proxmox. the "1" in these 3 lines tells system these parms go together.
Save out of nano back to the command prompt.
If you have an ethernet cable connected to the NIC you should be able to power up or reboot the container. If the container starts, you did it correctly.
5) The LAN interface should disappear from Proxmox as it has been taken over by the container.
Log into OpenWRT & navigate to the Network> Interfaces> Add new Interface>
give it a name - lan seems reasonable
Decide if you want to give it a static IP now or later (Depends on your lab setup). Do whichever works for you.
Device> from the drop down you should now see your NIC as an option in the drop down. Eureka! You are going to own that cat; no vnet for you!
Create the interface. Save & Apply.
6) If it has gone well and you are comfortable, it is time to make a clone! Then finish the jog and seal the WAN deal.
Back to the VE command line as above in step 4.
This time we will be adding the new WAN interface. Leave the existing WAN just in case. You can go back and delete it afterwards when you are done with the import of the NIC.
Code:
root@proxmox:~# cat /etc/pve/lxc/110.conf
arch: amd64
cores: 4
hostname: openwrt
memory: 1024
net0: name=eth0,bridge=vmbr0,firewall=1,hwaddr=D6:A8:ED:F8:96:A8,ip=dhcp,type=veth
ostype: unmanaged
rootfs: SiliconPower:vm-111-disk-0,size=524M
swap: 0
unprivileged: 1
lxc.net.1.name: lan
lxc.net.1.type: phys
lxc.net.1.link: enp4s0
lxc.net.0.name: wan
lxc.net.0.type: phys
lxc.net.0.link: enp5s0
Notice how this time we use a different name and #. Exit/save out of nano.
7) Start or reboot the container & if it starts, you can go right back to the gui to add in your new WAN.
Log into OpenWRT & navigate to the Network> Interfaces> wan> edit > device
from the device drop down you should now see your 2nd hardware NIC. Select that for your new WAN interface; save.
Save & Apply.
I suggest rebooting it a couple of times. Testing and kicking the tires before you go back into the file and deleting out the line
Code:
net0: name=eth0,bridge=vmbr0,firewall=1,hwaddr=D6:A8:ED:F8:96:A8,ip=dhcp,type=veth
Thereby removing the last piece of the vnet instance.
Run the updates, make clones and enjoy.
Hope that helps someone else.
Here are a couple of screen shots of my Proxmox & OpenWRT.


