I am just getting to grips with Proxmox, retiring my power hungry server in my basement in favor of a ThinkCentre M910Q. I've been running a few things on Hyper-V for some time now, and don't want to migrate away from the Windows VMs that I have. So, of course, I want to migrate them. There are lots of threads and articles on this (I know - I read many!), but I had to piece together their information to figure out what works. Set out below are the basic steps I followed. I am assuming some basic knowledge here, so didn't detail everything.
1) install the Virtio driver on the Hyper-V VM to be migrated. Also install the correct agent from the guest-agent directory
2) stop the VM on Hyper-V. I didn't have checkpoints / snapshots, but if you do you may need to deal with those.
3) Export the VM to a shared folder accessible via Proxmox
4) Mount the shared folder onto the Proxmox node (e.g. mount -t cifs -o username=<user>,password=<pswd> //hyper-v-host/share /home/vm)
6) Create a VM on Proxmox:
General - supply a name
OS - Do not use any media; Windows guest OS
System - OVMF (UEFI) bios; add an EFI disk; device q35
Disks - leave as default, but set size to 1GB
CPU, memory, network - your choice
Selecting the q35 device turned out to be the solution to my problems of getting the VM to start properly. It didn't solve everything, but was a major piece.
7) Delete the IDE disk on the created VM
8) From the Proxmox host console, import the .vhdx to the new VM:
qm disk import <VM ID> /home/vm/<.vhdx filename> local-lvm
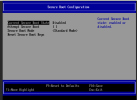
9) On the Proxmox VM Hardware settings double click the Unused Disk 0 (just imported) and add it to the IDE/SATA bus. In Options > Boot Order, select IDE/SATA and move it to the top
10) Also add a 1GB SCSI hard disk. This will be deleted later, its purpose is to get Windows to install the drivers so that the boot drive can be moved from IDE/SATA to SCSI
11) Start the VM. Check in the Windows Device Manager > Disks that there are 2 disk drives (IDE, SCSI) and that the Storage Controllers and USB controllers are active. I encountered resource problems with them, and needed to reboot to clear the exclamation marks.
12) Shutdown and detach the IDE boot drive, re-attach it to SCSI. In Options > Boot Order, select the SCSI drive as the boot device, reboot. There now should be two SCSI disks under Windows Device Manager > Disks. If so, the temporary 1GB SCSI disk can be detached and removed. Removing it prior to re-mounting the boot drive as SCSI caused my blue screen problems.
13) restart to make sure everything is working
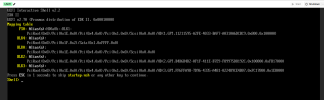
This took me a while to figure out, I was continually getting INACCESSIBLE_BOOT_DEVICE blue screens and went down a rabbit hole of messing with the OVMF BIOS settings. The key pieces to the puzzle were the q35 device and mounting a temporary SCSI drive to get Windows to load the drivers.
Hopefully this is helpful to someone!
1) install the Virtio driver on the Hyper-V VM to be migrated. Also install the correct agent from the guest-agent directory
2) stop the VM on Hyper-V. I didn't have checkpoints / snapshots, but if you do you may need to deal with those.
3) Export the VM to a shared folder accessible via Proxmox
4) Mount the shared folder onto the Proxmox node (e.g. mount -t cifs -o username=<user>,password=<pswd> //hyper-v-host/share /home/vm)
6) Create a VM on Proxmox:
General - supply a name
OS - Do not use any media; Windows guest OS
System - OVMF (UEFI) bios; add an EFI disk; device q35
Disks - leave as default, but set size to 1GB
CPU, memory, network - your choice
Selecting the q35 device turned out to be the solution to my problems of getting the VM to start properly. It didn't solve everything, but was a major piece.
7) Delete the IDE disk on the created VM
8) From the Proxmox host console, import the .vhdx to the new VM:
qm disk import <VM ID> /home/vm/<.vhdx filename> local-lvm
9) On the Proxmox VM Hardware settings double click the Unused Disk 0 (just imported) and add it to the IDE/SATA bus. In Options > Boot Order, select IDE/SATA and move it to the top
10) Also add a 1GB SCSI hard disk. This will be deleted later, its purpose is to get Windows to install the drivers so that the boot drive can be moved from IDE/SATA to SCSI
11) Start the VM. Check in the Windows Device Manager > Disks that there are 2 disk drives (IDE, SCSI) and that the Storage Controllers and USB controllers are active. I encountered resource problems with them, and needed to reboot to clear the exclamation marks.
12) Shutdown and detach the IDE boot drive, re-attach it to SCSI. In Options > Boot Order, select the SCSI drive as the boot device, reboot. There now should be two SCSI disks under Windows Device Manager > Disks. If so, the temporary 1GB SCSI disk can be detached and removed. Removing it prior to re-mounting the boot drive as SCSI caused my blue screen problems.
13) restart to make sure everything is working
This took me a while to figure out, I was continually getting INACCESSIBLE_BOOT_DEVICE blue screens and went down a rabbit hole of messing with the OVMF BIOS settings. The key pieces to the puzzle were the q35 device and mounting a temporary SCSI drive to get Windows to load the drivers.
Hopefully this is helpful to someone!


")