How to setup SATA SSD for ISOs and NVMe SSD for VMs

May 2, 2022
8
1
8
I am using a Dell Optiplex 3060 on which I have a SATA & NVMe SSD. I have installed the latest version of Proxmox VE on the SATA SSD. I have completed all the initial configurations. I want to use the SATA SDD to only store the ISOs & CT Templates. And I want to use the NVMe SSD to store & run VMs & LXC Containers.
Can you please help me do this?
P.S. I am new to Proxmox, so I would really appreciate if someone were to write down how to do this step by step.
 
Hello @satyajitmishra ,
It would be more productive if you could first review the existing resources and then follow up with any specific questions you may have. For example:

https://www.youtube.com/watch?v=Qm5xIUvku1g
https://www.youtube.com/watch?v=ZsVJkDoK-hg
https://www.youtube.com/watch?v=HqOGeqT-SCA


Blockbridge : Ultra low latency all-NVME shared storage for Proxmox - https://www.blockbridge.com/proxmox
"Review the existing resources". Can you please elaborate?
 
"Review the existing resources". Can you please elaborate?
I listed the existing resources that visually explain how to work with Proxmox storage. One even going over a scenario very close to yours.

To assist you even further, I've plugged your question in AI engine. Disclaimer: I did not read it's reply:

Step 1: Identify your disks


First, you want to confirm the device names of both your SATA and NVMe SSDs.


  1. Log into the Proxmox web UI (usually via https://your-ip:8006).
  2. Open a terminal or SSH into your Proxmox node.
  3. Run the following:

    bash
    CopyEdit
    <span><span>lsblk<br></span></span>
    You'll see something like:

    graphql
    CopyEdit
    <span><span>NAME SIZE </span><span><span>TYPE</span></span><span> MOUNTPOINT<br>sda </span><span><span>500</span></span><span>G disk </span><span><span># Your SATA SSD</span></span><span><br>└─sda3 </span><span><span>500</span></span><span>G part /<br>nvme0n1 </span><span><span>1.0</span></span><span>T disk </span><span><span># Your NVMe SSD (raw)</span></span><span><br></span></span>
    Confirm which disk is which based on size and current usage.


Step 2: Format the NVMe SSD


Now you’ll prepare the NVMe SSD to be used as storage for VMs and containers.


⚠️ WARNING: This will wipe everything on the NVMe drive!

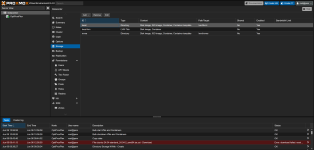
  1. In the Proxmox Web UI, go to Datacenter > Node (your server) > Disks.
  2. Find your NVMe disk (nvme0n1), click on it.
  3. Click Wipe Disk to remove old partitions.
  4. Then click Initialize Disk with GPT.


Step 3: Create a storage volume on the NVMe


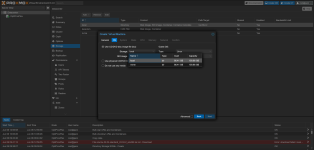
  1. Still under Disks, go to LVM or Directory, depending on your preference. Let's use Directory for simplicity.
  2. Click Create: Directory.
    • Disk: Select your NVMe drive (e.g., /dev/nvme0n1).
    • Filesystem: ext4 (recommended)
    • Mount point: e.g., /mnt/nvme-vmstore
    • Click Create

Now the filesystem is mounted and ready.


Step 4: Add the NVMe directory as storage


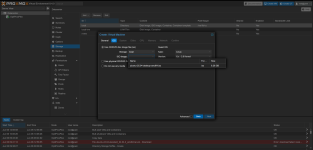
  1. Go to Datacenter > Storage.
  2. Click Add > Directory.
  3. Fill in the form:
    • ID: nvme-vmstore (or whatever you like)
    • Directory: /mnt/nvme-vmstore
    • Content: Check Disk image, Container, Backup if you want.
    • Nodes: Leave default
    • Click Add

Now you can use the NVMe SSD for VM disks and containers.


Step 5: Configure SATA SSD for ISO/CT Templates


Your Proxmox is already installed on SATA, so we just configure that storage accordingly.


  1. Still in Datacenter > Storage, find your default storage (likely local or local-lvm).
  2. If it's local (typically /var/lib/vz), click on it.
  3. Click Edit and adjust:
    • Uncheck Disk image, Container, Backup
    • Leave checked: ISO image, Container template, maybe Snippets
    • Click OK

This ensures only ISOs and templates are stored there.


Step 6: Create and Use VMs/CTs on the NVMe


Now when you create a new VM or LXC container:


  • In the disk/storage dropdown, select your nvme-vmstore
  • That ensures VM disks are stored on your fast NVMe drive.


Blockbridge : Ultra low latency all-NVME shared storage for Proxmox - https://www.blockbridge.com/proxmox
 
I followed the above steps, but when I am trying to create a VM, it doesn't show the NVMe directory (that I created using the above steps) under the VM Storage. Under the VM's Storage, it only shows local i.e. the SATA SSD location. The ISO image location is working i.e. the ISO file is in my SATA SSD.ss1.png
 

Attachments

  • ss2.png
    ss2.png
    254.1 KB · Views: 5
The NVMe storage does not have the content type for iso images so it will not show up there.

1749190046058.png
You generally shouldn't use Directory for CT/VM images. I'd recommend LVM-Thin or ZFS for that.
 
Last edited:
I wanted to use the NVMe for runnning VMs & LXC Containers; that why the NVMe contents are Disk image & Container. The local is the SATA SSD & this is where I intend to store ISOs & CT Templates.
 
I ticked every content under Datacenter > Storage > local, local-lvm & nvme. But when i go to create a VM, if I choose local as the storage, then only it shows the iso (that I have stored in the SATA SSD). But when I change the storage to nvme, it doesn't show the iso anymore.
 

Attachments

  • ss3.png
    ss3.png
    243.5 KB · Views: 1
  • ss4.png
    ss4.png
    319.7 KB · Views: 2
  • ss5.png
    ss5.png
    315.7 KB · Views: 2
  • ss6.png
    ss6.png
    309.6 KB · Views: 2
I ticked every content under Datacenter > Storage > local, local-lvm & nvme. But when i go to create a VM, if I choose local as the storage, then only it shows the iso (that I have stored in the SATA SSD). But when I change the storage to nvme, it doesn't show the iso anymore.
thats expected, you first select the storage for the iso, then the iso. the storage for the vm disks will be selected later in the disks panel
 
  • Like
Reactions: SatyajitMishra
BTW I was suggested to use LVM-Thin for VMs & LXC Containers. Is below the right steps to do so;
Code:
lsblk
wipefs -a /dev/nvme0n1
pvcreate /dev/nvme0n1
vgcreate NVMeVG /dev/nvme0n1
lvcreate -l 100%FREE --thinpool NVMeLV NVMeVG

mkdir -p /etc/lvm/profile

cat > /etc/lvm/profile/thin-pool.profile <<EOF
activation {
    thin_pool_autoextend_threshold=80
    thin_pool_autoextend_percent=20
}
EOF

lvchange --metadataprofile thin-pool NVMeVG/NVMeLV

lvchange --metadataprofile thin-pool NVMeVG/NVMeLV
lvresize --poolmetadatasize +2G NVMeVG/NVMeLV

Then we add the NVMe storage by going to Datacenter > Storage > Add > LVM-Thin > ID: Our NVMe Storage Name, Volume Group: NVMeVG, ThinPool: NVMeVL & Content: Disk Image, Container
 
Before wiping the device, you want to remove the storage pool from the PVE and unmount the device forever.

cat > /etc/lvm/profile/thin-pool.profile <<EOF activation { thin_pool_autoextend_threshold=80 thin_pool_autoextend_percent=20 } EOF
This informs the LVM to automatically extend the pool when it reaches 80%. It tells the system to extend the pool by 20%.
However, just one step earlier you assigned 100% of space to the pool. While its fine to leave this config as you posted, it will have no effect.

You are then running the same command twice. It will probably be fine.

The primary wiki is here: https://pve.proxmox.com/wiki/Storage:_LVM_Thin

The commands you posted will prepare the LVM thin pool. You still need to add it to the PVE as a storage pool.


Blockbridge : Ultra low latency all-NVME shared storage for Proxmox - https://www.blockbridge.com/proxmox
 
  • Like
Reactions: SatyajitMishra