Decrease a VM Disk Size
- Thread starter securecpu
- Start date
You are using an out of date browser. It may not display this or other websites correctly.
You should upgrade or use an alternative browser.
You should upgrade or use an alternative browser.
Shrinking disks is kinda tricky and dangerous, depending on your data and setup it might be
easiest to:
First of all, make a backup before resizing.
How to do this heavily depends on your setup, i.e., what filing system are you using (ext4, zfs, btrfs), what partition table you are using (MBR, GUID) if your vms are on an lvm and probably more...
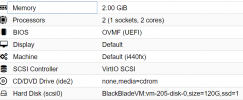
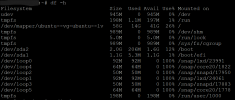
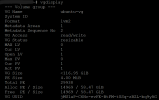
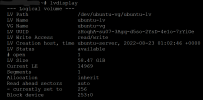
From your screenshots, there are a couple of things you will need to do: resize the filesystem inside the vm, shrink the Logical Volume and then rescan.
I am assuming that your vm uses ext4, but if not, this part will be different.
In the proxmox web interface: under `hardware` click `add`->`cd/dvd drive` and add a linux iso (e.g. ubuntu if you still have on on your server or gparted live). Under `options` in the web interface, change the boot order to your iso by dragging it to the top of the list or boot into it by pressing `esc` and selecting it during boot.
boot into your live image and resize the partition. I recommend gparted, it is user-friendly and a gui app, but you can use parted as well. make sure to leave a little overhead
Next, it depends if your partition table is GUID or MBR. If you are using MBR, you should be done. To my knowledge all the metadata is stored at the front of the disk in this case, if you are using GUID, you will need to make a new table, see [1]. This is because GUID has metadata at the end of the disk and, when shrinking, this part is just cut off, leaving the disk unusable.
Next, since you are using LVM, you will need to shrink your logical volume. You can do this with
Now, with
If everything worked, your disks should be shrunk now.
Best of luck, and again, make a backup beforehand.
[1]: https://linuxconfig.org/how-to-manipulate-gpt-partition-tables-with-gdisk-and-sgdisk-on-linux
easiest to:
- set up a new, smaller vm and copy/pasting the important data over
- cloning the disk to a smaller disk (e.g. with clonezilla)
- adding more storage
First of all, make a backup before resizing.
How to do this heavily depends on your setup, i.e., what filing system are you using (ext4, zfs, btrfs), what partition table you are using (MBR, GUID) if your vms are on an lvm and probably more...
From your screenshots, there are a couple of things you will need to do: resize the filesystem inside the vm, shrink the Logical Volume and then rescan.
I am assuming that your vm uses ext4, but if not, this part will be different.
In the proxmox web interface: under `hardware` click `add`->`cd/dvd drive` and add a linux iso (e.g. ubuntu if you still have on on your server or gparted live). Under `options` in the web interface, change the boot order to your iso by dragging it to the top of the list or boot into it by pressing `esc` and selecting it during boot.
boot into your live image and resize the partition. I recommend gparted, it is user-friendly and a gui app, but you can use parted as well. make sure to leave a little overhead
Next, it depends if your partition table is GUID or MBR. If you are using MBR, you should be done. To my knowledge all the metadata is stored at the front of the disk in this case, if you are using GUID, you will need to make a new table, see [1]. This is because GUID has metadata at the end of the disk and, when shrinking, this part is just cut off, leaving the disk unusable.
Next, since you are using LVM, you will need to shrink your logical volume. You can do this with
lvresize. Again, leave a little overhead.Now, with
qm rescan you can update the disksize in your node.If everything worked, your disks should be shrunk now.
Best of luck, and again, make a backup beforehand.
[1]: https://linuxconfig.org/how-to-manipulate-gpt-partition-tables-with-gdisk-and-sgdisk-on-linux
Last edited:
Thanks Everyone.
But how do I shrink it in proxmox? Within proxmox it only lets me add, not remove.
But how do I shrink it in proxmox? Within proxmox it only lets me add, not remove.
Since it is not straightforward and there is a good chance of data loss, there is no option to shrink a disk from the proxmox web interface. The only possibility is doing it by hand the way i described above. Or, like mentioned above, by making a copy to a smaller disk (e.g. with clonezilla), making a new vm an copy/pasting the important files.But how do I shrink it in proxmox? Within proxmox it only lets me add, not remove.
excellent tutorial, a lot of fear but actually it was 2 commands:Hi, sorry that you had to wait so long for my updated answer.
Shrinking disks is kinda tricky and dangerous, depending on your data and setup it might be
easiest to:
If you want to manually resize:
- set up a new, smaller vm and copy/pasting the important data over
- cloning the disk to a smaller disk (e.g. with clonezilla)
- adding more storage
First of all, make a backup before resizing.
How to do this heavily depends on your setup, i.e., what filing system are you using (ext4, zfs, btrfs), what partition table you are using (MBR, GUID) if your vms are on an lvm and probably more...
From your screenshots, there are a couple of things you will need to do: resize the filesystem inside the vm, shrink the Logical Volume and then rescan.
I am assuming that your vm uses ext4, but if not, this part will be different.
In the proxmox web interface: under `hardware` click `add`->`cd/dvd drive` and add a linux iso (e.g. ubuntu if you still have on on your server or gparted live). Under `options` in the web interface, change the boot order to your iso by dragging it to the top of the list or boot into it by pressing `esc` and selecting it during boot.
boot into your live image and resize the partition. I recommend gparted, it is user-friendly and a gui app, but you can use parted as well. make sure to leave a little overhead
Next, it depends if your partition table is GUID or MBR. If you are using MBR, you should be done. To my knowledge all the metadata is stored at the front of the disk in this case, if you are using GUID, you will need to make a new table, see [1]. This is because GUID has metadata at the end of the disk and, when shrinking, this part is just cut off, leaving the disk unusable.
Next, since you are using LVM, you will need to shrink your logical volume. You can do this withlvresize. Again, leave a little overhead.
Now, withqm rescanyou can update the disksize in your node.
If everything worked, your disks should be shrunk now.
Best of luck, and again, make a backup beforehand.
[1]: https://linuxconfig.org/how-to-manipulate-gpt-partition-tables-with-gdisk-and-sgdisk-on-linux
Code:
lvm lvreduce -L -32g pve/vm-103-disk-0
qm rescanHi, sorry that you had to wait so long for my updated answer.
Shrinking disks is kinda tricky and dangerous, depending on your data and setup it might be
easiest to:
If you want to manually resize:
- set up a new, smaller vm and copy/pasting the important data over
- cloning the disk to a smaller disk (e.g. with clonezilla)
- adding more storage
First of all, make a backup before resizing.
How to do this heavily depends on your setup, i.e., what filing system are you using (ext4, zfs, btrfs), what partition table you are using (MBR, GUID) if your vms are on an lvm and probably more...
From your screenshots, there are a couple of things you will need to do: resize the filesystem inside the vm, shrink the Logical Volume and then rescan.
I am assuming that your vm uses ext4, but if not, this part will be different.
In the proxmox web interface: under `hardware` click `add`->`cd/dvd drive` and add a linux iso (e.g. ubuntu if you still have on on your server or gparted live). Under `options` in the web interface, change the boot order to your iso by dragging it to the top of the list or boot into it by pressing `esc` and selecting it during boot.
boot into your live image and resize the partition. I recommend gparted, it is user-friendly and a gui app, but you can use parted as well. make sure to leave a little overhead
Next, it depends if your partition table is GUID or MBR. If you are using MBR, you should be done. To my knowledge all the metadata is stored at the front of the disk in this case, if you are using GUID, you will need to make a new table, see [1]. This is because GUID has metadata at the end of the disk and, when shrinking, this part is just cut off, leaving the disk unusable.
Next, since you are using LVM, you will need to shrink your logical volume. You can do this withlvresize. Again, leave a little overhead.
Now, withqm rescanyou can update the disksize in your node.
If everything worked, your disks should be shrunk now.
Best of luck, and again, make a backup beforehand.
[1]: https://linuxconfig.org/how-to-manipulate-gpt-partition-tables-with-gdisk-and-sgdisk-on-linux
I have a need to shink a drive, and followed this path... booted to a live cd, and went into Gparted. I shrank the disk, but when i go back to proxmox shell and do "qm rescan --vmid 100" i don't see any change in the hardware listing. I don't get any errors, but my 55Gib drive is still 55Gb in proxmox, but when I go into the VM it shows 32Gb.
This is very helpful ! But what if you don't resize the partition(s) before? Is that a problem?excellent tutorial, a lot of fear but actually it was 2 commands:
and from 64GB it became 32GBCode:lvm lvreduce -L -32g pve/vm-103-disk-0 qm rescan
Sounds very dangerous. I would only try to shink a virtual disk after shinking the filesystems and partitions on it, so all whats then removed is unallocated space on that virtual disk.This is very helpful ! But what if you don't resize the partition(s) before? Is that a problem?
And after the shrinking of the disk you also might want fix the backup partition table header.
Last edited:
Excellent answer.Shrinking disks is kinda tricky and dangerous, depending on your data and setup it might be
easiest to:
If you want to manually resize:
- set up a new, smaller vm and copy/pasting the important data over
- cloning the disk to a smaller disk (e.g. with clonezilla)
- adding more storage
First of all, make a backup before resizing.
How to do this heavily depends on your setup, i.e., what filing system are you using (ext4, zfs, btrfs), what partition table you are using (MBR, GUID) if your vms are on an lvm and probably more...
From your screenshots, there are a couple of things you will need to do: resize the filesystem inside the vm, shrink the Logical Volume and then rescan.
I am assuming that your vm uses ext4, but if not, this part will be different.
In the proxmox web interface: under `hardware` click `add`->`cd/dvd drive` and add a linux iso (e.g. ubuntu if you still have on on your server or gparted live). Under `options` in the web interface, change the boot order to your iso by dragging it to the top of the list or boot into it by pressing `esc` and selecting it during boot.
boot into your live image and resize the partition. I recommend gparted, it is user-friendly and a gui app, but you can use parted as well. make sure to leave a little overhead
Next, it depends if your partition table is GUID or MBR. If you are using MBR, you should be done. To my knowledge all the metadata is stored at the front of the disk in this case, if you are using GUID, you will need to make a new table, see [1]. This is because GUID has metadata at the end of the disk and, when shrinking, this part is just cut off, leaving the disk unusable.
Next, since you are using LVM, you will need to shrink your logical volume. You can do this withlvresize. Again, leave a little overhead.
Now, withqm rescanyou can update the disksize in your node.
If everything worked, your disks should be shrunk now.
Best of luck, and again, make a backup beforehand.
[1]: https://linuxconfig.org/how-to-manipulate-gpt-partition-tables-with-gdisk-and-sgdisk-on-linux
Here is what I did, when i needed reduce disk of VM running Ubuntu with LVM layout inside of it and ext4 underlying filesystem.
Boot to SystemRescueCD
In console
Code:
# Resize LV and fs with one command
[root@sysrescue ~]# lvreduce --resizefs -L 500G /dev/ubuntu-vg/ubuntu-lv

# check everything
[root@sysrescue ~]# lvdisplay /dev/ubuntu-vg/ubuntu-lv
[root@sysrescue ~]# vgdisplay
[root@sysrescue ~]# pvdisplay

# Check whether free extents  at the end of the PV
[root@sysrescue ~]# pvs -v --segments /dev/sda3

[root@sysrescue ~]# pvresize /dev/sda3 --setphysicalvolumesize 500G
# Check
[root@sysrescue ~]# pvdisplay
Then
startx and resize sda3 partition with the help of gparted. Or you can do the same without GUI, if you likeIf Ubuntu running with standard partitions then just resize /dev/sda3 or whatever partition you need without LVM related commands
Next stage happens at the PVE linux shell
Code:
lvdisplay /dev/data-vg/vm-311-disk-0
# reduce LV of VM drive. For some reason, it should be a couple GiBs more
lvreduce -L 523G /dev/data-vg/vm-311-disk-0
     WARNING: Reducing active logical volume to 523.00 GiB.  THIS MAY DESTROY YOUR DATA (filesystem etc.)
     Do you really want to reduce data-vg/vm-311-disk-0? [y/n]: y

# Repair GUID table
# Essentially - (x) - (e) - (m) - (p) - (w) - (q)
gdisk /dev/data-vg/vm-311-disk-0

qm rescan
qm start 311
Hope it helps somebody.
Hi Kaboon ,for the command lvm lvreduce -L -32g pve/vm-103-disk-0 . 32G it's mean reduce space to 32g?This is very helpful ! But what if you don't resize the partition(s) before? Is that a problem?
i'm still new be for need reduce space data on the promox
Always read the manual before running commands someone is posting:for the command lvm lvreduce -L -32g pve/vm-103-disk-0 . 32G it's mean reduce space to 32g?
https://man7.org/linux/man-pages/man8/lvreduce.8.html said:-L|--size [-]Size[m|UNIT]
Specifies the new size of the LV. The --size and
--extents options are alternate methods of specifying
size. The total number of physical extents used will be
greater when redundant data is needed for RAID levels.
When the plus + or minus - prefix is used, the value is
not an absolute size, but is relative and added or
subtracted from the current size.
Then I hope you got proper backups as shrinking a LV can easily corrupt data. Did you really boot a live CD inside the VM, Shrink the partitions and filesystems on that virtual disk? If not, a lvresize is a bad idea.i'm still new be for need reduce space data on the promox
Are you actually using LVM as your storage? Because the ".raw" looks more like you are using a filesystem based and not a block based storage.
And did you shrink the partitions und filesystems inside the guest first? If not you are most likely corrupting the guests filesystems.
And did you shrink the partitions und filesystems inside the guest first? If not you are most likely corrupting the guests filesystems.
In proxmox, create new drive at the size you want.
Boot the VM with a live disk. Install clonezilla, and use that to copy old disk to new. There's an option to ignore partition sizes. This is key to get old, bigger drive onto a smaller one.
That's it. It's easy.
Boot the VM with a live disk. Install clonezilla, and use that to copy old disk to new. There's an option to ignore partition sizes. This is key to get old, bigger drive onto a smaller one.
That's it. It's easy.
This really saved my bacon with the commands for the GUID table repair!Code:lvdisplay /dev/data-vg/vm-311-disk-0 # reduce LV of VM drive. For some reason, it should be a couple GiBs more lvreduce -L 523G /dev/data-vg/vm-311-disk-0 WARNING: Reducing active logical volume to 523.00 GiB. THIS MAY DESTROY YOUR DATA (filesystem etc.) Do you really want to reduce data-vg/vm-311-disk-0? [y/n]: y # Repair GUID table # Essentially - (x) - (e) - (m) - (p) - (w) - (q) gdisk /dev/data-vg/vm-311-disk-0 qm rescan qm start 311
Hope it helps somebody.
I was searching several days for this information. In special the SystemRescue part. This helped me! Thank you so much!!!!!!!Excellent answer.
Here is what I did, when i needed reduce disk of VM running Ubuntu with LVM layout inside of it and ext4 underlying filesystem.
Boot to SystemRescueCD
In console
Code:# Resize LV and fs with one command [root@sysrescue ~]# lvreduce --resizefs -L 500G /dev/ubuntu-vg/ubuntu-lv # check everything [root@sysrescue ~]# lvdisplay /dev/ubuntu-vg/ubuntu-lv [root@sysrescue ~]# vgdisplay [root@sysrescue ~]# pvdisplay # Check whether free extents at the end of the PV [root@sysrescue ~]# pvs -v --segments /dev/sda3 [root@sysrescue ~]# pvresize /dev/sda3 --setphysicalvolumesize 500G # Check [root@sysrescue ~]# pvdisplay
Thenstartxand resize sda3 partition with the help of gparted. Or you can do the same without GUI, if you like
If Ubuntu running with standard partitions then just resize /dev/sda3 or whatever partition you need without LVM related commands
Next stage happens at the PVE linux shell
Code:lvdisplay /dev/data-vg/vm-311-disk-0 # reduce LV of VM drive. For some reason, it should be a couple GiBs more lvreduce -L 523G /dev/data-vg/vm-311-disk-0 WARNING: Reducing active logical volume to 523.00 GiB. THIS MAY DESTROY YOUR DATA (filesystem etc.) Do you really want to reduce data-vg/vm-311-disk-0? [y/n]: y # Repair GUID table # Essentially - (x) - (e) - (m) - (p) - (w) - (q) gdisk /dev/data-vg/vm-311-disk-0 qm rescan qm start 311
Hope it helps somebody.
Cant you just backup with pbs and when restoring select the smaller size? If I restore, I am prompted for the disk size (for VM, CT not so sure..)
Have you used LVM before or are you just trying commands?Hello,
I tried the following and got the error.
root@xxxxx:~# lvm lvreduce -L -150g pve/vm-106-disk-0
Volume group "pve" not found
Cannot process volume group pve
root@xxxxx:~#
What am I doing wrong? How do I find the volume group?
Thanks.
Post results of ' vgs ' and ' vgdisplay '


