batocera linux installation

They provide an img.gz file which I extracted and uploaded to proxmox.
How exactly? And what does
But I am unable to boot.
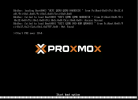
mean exactly? Does the start task throw an error? Do you see the Proxmox Logo of the BIOS and then nothing?

You can try to run qm importdisk <vmid> <path to uncompressed image> <target storage>.

This will add the image as an unused disk to the VM which you can then configure to attach it. Don't forget to adjust the boot order in the Options panel of the VM.
The disk that was created automatically by the "Create VM" wizard can be removed.

You might need to play around with the bus type of the disk (detach first) and maybe also the display type.
 
Hi,

How exactly? And what does

mean exactly? Does the start task throw an error? Do you see the Proxmox Logo of the BIOS and then nothing?

You can try to run qm importdisk <vmid> <path to uncompressed image> <target storage>.

This will add the image as an unused disk to the VM which you can then configure to attach it. Don't forget to adjust the boot order in the Options panel of the VM.
The disk that was created automatically by the "Create VM" wizard can be removed.

You might need to play around with the bus type of the disk (detach first) and maybe also the display type.

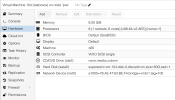
Thank you for your message. I tried with different display types etc. but I am getting an Access denied error.
 

Attachments

  • Screenshot 2021-10-28 at 13.18.54.png
    Screenshot 2021-10-28 at 13.18.54.png
    143.5 KB · Views: 47
My vm config:
Code:
bios: ovmf
boot: order=scsi0;ide2;net0
cores: 4
cpu: host
efidisk0: faster:vm-105-disk-1,efitype=4m,pre-enrolled-keys=1,size=1M
ide2: none,media=cdrom
machine: q35
memory: 2048
name: batocera
net0: virtio=96:00:A0:D7:9C:4B,bridge=vmbr0,firewall=1
numa: 1
ostype: l26
scsi0: local-lvm:vm-105-disk-0,discard=on,size=128G,ssd=1
scsihw: virtio-scsi-pci
smbios1: uuid=12174b04-1d76-496e-b63c-369b030bf6c5
sockets: 1
vmgenid: 040cf794-f497-445f-aefa-93e9e14f367a
 
Have you tried changing the disk bus type from SCSI to something else? IDE or SATA is usually a good first try as that should be supported by pretty much everyone. You will have to detach the disk first and don't forget to adapt the boot order once you attached the disk with the other bus type.
 
  • Like
Reactions: tew
Hey

I followed this guide and it works quite well. tails on proxmox
Just exchange the *.img file with the unzipped batocera one.

Let me know if you need further info.

Besides that there is one problem: batocera hangs from time to time.
Sometimes in the menu, sometimes in games (f. ex. snes) - both is annoying.

According to the guide the virtual hard disk is mounted as an usb device. Could this lead to some performance bottle necks.

Btw: my machine is strong enough handle batocera ui and snes emulation.

Regards Rudi
 
I imaged Batocera to a USB using Etcher, built a basic VM (config below) using VirtIO Block for storage, including the usb device on the host, ensured boot order was set to virtual storage first then USB, followed Batocera's instructions to install to 'Internal Disk' using these instructions: Install Batocera from Batocera, After the install Batocera booted from the virtual disk and I was good to go.

I was able to create a VM and passthrough hardware (GPU and USB Controller). It seems to work great so far. This method was pretty painless.

Code:
balloon: 0
bios: ovmf
boot: order=virtio0
cores: 8
cpu: host
efidisk0: SSD1:vm-101-disk-2,efitype=4m,size=4M
hostpci1: 0000:01:00.1
hostpci2: 0000:00:14.0
machine: q35
memory: 8192
meta: creation-qemu=8.0.2,ctime=1693241981
name: batocera
net0: e1000=FB:2F:3C:GA:0E:45,bridge=vmbr0,firewall=1
numa: 0
onboot: 1
ostype: l26
parent: SNAP6
scsihw: virtio-scsi-single
smbios1: uuid=25573973-83c2-4a19-8b13-bc7244af2cd1
sockets: 1
usb0: host=046d:c52b
vga: qxl,memory=128
virtio0: SSD1:vm-101-disk-0,cache=writeback,discard=on,iothread=1,size=300G
vmgenid: bd9a8cb8-6c8e-4076-a451-e1498ef64051
 
Last edited:
Have you tried changing the disk bus type from SCSI to something else? IDE or SATA is usually a good first try as that should be supported by pretty much everyone. You will have to detach the disk first and don't forget to adapt the boot order once you attached the disk with the other bus type.
This! I also originally followed the tails guide (and the batocera guide that is based on it), but having the same disk mounted twice (read-only SCSI plus active USB) seemed a bit ridiculous considering that batocera can typically run just fine from non-removable drives. So after importdisk I just imported as SATA, which does the trick directly:

Code:
balloon: 0
bios: ovmf
boot: order=sata0;ide2;net0
cores: 3
cpu: host
efidisk0: local-lvm:vm-500-disk-0,efitype=4m,pre-enrolled-keys=1,size=4M
ide2: none,media=cdrom
machine: q35
memory: 3072
meta: creation-qemu=8.0.2,ctime=XXXX
name: batocera
net0: e1000=XXXX,bridge=vmbr0,tag=10
numa: 0
ostype: l26
parent: take2
sata0: local-lvm:vm-500-disk-1,discard=on,size=16G,ssd=1
scsihw: virtio-scsi-single
smbios1: uuid=XXXX
sockets: 1
vmgenid: XXXX
hostpci0: 0000:00:01,pcie=1,x-vga=1,romfile=vbios_XXXX.bin
 
This! I also originally followed the tails guide (and the batocera guide that is based on it), but having the same disk mounted twice (read-only SCSI plus active USB) seemed a bit ridiculous considering that batocera can typically run just fine from non-removable drives. So after importdisk I just imported as SATA, which does the trick directly:
I don't understand why you have to import 2 disks? one sata0 and the other scsihw? Why can't you boot from ISO and install normal?
 
I don't understand why you have to import 2 disks? one sata0 and the other scsihw? Why can't you boot from ISO and install normal?
1) I don't have two disks. Just like you, I only have one disk, except it's sata0 instead of scsi0. The scsihw is only the controller. To change over (as per @aaron), detach the disk, then re-attach as SATA, then fix the boot order.

2) The batocera image is essentially the final file system, not an installation disk, so "booting from iso" doesn't really work. (@wickedaverage's approach is closest to this in principle, but as they say requires a physical batocera USB drive to get started)

Side note 1: where you do end up with two disks is the existing guides that I linked and also @rudi1234 referred to - in those, you end up with one readonly-scsi0 and one usb0. That's unnecessarily complicated, though - the better idea is to follow those guides but simply mount the image as SATA directly.

---------

Step-by-step:
1) get the batocera .img.gz and unzip
2) truncate -s 16G batocera-x86_64-*.img (replace 16G with whatever system size you are aiming at)
3) create a VM (using your preferences; important things are "OS -> do not use media", q35 machine, OVMF bios, "Disks" -> trash the pre-configured one, "Network" model -> E1000)
4) qm importdisk <your VM ID> batocera-x86_64-*.img <your storage name> to import the file system (you can delete the large IMG file after, I believe)
5) in hardware config, configure the just-created unattached volume to use bus/device SATA and select options SSD emulation and Discard
(edit - and, upon further reflection: )
6) disable VM BIOS secure boot
7) spend some more time to try and get graphics PCIe passthrough going, but that one strongly depends on your HW
 
Last edited:
Step-by-step:
1) get the batocera .img.gz and unzip
2) truncate -s 16G batocera-x86_64-*.img (replace 16G with whatever system size you are aiming at)
3) create a VM (using your preferences; important things are "OS -> do not use media", q35 machine, QEMU bios, "Disks" -> trash the pre-configured one, "Network" model -> E1000)
4) qm importdisk <your VM ID> batocera-x86_64-*.img local-lvm to import the file system (you can delete the large IMG file after, I believe)
5) in hardware config, configure the just-created unattached volume to use bus/device SATA and select options SSD emulation and Discard
Here is what I created:
1697815324139.png

But it keeps rebooting:
1697815362038.png
I followed the exact step by step as you mentioned....what have I missed?

Cheers
 
OVMF bios is a better choice than SeaBIOS, and for CPU "host" is likely preferred, but that's probably not it. Which image did you download?
 
OVMF bios is a better choice than SeaBIOS, and for CPU "host" is likely preferred, but that's probably not it. Which image did you download?
ok changed it to:
Code:
cat 104.conf

bios: ovmf
boot: order=ide2;sata0;net0
cores: 6
cpu: host
efidisk0: supersonic:vm-104-disk-0,efitype=4m,pre-enrolled-keys=1,size=4M
ide2: none,media=cdrom
machine: q35
memory: 8192
meta: creation-qemu=8.0.2,ctime=1697815004
name: batocera
net0: e1000=76:AE:47:63:BE:F4,bridge=vmbr1,tag=100
numa: 0
ostype: l26
sata0: supersonic:vm-104-disk-1,discard=on,size=50G,ssd=1
scsihw: virtio-scsi-single
smbios1: uuid=799bfa5b-ea52-429d-a922-8d30a4d2b31f
sockets: 1
vmgenid: e89eb0d2-7a2d-4d89-9684-5b37aa1b223c

This mirrors with the @wickedaverage settings mentioned above...

The image is: Desktop, Laptop, NUC and Intel-based Apple Computers
https://updates.batocera.org/x86_64/stable/last/batocera-x86_64-x86_64-38-20231014.img.gz

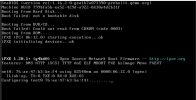
changing the settings had no effect. it just tries PXE boot now
 
I dont know if it helps, this is as far as I gotten with the above image:

Code:
root@pve7demo1:~# OSIMAGE=batocera-x86_64-x86_64-38-20231014.img VMID=110 ./vm_create.sh
importing disk '/mnt/pve/bbnas/template/iso/batocera-x86_64-x86_64-38-20231014.img' to VM 110 ...
transferred 0.0 B of 7.5 GiB (0.00%)
..
transferred 7.5 GiB of 7.5 GiB (100.00%)
Successfully imported disk as 'unused0:bb-nvme:vm-110-disk-0'
update VM 110: -scsi0 bb-nvme:vm-110-disk-0 -scsihw virtio-scsi-single
update VM 110: -net0 virtio,bridge=vmbr0,firewall=1
update VM 110: -scsi1 bb-nvme:cloudinit
scsi1: successfully created disk 'bb-nvme:vm-110-cloudinit,media=cdrom'
generating cloud-init ISO
update VM 110: -serial1 socket -vga serial1
update VM 110: -args -chardev file,id=char0,mux=on,path=/tmp/serial.110.log,signal=off -serial chardev:char0
update VM 110: -boot c -bootdisk scsi0
update VM 110: -bios ovmf
update VM 110: -efidisk0 bb-nvme:1
transferred 0.0 B of 128.0 KiB (0.00%)
transferred 128.0 KiB of 128.0 KiB (100.00%)
efidisk0: successfully created disk 'bb-nvme:vm-110-disk-1,size=128K'
update VM 110: -ipconfig0 ip=dhcp

and this:
Code:
 qm start 110
generating cloud-init ISO
root@pve7demo1:~# tail -f /tmp/serial.110.log
3h
3h
BdsDxe: loading Boot0001 "UEFI QEMU QEMU HARDDISK " from PciRoot(0x0)/Pci(0x5,0x0)/Pci(0x1,0x0)/Scsi(0x0,0x0)
BdsDxe: starting Boot0001 "UEFI QEMU QEMU HARDDISK " from PciRoot(0x0)/Pci(0x5,0x0)/Pci(0x1,0x0)/Scsi(0x0,0x0)


Booting Batocera.linux...

keep in mind that this is a raw image:
Code:
root@pve7demo1:~# file /mnt/pve/bbnas/template/iso/batocera-x86_64-x86_64-38-20231014.img
/mnt/pve/bbnas/template/iso/batocera-x86_64-x86_64-38-20231014.img: DOS/MBR boot sector; partition 1 : ID=0xee, start-CHS (0x0,0,2), end-CHS (0x3d3,49,6), startsector 1, 15730727 sectors

root@pve7demo1:~# qemu-img info /mnt/pve/bbnas/template/iso/batocera-x86_64-x86_64-38-20231014.img
image: /mnt/pve/bbnas/template/iso/batocera-x86_64-x86_64-38-20231014.img
file format: raw
virtual size: 7.5 GiB (8054132736 bytes)
disk size: 2.94 GiB

I may need to add more ram and cpu when I have a spare moment
Code:
root@pve7demo1:~# qm config 110
args: -chardev file,id=char0,mux=on,path=/tmp/serial.110.log,signal=off -serial chardev:char0
bios: ovmf
boot: c
bootdisk: scsi0
efidisk0: bb-nvme:vm-110-disk-1,size=128K
ipconfig0: ip=dhcp
memory: 512
meta: creation-qemu=7.2.0,ctime=1697830485
name: vm110
net0: virtio=B6:6C:46:86:20:44,bridge=vmbr0,firewall=1
onboot: 0
scsi0: bb-nvme:vm-110-disk-0,size=7865364K
scsi1: bb-nvme:vm-110-cloudinit,media=cdrom
scsihw: virtio-scsi-single
serial1: socket
smbios1: uuid=085c8f93-6b9e-47ba-988d-48f31b4c0ee9
sockets: 1
vga: serial1
vmgenid: 50edd5a8-54b0-4cd7-b8a2-ab750146e3bb


Blockbridge : Ultra low latency all-NVME shared storage for Proxmox - https://www.blockbridge.com/proxmox
can you enter the VM bios and disable secure boot?
 

About

The Proxmox community has been around for many years and offers help and support for Proxmox VE, Proxmox Backup Server, and Proxmox Mail Gateway.
We think our community is one of the best thanks to people like you!

Get your subscription!

The Proxmox team works very hard to make sure you are running the best software and getting stable updates and security enhancements, as well as quick enterprise support. Tens of thousands of happy customers have a Proxmox subscription. Get yours easily in our online shop.

Buy now!