I try to do this : https://pve.proxmox.com/wiki/Shrink_Qcow2_Disk_Files and I see with these steps from Trims/Discards the spaces in server down, but the qcow2 still hace the same size.
The solution is clone disk, but how?
0. Backup VM
I suggest backup , you never know! But only include in backup the disk qcow2 you want to reduce space or go to shell for a copy
Exmaple of VM
1. Proxmox Preparation
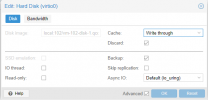
Enable discard option in disk and restart VM
2. Windows Preparation
Download SDdelete tool : https://download.sysinternals.com/files/SDelete.zip
Unzip into C:\Windows\System32
Run CMD as administrator
Enable Trim for Discard feature this :
Enter
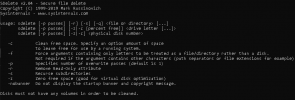
Clean free space for Discard
Enter
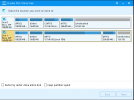
Go to Windows Partition Disk or any Tool for Resize Partiton and move all partition to the left and resize. For example I have a qwow2 with 700Gb and I resize third partition (C:\) from 698GB to 157 GB

Tool Portable : https://mega.nz/file/od4wlJSS#Ol4en_Wt-21TcGlcaAtILsvKmQs-d10w0qqoK_KOTns

I recomend clean the partition unallocated
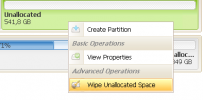
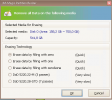
This is the same of sclean (filling with zero)
Now you can see the store and disk down
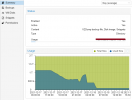
But qcow2 have the same size

3. QCOW2 Preparation
Now if go to shell and run this
In teory now the new qcow2 (NEWvm-100-disk-1.qcow2) reduce the size but not for me.
If it is your case run this
If not go to fourth step
4. Clone Preparation
Download and Upload ISOS to Proxmox
Drivers : https://fedorapeople.org/groups/vir...ve-virtio/virtio-win-0.1.208-1/virtio-win.iso
Clone APP : https://mega.nz/file/QYxyBLSC#LhpOM_kX_-EnTUyZ484M0BuMQTDbi5a3kVagyH4E0Go
Create new VM with low requirement :
2GB RAM
2 or 4 Core
Disk 160GB in my case (I want to reduce from 700GB to 160GB)
Add 2 CDROM (Drivers ISO,Clone APP ISO)
When was created change option boots
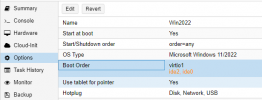
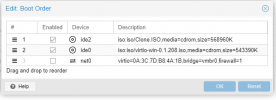
Copy backup to new VM 101
Go to hardward and now see new disk. Click on EDIT to add this unused disk like this

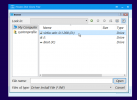
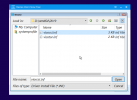
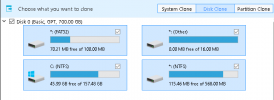
Run NEW VM from CD ROM and see second post. In this post I upload the max screenshot per post
The solution is clone disk, but how?
0. Backup VM
I suggest backup , you never know! But only include in backup the disk qcow2 you want to reduce space or go to shell for a copy
Exmaple of VM
cp /var/lib/vz/images/100/vm-100-disk-1.qcow2 /var/lib/vz/images/100/bkvm-100-disk-1.qcow2 1. Proxmox Preparation
Enable discard option in disk and restart VM

2. Windows Preparation
Download SDdelete tool : https://download.sysinternals.com/files/SDelete.zip
Unzip into C:\Windows\System32
Run CMD as administrator
Enable Trim for Discard feature this :
Enter
fsutil behavior set DisableDeleteNotify 0Clean free space for Discard
Enter
sdelete -z c:
Go to Windows Partition Disk or any Tool for Resize Partiton and move all partition to the left and resize. For example I have a qwow2 with 700Gb and I resize third partition (C:\) from 698GB to 157 GB

Tool Portable : https://mega.nz/file/od4wlJSS#Ol4en_Wt-21TcGlcaAtILsvKmQs-d10w0qqoK_KOTns

I recomend clean the partition unallocated


This is the same of sclean (filling with zero)
Now you can see the store and disk down

But qcow2 have the same size

3. QCOW2 Preparation
Now if go to shell and run this
cd /var/lib/vz/images/100
cp vm-100-disk-1.qcow2 vm-100-disk-1.bk
qemu-img convert -O -p qcow2 vm-100-disk-1.bk NEWvm-100-disk-1.qcow2
rm vm-100-disk-1.bk
In teory now the new qcow2 (NEWvm-100-disk-1.qcow2) reduce the size but not for me.
If it is your case run this
qm stop 100
rm vm-100-disk-1.qcow2
mv NEWvm-100-disk-1.qcow2 vm-100-disk-1.qcow2
qm start 100
If not go to fourth step
4. Clone Preparation
Download and Upload ISOS to Proxmox
Drivers : https://fedorapeople.org/groups/vir...ve-virtio/virtio-win-0.1.208-1/virtio-win.iso
Clone APP : https://mega.nz/file/QYxyBLSC#LhpOM_kX_-EnTUyZ484M0BuMQTDbi5a3kVagyH4E0Go
Create new VM with low requirement :
2GB RAM
2 or 4 Core
Disk 160GB in my case (I want to reduce from 700GB to 160GB)
Add 2 CDROM (Drivers ISO,Clone APP ISO)
When was created change option boots


Copy backup to new VM 101
cp /var/lib/vz/images/100/NEWvm-100-disk-1.qcow2 /var/lib/vz/images/101/bkvm-101-disk-1.qcow2
qm rescan
Go to hardward and now see new disk. Click on EDIT to add this unused disk like this

Run NEW VM from CD ROM and see second post. In this post I upload the max screenshot per post
Last edited:


