Hello,
I was testing various installation methods to create a FULLY working FreePBX 15 installation on Proxmox 7.1.
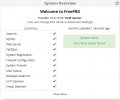
The issue at this moment is, when you install the FreePBX ISO onto a Proxmox VM, UCP (User Control Panel) will not work.
The method i concluded on is quiet extensive, so let me tell you what i did.
- Download the latest stable version of FreePBX form freepbx.org
Tools i used:
- Proxmox 7.1.x
- Vitualbox
- qemu-img for Windows
- WinSCP (to copy the converted file over to Proxmox)
- Putty (SSH client)
Steps:
* Proxmox steps #1:
- Create a VM which is complainant to the minimal requirements for FreePBX 15,
- Make sure you use a QCOW2 disk format with the same size as you made/make the Virtualbox one.
- Remove the CD-Rom as we do not need it, and i disable the firewall checkmark from the network settings.
- Do not start the VM just yet.
* Virtualbox steps:
- Install Virtualbox on your work system (I use Windows)
- Create a virtual machine, matching your VM on Proxmox, I used VMDK as disk format.
- Install FreePBX on the Virtualbox machine, Enter the root password when asked and reboot. Do not start the install wizard.
- SSH into FreePBX machine and type: 'poweroff'.
* qemu-img steps:
- Open an powershell window in admin mode.
- ! know where to find the files !
- Start the converting from VMDK to QCOW2.
- example: C:\qemu-img.exe convert -p -f vmdk -O qcow2 "C:\users\<username>\VirtualBox VMs\<VM name>\<VM name>.vmdk" C:\vm-<VM number>-disk-0.qcow2
* Winscp steps:
- Copy with WinSCP the QCOW2 file from your system to the location Proxmox created the VM disk, you should get a popup to overwrite the file.
* Proxmox steps #2:
- Before you start the VM on Proxmox i recommend to make a STOP backup of the VM, useful if you need to start anew or want a "template" for FreePBX.
- Now you can start the FreePBX VM on Proxmox, browse to the IP and start configuring your working VoIP server.
- Note that the FreePBX firewall kicks in after 5 minutes of every boot, so don't be alarmed by the warning.
- As extra we also can add the qemu-guest-agent to the VM.
- In a SSH session to the FreePBX VM type : yum install qemu-guest-agent to download and install the agent.
- then type: systemctl start qemu-guest-agent, this can take a log time to complete and even fail.
- I made sure the agent would start a boot with the command: systemctl enable qemu-guest-agent
- Poweroff the FreePBX VM (not only reboot) and change the setting in the Proxmox VM settings Options\Qemu-guest-agent = Enabled.
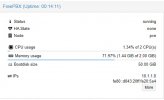
- Now restart the FreePBX VM and check if the IP information is there.
I included a screen shot of my FreePBX running on Proxmox ( 2 cores - 2 GB )
As footnote: I converted VMDK to QCOW2 as Proxmox does not recognize the vmdk image format of Virtualbox.
I was testing various installation methods to create a FULLY working FreePBX 15 installation on Proxmox 7.1.
The issue at this moment is, when you install the FreePBX ISO onto a Proxmox VM, UCP (User Control Panel) will not work.
The method i concluded on is quiet extensive, so let me tell you what i did.
- Download the latest stable version of FreePBX form freepbx.org
Tools i used:
- Proxmox 7.1.x
- Vitualbox
- qemu-img for Windows
- WinSCP (to copy the converted file over to Proxmox)
- Putty (SSH client)
Steps:
* Proxmox steps #1:
- Create a VM which is complainant to the minimal requirements for FreePBX 15,
- Make sure you use a QCOW2 disk format with the same size as you made/make the Virtualbox one.
- Remove the CD-Rom as we do not need it, and i disable the firewall checkmark from the network settings.
- Do not start the VM just yet.
* Virtualbox steps:
- Install Virtualbox on your work system (I use Windows)
- Create a virtual machine, matching your VM on Proxmox, I used VMDK as disk format.
- Install FreePBX on the Virtualbox machine, Enter the root password when asked and reboot. Do not start the install wizard.
- SSH into FreePBX machine and type: 'poweroff'.
* qemu-img steps:
- Open an powershell window in admin mode.
- ! know where to find the files !
- Start the converting from VMDK to QCOW2.
- example: C:\qemu-img.exe convert -p -f vmdk -O qcow2 "C:\users\<username>\VirtualBox VMs\<VM name>\<VM name>.vmdk" C:\vm-<VM number>-disk-0.qcow2
* Winscp steps:
- Copy with WinSCP the QCOW2 file from your system to the location Proxmox created the VM disk, you should get a popup to overwrite the file.
* Proxmox steps #2:
- Before you start the VM on Proxmox i recommend to make a STOP backup of the VM, useful if you need to start anew or want a "template" for FreePBX.
- Now you can start the FreePBX VM on Proxmox, browse to the IP and start configuring your working VoIP server.
- Note that the FreePBX firewall kicks in after 5 minutes of every boot, so don't be alarmed by the warning.
- As extra we also can add the qemu-guest-agent to the VM.
- In a SSH session to the FreePBX VM type : yum install qemu-guest-agent to download and install the agent.
- then type: systemctl start qemu-guest-agent, this can take a log time to complete and even fail.
- I made sure the agent would start a boot with the command: systemctl enable qemu-guest-agent
- Poweroff the FreePBX VM (not only reboot) and change the setting in the Proxmox VM settings Options\Qemu-guest-agent = Enabled.
- Now restart the FreePBX VM and check if the IP information is there.
I included a screen shot of my FreePBX running on Proxmox ( 2 cores - 2 GB )
As footnote: I converted VMDK to QCOW2 as Proxmox does not recognize the vmdk image format of Virtualbox.
Attachments
Last edited:
