My Journey PROXMOX - compac 6000mt 12GB 250SSD 2x 500HDD

_humble_student_

New Member
Dec 22, 2022
16
0
1
My plan is to setup a testing server at my office.

Hi everyone and thanks for stopping by.
Humble here and just want to share my ups my downs and my turn arounds.

so far I have setup an old compac 6000 mt adding 8 gb or ram that was lying about and a ssd and some old hdds

I have downloaded promox 7.3 and and planing to use ventoy to do the usb key.

I will post updates as i get them.

ISSUEs so far is the COMPAC 6000 not allowing me to boot up from the USB just give flashing cursor

BIOS version is 1.09.
 
Updates my people

BIOS version 1.09 or something - was not working. black screen flashing cursor.

After a few days of google fuu.
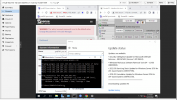
I found the video below.
How to Create a BIOS Firmware Update Bootable USB Drive For HP Compaq DC7800 Computer
https://www.youtube.com/watch?v=6oTRYwB5m_E

I downloaded the bios update
ROM Firmware for HP Compaq 6000 Pro (786G2)
https://support.hp.com/lamerica_nsc...mall-form-factor-pc/4024462?ssfFlag=true&sku=

Get Rufus
https://rufus.ie/en/

Create a free dos bootable usb, extract the bios update. add folder to usb, boot from usb. run the update.
The video will do a better job so watch it, as its very short.

BIOS now at 2.03 and ventoy (https://www.ventoy.net/en/index.html) works

I will now begin the installation on my rig.

If anyone else had this issue hope this solves it whenever you may read this.
 
My journey to a proxmox server on acient hardware is over now. Now the fun part lets make some vms and break stuff repeatedly
 
1671835956143.png

click on your server then click on shell

apt install cifs-utils -y

mkdir /media/share

nano ~/.smb

username=smb_username
password=smb_password

nano /etc/fstab

//[ip of server]/[name of share] /media/share cifs credentials=/root/.smb,domain=waaah,users,rw,iocharset=utf8

mount -a

close shell

on web gui

click on datacenter
storage
add
directory

id = some name
directory = /media/share *folder created in step on*
content = the template you want in my case only iso but you can select multiple. Uncheck the default disk image
click add

click on your server then click on shell
pvesm set YourStorageId --is_mountpoint yes
close shell
credits
https://forum.proxmox.com/members/dunuin.96080/


if you don't see your ISO's then check the share and add them to the folder
template\iso
golden

credits to these sources
https://000d3v4000.wordpress.com/2010/07/07/mounting-windows-share-to-proxmox/
https://virtualizeeverything.com/2021/09/28/adding-a-samba-share-to-proxmox-as-storage/
 
Last edited:
On a side note

1671850383404.png

Manual:CHR ProxMox installation
Create a new guest with the system disk and other devices as required.
Make sure that VM storage is on local storage (this way there will no need to work with LVM config side, and disk image can be moved later on to LVM or other desired storage if needed).

Log into ProxMox host via SSH and navigate to VM image directory.
Default local storage is located in: /dev/pve/

click on server name
click shell

apt update

apt dist-upgrade
apt full-upgrade
credits https://forum.proxmox.com/members/dunuin.96080/

From <https://forum.proxmox.com/threads/m...0mt-12gb-250ssd-2x-500hdd.119912/#post-521068>

clear

apt install unzip

clear

apt install wget

clear

got to https://mikrotik.com/download
Cloud Hosted Router
6.48.6 Long-term
Raw disk image
copy the link
https://download.mikrotik.com/routeros/6.48.6/chr-6.48.6.img.zip

while we are here grab the winbox dl
https://mt.lv/winbox64

cd /dev/pve/

wget https://download.mikrotik.com/routeros/6.48.6/chr-6.48.6.img.zip

clear

ls

unzip chr-6.48.6.img.zip

ls

rm chr-6.48.6.img.zip

ls

qemu-img info chr-6.48.6.img

qemu-img resize chr-6.48.6.img +10G

clear

qemu-img info chr-6.48.6.img

qm importdisk 100 chr-6.48.6.img local-lvm

ls

clear

rm chr-6.48.6.img

ls

clear

exit shell

back at gui

click vm name
Hardware
Double click Unused Disk 0
click add

detach disk-0
remove disk-0

options
boot order
drag scsi0 to top and check enable
click ok to apply

summary
check boot disk size = 10.06 GiB

start the vm
login
admin no password
check ip address pr

enjoy

it all started here: https://www.youtube.com/watch?v=zx5LFqyMPMU&t=460s

sources
https://www.youtube.com/watch?v=wI98U1WBFFI
https://www.youtube.com/watch?v=eOmMLsRzM5k
https://wiki.mikrotik.com/wiki/Manual:CHR_ProxMox_installation
https://www.youtube.com/watch?v=wnsrpc0TCpI&t=172s
 
Last edited:
1671901030142.png
my plan
Setup virtual networkcard interfaces. trying to simulate a real network. wan to firewall to edge router or core switch to vlans

1 simulate wan connect vmbr0 to pfsence wan port
2 connect vmbr2 to pfsence lan port
3 connect vmbr2, vmbr3, vmbr4, vmbr5 to router os
4 create four vlans in router os
5 get internet access on vlans
6 setup dhcp on vlans
7 setup dns on vlans
8 setup test client
9 try to ping google
connect

create virtual interfaces
vmbr0 - created by default and connected to network device enp025
vmbr1 - blank not sure but saw in config
vmbr2 - internet vlan firewall lan
vmbr3 - server vlan
vmbr4 - client_lan vlan
vmbr5 - client_wifi vlan
vmbr6 - fake internet port from modem to firewall WAN

Enable datacenter firewall
click on datacenter
firewall
add rule

create rule
in
accept
enable
interface vmbr0
protocol tcp
source port - BLANK
dest. port 8006
comment web pannel access dont mess with this
click ok

options
firewall edit
check to enable

open powershell
ping datacenterIP this should not
but work but web works

no vm should be able to access vmbr0 directly only through the router os and then the pfsense firewall

sources
https://www.youtube.com/watch?v=DNsLLrCgK0U
 
Last edited:
View attachment 44795

click on your server then click on shell

apt install cifs-utils -y

mkdir /media/share

nano ~/.smb

username=smb_username
password=smb_password

nano /etc/fstab

//[ip of server]/[name of share] /media/share cifs credentials=/root/.smb,domain=waaah,users,rw,iocharset=utf8

mount -a

close shell

on web gui

click on datacenter
storage
add
directory

id = some name
directory = /media/share *folder created in step on*
content = the template you want in my case only iso but you can select multiple. Uncheck the default disk image
click add

if you don't see your ISO's then check the share and add them to the folder
template\iso
golden

credits to these sources
https://000d3v4000.wordpress.com/2010/07/07/mounting-windows-share-to-proxmox/
https://virtualizeeverything.com/2021/09/28/adding-a-samba-share-to-proxmox-as-storage/
You forgot to set the "is_mountpoint yes" with pvesm for your directory storage: https://pve.proxmox.com/pve-docs/pvesm.1.html
pvesm set YourStorageId --is_mountpoint yes. Otherwise your ISOs will be stored on the root filesystem instead of your NAS, in case the SMB share fails to mount because of network problems or whatever.
Thank you,
Quick question
should i run command

pvesm set YourStorageId --is_mountpoint yes

after
click on datacenter
storage
add
directory

or after
mount -a

I am not sure where
Thanks

edit--
I did this below?

id = iso
directory = /media/share *folder created in step on*
content = the template you want in my case only iso but you can select multiple. Uncheck the default disk image
click add


click on your server then click on shell
pvesm set iso --is_mountpoint yes
close shell
 
Last edited:
1671900955867.png
create pfsense firewall
create a basic vm
memory 2GB
processors 2
HDD 32GB
wan - vmbr0
lan - vmbr2

download the pfsense iso
https://www.pfsense.org/download/
https://atxfiles.netgate.com/mirror/downloads/pfSense-CE-2.6.0-RELEASE-amd64.iso.gz

unzip and upload iso to datacenter your way you a comfy with
load the iso
complete the install

run through the initial configuration and set you ips.
mine are set from when i created the virtual nics vmbr2 and from proxmox default install setting vmbr0
pfSense
wan - blaaa/30 -desired
wan - blaaa/24 - current
lan - blaaa/29

sources
https://www.wundertech.net/how-to-install-pfsense-on-proxmox/
https://docs.netgate.com/pfsense/en/latest/config/factory-defaults.html
 
Thank you,
Quick question
should i run command

pvesm set YourStorageId --is_mountpoint yes

after
click on datacenter
storage
add
directory

or after
mount -a

I am not sure where
Thanks

edit--
I did this below?

id = iso
directory = /media/share *folder created in step on*
content = the template you want in my case only iso but you can select multiple. Uncheck the default disk image
click add

click on your server then click on shell
pvesm set iso --is_mountpoint yes
close shell
You just need to run that once after your storage is created. Then PVE will add it to your storage config file. That is one of the many things that people usually forget because it can't be done using the webUI and then wonder why PVE doesn't work anymore, because the root filesystem got completely full and switched to read-only, because they wrote a lot of stuff to the empty mountpoint (and so to the root filesystem) instead of writing it to a NAS or another disk.
 
  • Like
Reactions: _humble_student_
1671909855053.png

how to backup proxmox Node configuration

It's a good idea to regularly backup the configuration of your Proxmox Virtual Environment (PVE) host to ensure that you have a copy of all of your settings and configuration in case of a problem. Here's a simple script that you can use to automate the process of backing up the configuration of your PVE host:

click
node name mines = sp-mxl05116t9
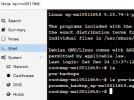
click shell

touch /etc/cron.daily/pve-sp-mxl05116t9-backup.sh
nano /etc/cron.daily/pve-sp-mxl05116t9-backup.sh

chmod 755 /etc/cron.daily/pve-sp-mxl05116t9-backup.sh
or
chmod +x /etc/cron.daily/pve-sp-mxl05116t9-backup.sh

I had to remove it i made mistakes see i have two scripts below.
rm /etc/cron.daily/pve-sp-mxl05116t9-backup.sh

copy paste ==

Code:
#!/bin/sh

#You can modify variables to fit backups for your individual hosts:

#    BACKUP_PATH to specifiy where to store backups,
#    BACKUP_FILE to specify backups file prefix,
#    KEEP_DAYS to specify how many old backups to keep (in days)
#    PVE_CUSTOM_BACKUP_SET to add your installation specific folders and/or files,
#    PVE_BACKUP_SET defines standard set of folders and config files for generic PVE host.

# Set variables
BACKUP_PATH="/root/pve-backups"
#DATE=$(date +%Y-%m-%d)
BACKUP_FILE="pve-node"
KEEP_DAYS=7
PVE_BACKUP_SET="/etc/pve/ /etc/lvm/ /etc/modprobe.d/ /etc/network/interfaces /etc/vzdump.conf /etc/sysctl.conf /etc/resolv.conf /etc/ksmtuned.conf /etc/hosts /etc/hostname /etc/cron* /etc/aliases"
#PVE_CUSTOM_BACKUP_SET="/etc/apcupsd/ /etc/multipath/ /etc/multipath.conf"
PVE_CUSTOM_BACKUP_SET=""

# Create the backup directory if it doesn't exist
mkdir -p $BACKUP_PATH

# Do the backup
tar -czf $BACKUP_PATH$BACKUP_FILE-$(date +%Y_%m_%d-%H_%M_%S).tar.gz --absolute-names $PVE_BACKUP_SET $PVE_CUSTOM_BACKUP_SET

# Delete backups older than KEEP_DAYS
find $BACKUP_PATH$BACKUP_FILE-* -mindepth 0 -maxdepth 0 -depth -mtime +$KEEP_DAYS -delete

# works but i cant get the files in the BACKUP_PATH they seem to end up in the root
script 1 end

script 2 start

Code:
#!/bin/bash
# Version          0.2.3
# Date              04.18.2022
# Author           DerDanilo
# Contributors        aboutte, xmirakulix, bootsie123, phidauex

###########################
# Configuration Variables #
###########################

# Permanent backups directory
# Default value can be overridden by setting environment variable before running prox_config_backup.sh
#   example: export BACK_DIR="/mnt/pve/media/backup"
#   or
#   example: BACK_DIR="." ./prox_config_backup.sh
#    DEFAULT_BACK_DIR="/mnt/pve/media/backup"
DEFAULT_BACK_DIR="/root/pve-backups"

# number of backups to keep before overriding the oldest one
MAX_BACKUPS=5

# Healthchecks.io notification service
# Set to 1 to use Healthchecks.io
HEALTHCHECKS=0
# Set to the URL of your healthchecks.io check
#HEALTHCHECKS_URL=https://hc-ping.com/your_uuid_here

###########################

# Set terminal to "dumb" if not set (cron compatibility)
export TERM=${TERM:-dumb}

# Set backup directory to default OR environment variable
_bdir=${BACK_DIR:-$DEFAULT_BACK_DIR}

# always exit on error
set -e

# temporary storage directory
_tdir=${TMP_DIR:-/var/tmp}

_tdir=$(mktemp -d $_tdir/proxmox-XXXXXXXX)

function clean_up {
    exit_code=$?
    echo "Cleaning up"
    rm -rf $_tdir

    # Ping Healthchecks.io if enabled
    if [ $HEALTHCHECKS -eq 1 ]; then
        echo "Healthchecks.io notification is enabled"
        curl -fsS -m 10 --retry 5 -o /dev/null $HEALTHCHECKS_URL/${exit_code}
    fi
}

# register the cleanup function to be called on the EXIT signal
trap clean_up EXIT

# Don't change if not required
_now=$(date +%Y-%m-%d.%H.%M.%S)
_HOSTNAME=$(hostname -f)
_filename1="$_tdir/proxmoxetc.$_now.tar"
_filename2="$_tdir/proxmoxpve.$_now.tar"
_filename3="$_tdir/proxmoxroot.$_now.tar"
_filename4="$_tdir/proxmoxcron.$_now.tar"
_filename5="$_tdir/proxmoxvbios.$_now.tar"
_filename6="$_tdir/proxmoxpackages.$_now.list"
_filename7="$_tdir/proxmoxreport.$_now.txt"
_filename8="$_tdir/proxmoxlocalbin.$_now.tar"
_filename_final="$_tdir/proxmox_backup_"$_HOSTNAME"_"$_now".tar.gz"

##########

function description {
# Check to see if we are in an interactive terminal, if not, skip the description
    if [[ -t 0 && -t 1 ]]; then
        clear
        cat <<EOF

        Proxmox Server Config Backup
        Hostname: "$_HOSTNAME"
        Timestamp: "$_now"

        Files to be saved:
        "/etc/*, /var/lib/pve-cluster/*, /root/*, /var/spool/cron/*, /usr/share/kvm/*.vbios"

        Backup target:
        "$_bdir"
        -----------------------------------------------------------------

        This script is supposed to backup your node config and not VM
        or LXC container data. To backup your instances please use the
        built in backup feature or a backup solution that runs within
        your instances.

        For questions or suggestions please contact me at
        https://github.com/DerDanilo/proxmox-stuff
        -----------------------------------------------------------------

        Hit return to proceed or CTRL-C to abort.
EOF
        read dummy
        clear
    fi
}

function are-we-root-abort-if-not {
    if [[ ${EUID} -ne 0 ]] ; then
      echo "Aborting because you are not root" ; exit 1
    fi
}

function check-num-backups {
    if [[ $(ls ${_bdir}/*${_HOSTNAME}*.tar.gz -l | grep ^- | wc -l) -ge $MAX_BACKUPS ]]; then
      local oldbackup="$(basename $(ls ${_bdir}/*${_HOSTNAME}*.tar.gz -t | tail -1))"
      echo "${_bdir}/${oldbackup}"
      rm "${_bdir}/${oldbackup}"
    fi
}

function copyfilesystem {
    echo "Tar files"
    # copy key system files
    tar --warning='no-file-ignored' -cvPf "$_filename1" /etc/.
    tar --warning='no-file-ignored' -cvPf "$_filename2" /var/lib/pve-cluster/.
    tar --warning='no-file-ignored' -cvPf "$_filename3" /root/.
    tar --warning='no-file-ignored' -cvPf "$_filename4" /var/spool/cron/.

    if [ "$(ls -A /usr/local/bin 2>/dev/null)" ]; then tar --warning='no-file-ignored' -cvPf "$_filename8" /usr/local/bin/.; fi

    if [ "$(ls /usr/share/kvm/*.vbios 2>/dev/null)" != "" ] ; then
    echo backing up custom video bios...
    tar --warning='no-file-ignored' -cvPf "$_filename5" /usr/share/kvm/*.vbios
    fi
    # copy installed packages list
    echo "Copying installed packages list from APT"
    apt-mark showmanual | tee "$_filename6"
    # copy pvereport output
    echo "Copying pvereport output"
    pvereport | tee "$_filename7"
}

function compressandarchive {
    echo "Compressing files"
    # archive the copied system files
    tar -cvzPf "$_filename_final" $_tdir/*.{tar,list,txt}

    # copy config archive to backup folder
    # this may be replaced by scp command to place in remote location
    cp $_filename_final $_bdir/
}

function stopservices {
    # stop host services
    for i in pve-cluster pvedaemon vz qemu-server; do systemctl stop $i ; done
    # give them a moment to finish
    sleep 10s
}

function startservices {
    # restart services
    for i in qemu-server vz pvedaemon pve-cluster; do systemctl start $i ; done
    # Make sure that all VMs + LXC containers are running
    qm startall
}

##########

description
are-we-root-abort-if-not
check-num-backups

# We don't need to stop services, but you can do that if you wish
#stopservices

copyfilesystem

# We don't need to start services if we did not stop them
#startservices

compressandarchive

# this works but has an interactive prompt
script 2 end

save exit nano
ctrl x y enter

chmod 755 /etc/cron.daily/pve-sp-mxl05116t9-backup.sh

./etc/cron.daily/pve-sp-mxl05116t9-backup.sh
above did not work

i had to cd /etc/cron.daily/
then ./pve-sp-mxl05116t9-backup.sh

close the shell

This will create a gzipped tar archive of your PVE configuration in the specified backup directory (in this case, "/root/pve-backups"). You can then use a tool like rsync or scp to transfer the backup to a remote server or storage location for safekeeping.

You can also schedule this script to run automatically using a tool like cron. This will allow you to automate the process of backing up your PVE configuration so that you don't have to remember to do it manually.

sources
https://github.com/DerDanilo/proxmox-stuff
https://forum.proxmox.com/threads/how-to-backup-proxmox-configuration-files.67789/
https://chat.openai.com/chat/ee52eb93-1f5d-451b-aad7-f07e55cd5bfa
https://gist.github.com/mrpeardotnet/6bdc4b504f43ce57fa7eaee96d376edf
https://raw.githubusercontent.com/DerDanilo/proxmox-stuff/master/prox_config_backup.sh
 
Last edited:
You just need to run that once after your storage is created. Then PVE will add it to your storage config file. That is one of the many things that people usually forget because it can't be done using the webUI and then wonder why PVE doesn't work anymore, because the root filesystem got completely full and switched to read-only, because they wrote a lot of stuff to the empty mountpoint (and so to the root filesystem) instead of writing it to a NAS or another disk.
Thanks i am yet to set up proper storage. I am creating all test vms on the free part of the ssd where the pve is running also. Not sure how to go about creating a raid with the two 500GB hdds and was of the thinking that the vms i have been creating are like infrastucure and wont be doing too much in terms of needing big virtual disk space.

I will be working on space next. I need to set up a client and a server test vm.
Wish me luck.

Link some good sources.
Thanks (⌐■_■)
 
You really should post code in CODE tags. Makes it much easier to read without line wrapping, without losing text formating and without emojis.

Easy to read:
Code:
function clean_up {
    exit_code=$?
    echo "Cleaning up"
    rm -rf $_tdir

    # Ping Healthchecks.io if enabled
    if [ $HEALTHCHECKS -eq 1 ]; then
        echo "Healthchecks.io notification is enabled"
        curl -fsS -m 10 --retry 5 -o /dev/null $HEALTHCHECKS_URL/${exit_code}
    fi
}

Hard to read:
function clean_up {
exit_code=$?
echo "Cleaning up"
rm -rf $_tdir

# Ping Healthchecks.io if enabled
if [ $HEALTHCHECKS -eq 1 ]; then
echo "Healthchecks.io notification is enabled"
curl -fsS -m 10 --retry 5 -o /dev/null $HEALTHCHECKS_URL/${exit_code}
fi
}
 
Last edited:
  • Like
Reactions: _humble_student_
You really should post code in CODE tags. Makes it much easier to read without line wrapping, without losing text format and without emojis.

Easy to read:
Code:
function clean_up {
    exit_code=$?
    echo "Cleaning up"
    rm -rf $_tdir

    # Ping Healthchecks.io if enabled
    if [ $HEALTHCHECKS -eq 1 ]; then
        echo "Healthchecks.io notification is enabled"
        curl -fsS -m 10 --retry 5 -o /dev/null $HEALTHCHECKS_URL/${exit_code}
    fi
}

Hard to read:
function clean_up {
exit_code=$?
echo "Cleaning up"
rm -rf $_tdir

# Ping Healthchecks.io if enabled
if [ $HEALTHCHECKS -eq 1 ]; then
echo "Healthchecks.io notification is enabled"
curl -fsS -m 10 --retry 5 -o /dev/null $HEALTHCHECKS_URL/${exit_code}
fi
}
will fix
 
View attachment 44812
my plan
Setup virtual networkcard interfaces. trying to simulate a real network. wan to firewall to edge router or core switch to vlans

1 simulate wan connect vmbr0 to pfsence wan port
2 connect vmbr2 to pfsence lan port
3 connect vmbr2, vmbr3, vmbr4, vmbr5 to router os
4 create four vlans in router os
5 get internet access on vlans
6 setup dhcp on vlans
7 setup dns on vlans
8 setup test client
9 try to ping google
connect

create virtual interfaces
vmbr0 - created by default and connected to network device enp025
vmbr1 - blank not sure but saw in config
vmbr2 - internet vlan firewall lan
vmbr3 - server vlan
vmbr4 - client_lan vlan
vmbr5 - client_wifi vlan
vmbr6 - fake internet port from modem to firewall WAN

Enable datacenter firewall
click on datacenter
firewall
add rule

create rule
in
accept
enable
interface vmbr0
protocol tcp
source port - BLANK
dest. port 8006
comment web pannel access dont mess with this
click ok

options
firewall edit
check to enable

open powershell
ping datacenterIP this should not
but work but web works

no vm should be able to access vmbr0 directly only through the router os and then the pfsense firewall

sources
https://www.youtube.com/watch?v=DNsLLrCgK0U
Setup virtual routing fake internet - firewall - router os - server2016
my plan to setup three networks for now
0 default vmbr0 - linux bridge - used this for internet access. is there a better way?
1 INTERNET vmbr2 - net1 - ether2 - ip address 172.16.0.1/29 172.16.0.0/29
2 SERVER vmbr3 - net2 - ether3 - ip address 172.16.1.1/24 172.16.1.0/24

Done this by first creating the individual linux bridges in proxmox gui at the server level host level. vmbr1 vmbr2 vmbr3 vmbr4 vmbr5. I have not set any ip address on these bridges. just left them all blank. vmbr0 created by the default proxmox setup it has an IP from my real lan.

I have enabled the firewall at the datacenter level and allow only web port 8006 access to the datacenter.

next i have setup 3 vms
100 router os - this box will work as a virtual router for the proxmox hosts pfSense and server2016 and have linux bridges vmbr1 vmbr2 vmbr3. router os cant see the default linux bridge vmbr0 which is oly conneted to the pfSense firewall. the router os vm will have its internet access provided by the pfSense firewall which has access to vmbr0 and vmbr2 as it has these as virtual network cards.

101 pfSense - this box has one of the five linux bridges. and It uses the default vmbr0 connected to the local lan. to fake an incomming internet service provider (this is connected to the local lan irl so it can get the internet). vmbr2 which will be the virtual local internet lan interface. my plan for vmbr2 is to have it distribute internet via router os to vmbr3.

102 server2016 - this box will be used to access the webfig setup page for router os and the web config page for the pfsense firewall it has only one virtual network card vmbr3. this vm cant see vmbr0 nor vmbr2 and its internet access will be controlled by the router os.

Lets define success
If i can access the config pages for both pfSense and router os from server2016
If i can ping google.com from server 2016
If i can run windows update on server 2016
1671963807221.png

How to route internet between interface or bridge in router os configure new router os give internet to lans


connect to server2016 vm
download winbox
https://mt.lv/winbox64


open winbox
enter mac
connect winbox to router os vm using default mac address
c6:0a:df:df:81:86 - server or22:0e:c1:6d:71:38 - blank


enter username - admin
password blank


noticed that I can use both need to check the firewall

click on interfaces and configure names
0 BLANK - ether1
1 INTERNET - ether2
2 SERVER - ether3
3 CLIENT - ether4
4 WIFI - ether5


press enter to save the changes after each rename configuration

assign ip address to interfaces
go to
ip then addresses to set static ip for the interfaces
BLANK - ether1 - none for now
INTERNET - ether2 - ip address 172.16.0.2/29 172.16.0.0
SERVER - ether3 - ip address 172.16.1.1/24 172.16.1.0
CLIENT - ether4 - ip address 172.16.2.1/24 172.16.2.0
WIFI - ether5 - ip address 172.16.3.1/24 172.16.3.0


enable dhcp server
goto ip then dhcp server to setup dhcp for interaces
click dhcp setup and follow the prompts
next next
SERVER - ether3 - ip address 172.16.1.1/24 172.16.1.0
CLIENT - ether4 - ip address 172.16.2.1/24 172.16.2.0
WIFI - ether5 - ip address 172.16.3.1/24 172.16.3.0
enter dns 8.8.8.8 - need to setup dns on firewall pfsense


default route configuration
go to ip then route to configure default routes
set the dst address - 0.0.0.0/0
gateway - set to pfsence ip - 172.16.0.1
click apply and ok


NAT configuration
go to ip then firewall
select the NAT tab
chain: srcnat
Out. Interface: INTERNET
Select the action tab
Action: masquerade


click apply and ok

we should be able to browse the internet from any device connected to the router

next how to bridge
SERVER CLIENT and WIFI networks using router os


sources
https://www.youtube.com/watch?v=8QbI1-7zqkY
How to setup Proxmox with Single Public IP and share with VMs | Proxmox Tutorial
Proxmox NETWORKING: VLANs, Bridges, and Bonds!
https://chat.openai.com/chat/b499c1df-c058-4839-8008-943befcc65ad
MikroTik Tutorial 64 - Use your router to get internet from another router wirelessly
https://help.mikrotik.com/docs/display/ROS/First+Time+Configuration
MikroTik Tutorial 11 - Creating Bridges (LAN)
 

Attachments

  • 1671963621212.png
    1671963621212.png
    216.7 KB · Views: 3
Last edited:

About

The Proxmox community has been around for many years and offers help and support for Proxmox VE, Proxmox Backup Server, and Proxmox Mail Gateway.
We think our community is one of the best thanks to people like you!

Get your subscription!

The Proxmox team works very hard to make sure you are running the best software and getting stable updates and security enhancements, as well as quick enterprise support. Tens of thousands of happy customers have a Proxmox subscription. Get yours easily in our online shop.

Buy now!