This is the last in a series of five articles about installing and configuring VMs (Linux,BSD,Windows and macOS) in PCI Passthrough on Proxmox VE 8.
- Part 0-4 PCI/GPU Passthrough on Proxmox VE Installation and configuration (Part. 00x04)
- Part 1-4 PCI/GPU Passthrough on Proxmox VE: Windows 10,11 (Part. 01x04)
- Part 2-4 PCI/GPU Passthrough on Proxmox VE: Debian 12 (Part. 02x04)
- Part 3-4 PCI/GPU Passthrough on Proxmox VE: OpenBSD 7.3 (Part. 03x04)
- Part 4-4 PCI/GPU Passthrough on Proxmox VE: macOS Montrey (Part. 04x04)
Today, we're back with the configuration of our latest macOS VM. I must point out, however, that Proxmox does not officially support this type of operating system. As you'll notice, the configuration will be a little more "exotic" than for a simple VM running Linux, BSD or Windows. I've also drawn heavily on this article Installing macOS 12 "Monterey" on Proxmox 7, which I find very complete and fairly exhaustive. I've only made minor modifications and tested compatibility with my Proxmox v.8 configuration.
- Original article (FR) on my website
- YouTube video
Host system requirements
Before getting down to business, I'll give you a quick reminder of my hardware configuration:
Unfortunately my CPU, does not meet the hardware requirements imposed by Apple from macOS Ventura onwards (i.e. AVX2 support). I'm therefore going to fall back on an earlier version of macOS, Monterey in this case, which will pose fewer compatibility problems.
Incidentally, your hardware compatibility is undoubtedly the first thing to check if you want to virtualize a macOS system, as Apple limits the amount of hardware supported. You should take a look at this page 'Hardware limitations - OpenCore' to make sure your hardware is supported.
Build an installation image, for macOS Monterey (under Linux)
Let's start by installing the dependencies:
I retrieve the OSX-KVM git project, then execute fetch-macOS-v2 to retrieve the macOS installation DMG:
Then all I have to do is convert the DMG image to ISO, and move the converted image to your dedicated ISO storage directory.
[/code]
I also retrieve the OpenCore ISO and place it in the same directory:
[Creating our macOS VM[/b]
Let's move on to the creation of our VM.
Here are some explanations of the key points of this command:
We'll need to add a few extra lines to the QEMU configuration, depending on your CPU:
CPU INTEL
CPU AMD
This makes your AMD CPU look like a Penryn-generation Intel, and adds several features (both required and optional). Features that your host CPU doesn't support will simply be ignored - only SSE4.2 is required and must be supported by your host CPU. To check which features your CPU supports, enter the following command from Proxmox:
Installing macOS
Now let's start our virtual machine:
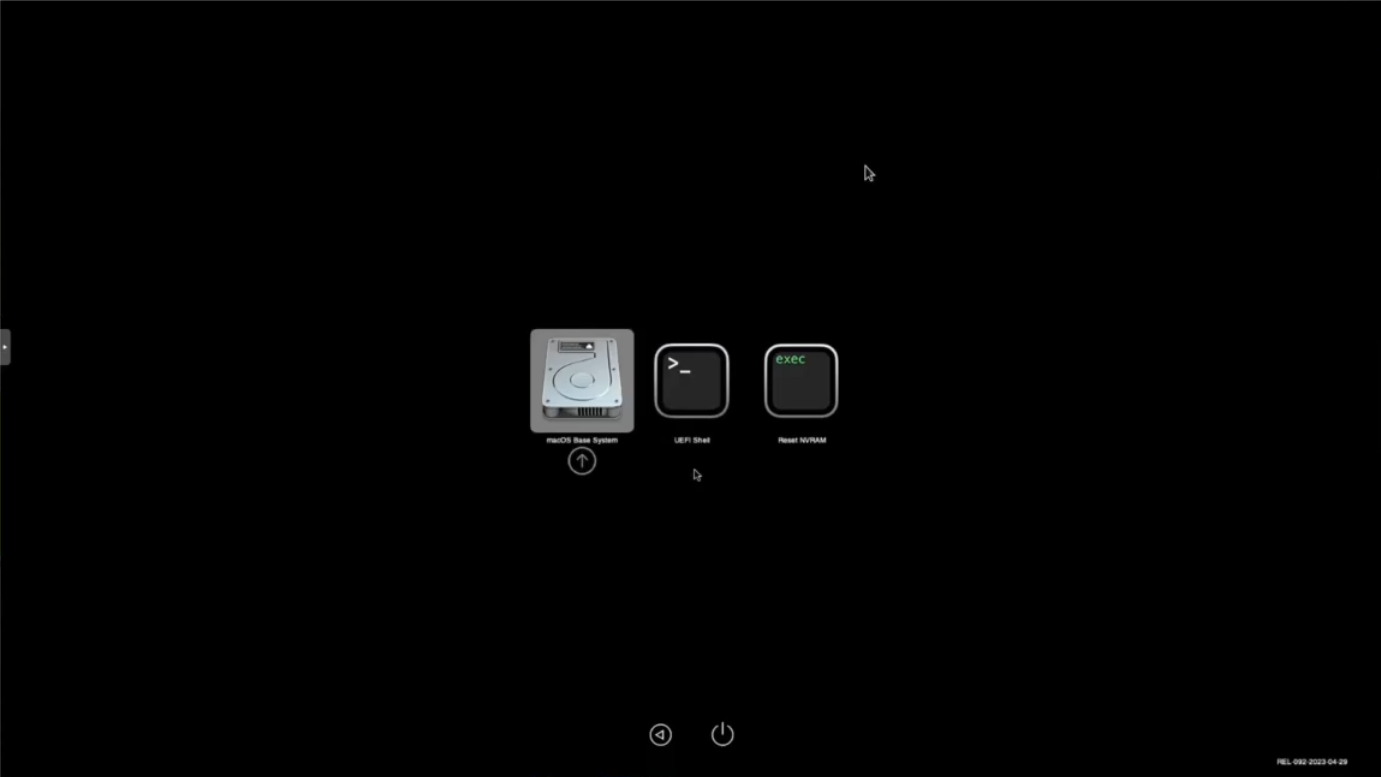
From the Proxmox console (noVNC), press "MacOS Base System".
Our destination hard disk must be formatted before we can install the system
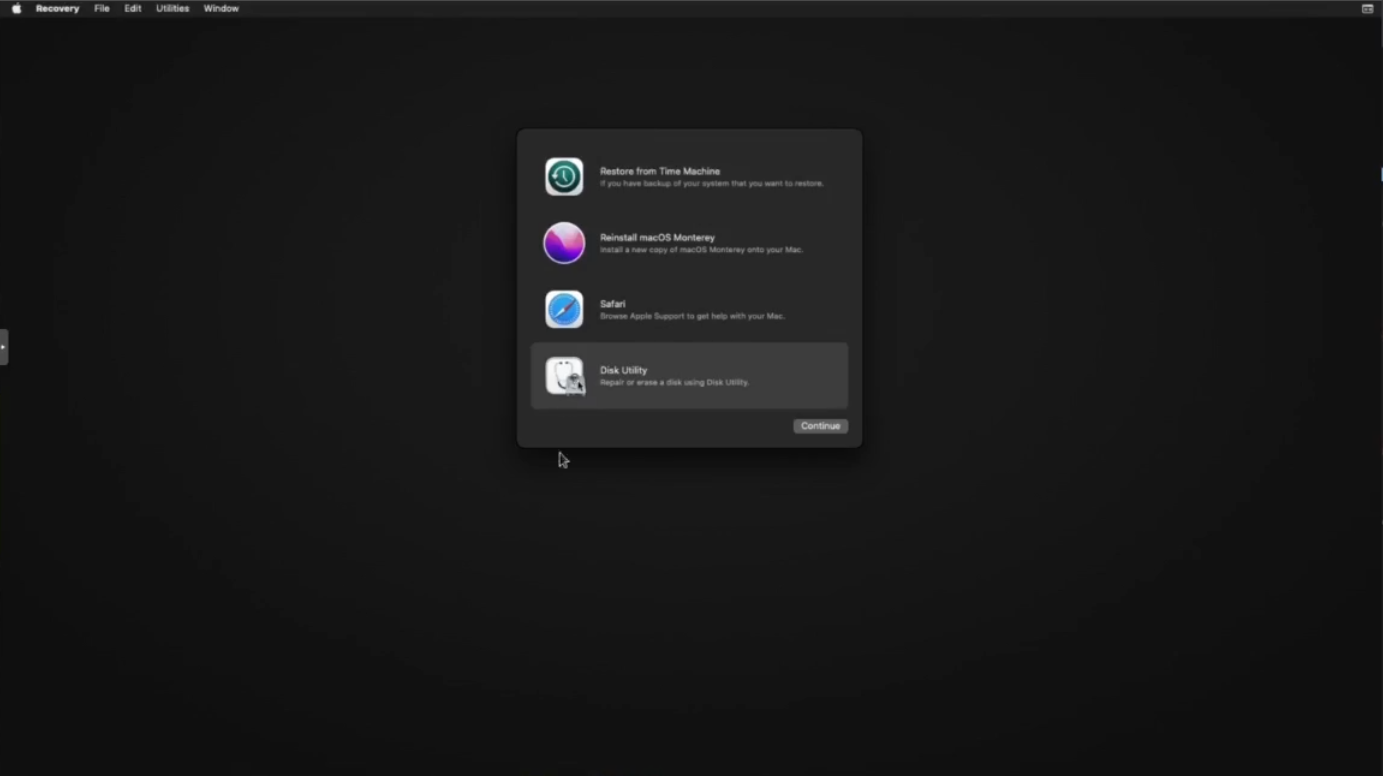
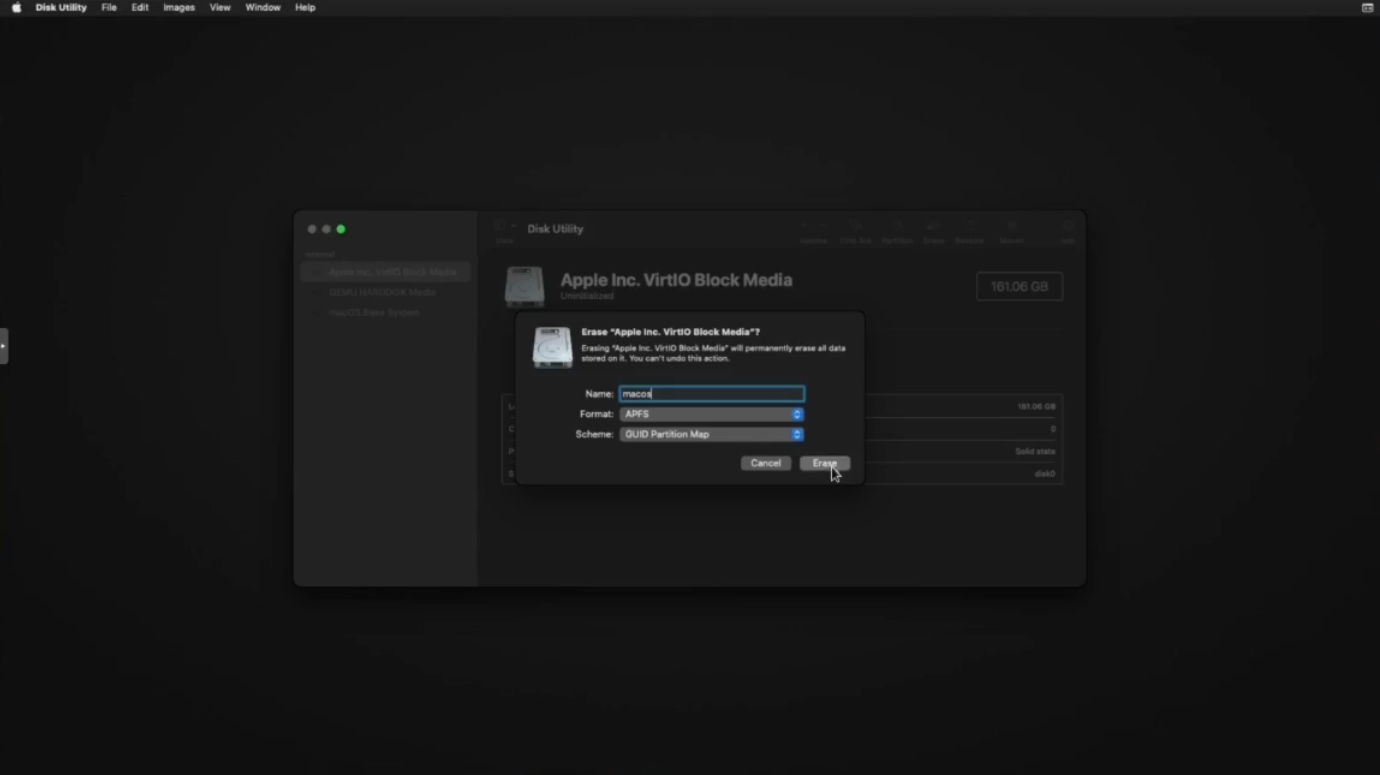
After quitting the Disk Utility, launch the macOS Monterey restore and select the destination disk, and wait (the installation process will be quite long).
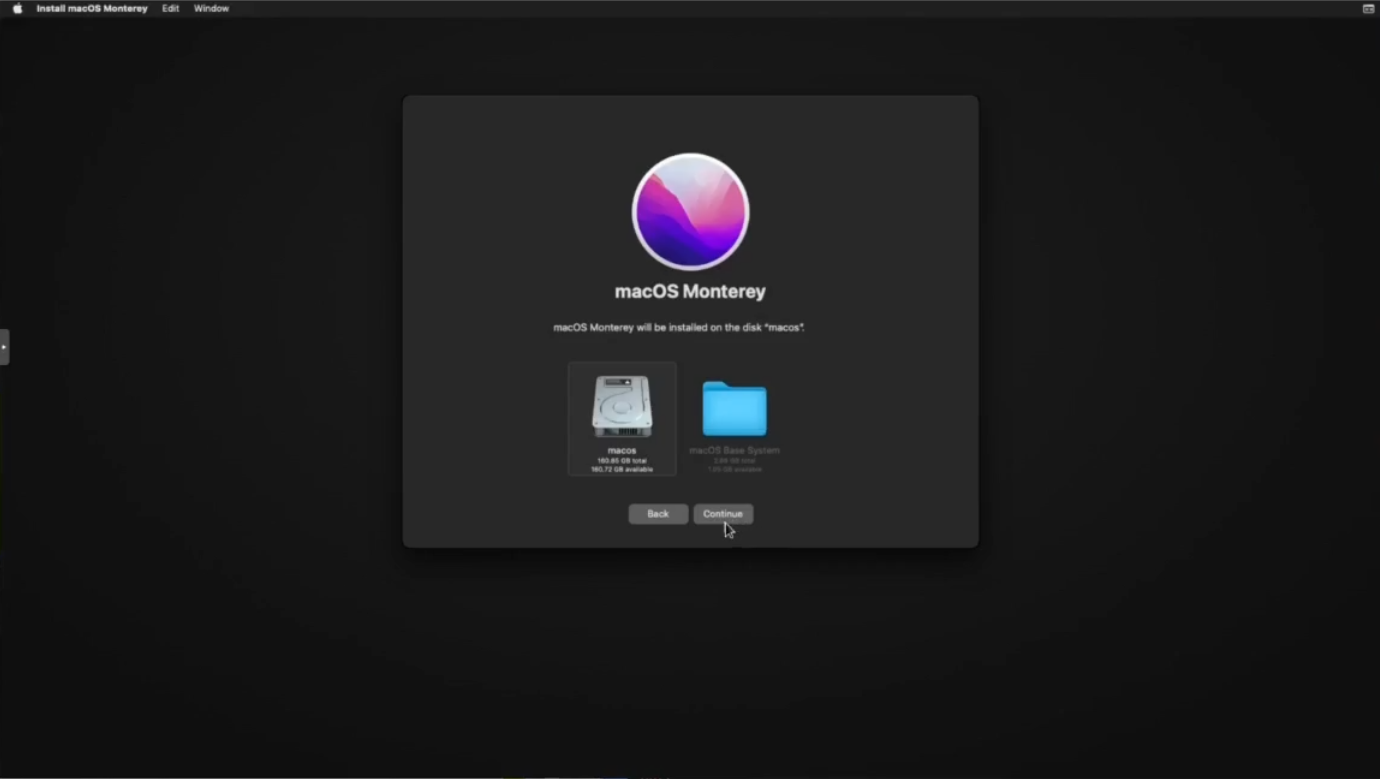
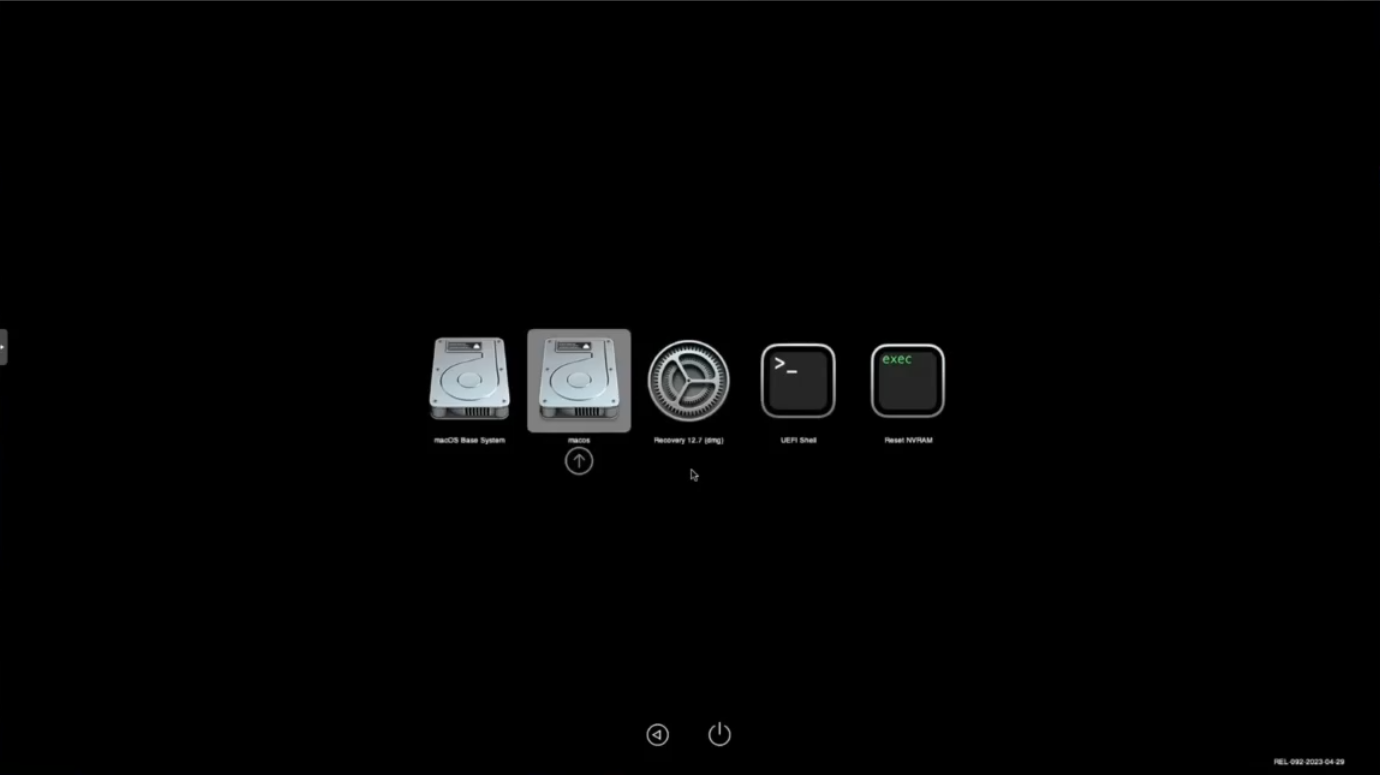
During system installation, the virtual machine will reboot 2 or 3 times in succession, so you'll need to manually select the "macOS Installer" entry each time to continue the process. After the umpteenth reboot, the "macOS Installer" entry disappears, so select the name of your destination disk
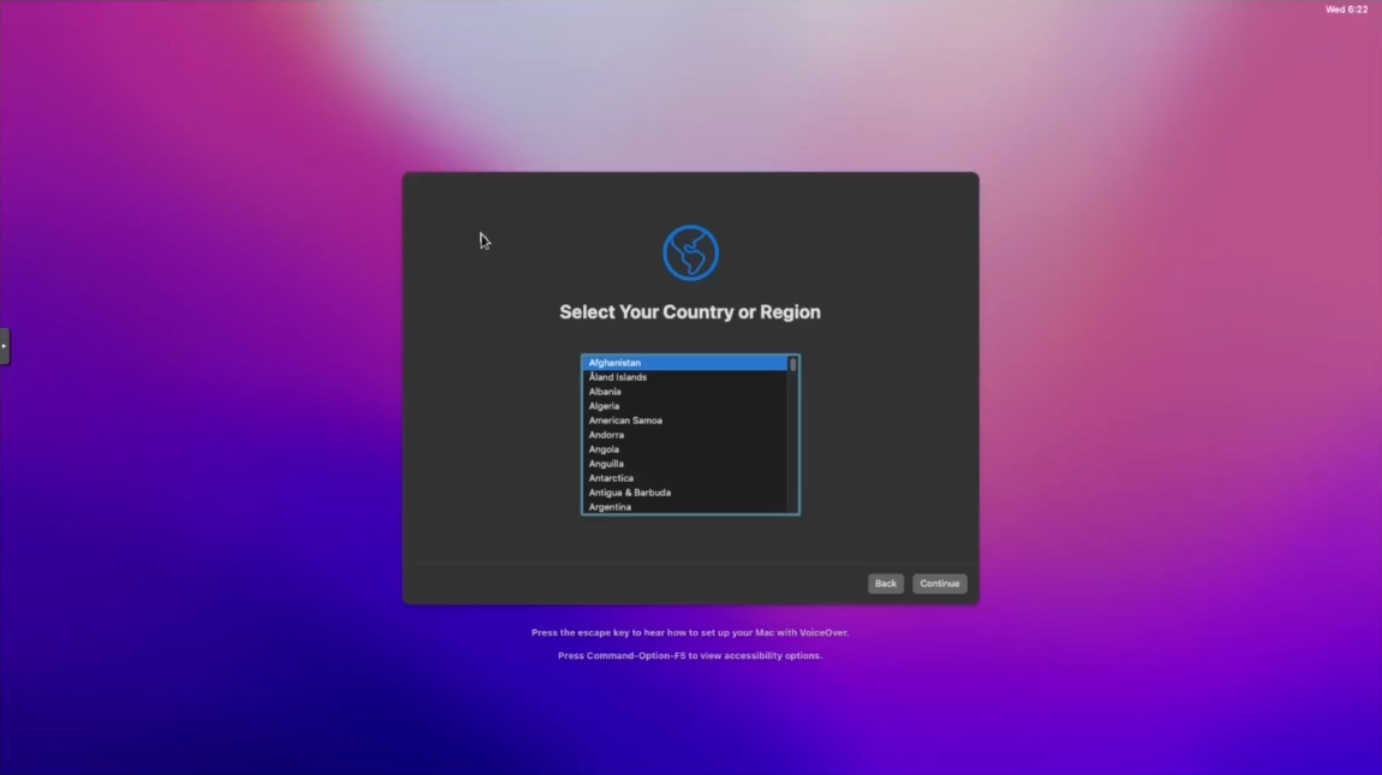
Finally, proceed with the classic post-installation process
OpenCore customization and EFI partition
As things stand, when booting up the system we necessarily use the OpenCore image.
import it into the EFI partition of macOS
From your macOS session, open the terminal and run "diskutil list":
Next, we'll use dd to replace the EFI partition on the hard disk with that of the OpenCore image. OpenCore is the small disk (~ 150 MB) which contains only one EFI partition, and the main hard disk is the one with the "Apple_APFS Container" partition (160 GB). In my case, these EFI partitions are designated disk2s1 and disk0s1 :
Next we will create a mount point to the EFI partition:
Finally, we will edit the following file "config.plist", to configure a timeout for an automatic boot on the "macOS" disk:
In the file, search for the value "BlessOverride" and change the value of the Timeout key from 0 to 5
Before shutting down your VM, set automatic login for your main user, from "System Preferences/Users & Groups". Once the VM is shut down, we can delete the OpenCore and Monterey disks, and make sure that virtio0 is the first disk in the boot order.
As I have a KVM Switch to share my mouse and keyboard between my thinkpad and the VMs hosted on the hypervisor, I add the IDs of both devices to my VM :
On the Proxmox host, I search the available USB devices:
All that's left is to add the two IDs to my VM:
Finally I add the graphics card, which I define as the primary GPU, enabling all its features:
If all went well, when the VM is restarted, you should see the OpenCore menu displayed and automatically booted on your macOS disk. I haven't yet found a "clean" way of getting the display to pass through the graphics card alone, as disabling the "VMWare display" prevents the VM from booting. That's why I have to manually define a mirroring between my "real" screen (don't forget to define the latter as the new main screen) and the VMware virtual screen.
Resources:
- Part 0-4 PCI/GPU Passthrough on Proxmox VE Installation and configuration (Part. 00x04)
- Part 1-4 PCI/GPU Passthrough on Proxmox VE: Windows 10,11 (Part. 01x04)
- Part 2-4 PCI/GPU Passthrough on Proxmox VE: Debian 12 (Part. 02x04)
- Part 3-4 PCI/GPU Passthrough on Proxmox VE: OpenBSD 7.3 (Part. 03x04)
- Part 4-4 PCI/GPU Passthrough on Proxmox VE: macOS Montrey (Part. 04x04)
Today, we're back with the configuration of our latest macOS VM. I must point out, however, that Proxmox does not officially support this type of operating system. As you'll notice, the configuration will be a little more "exotic" than for a simple VM running Linux, BSD or Windows. I've also drawn heavily on this article Installing macOS 12 "Monterey" on Proxmox 7, which I find very complete and fairly exhaustive. I've only made minor modifications and tested compatibility with my Proxmox v.8 configuration.
- Original article (FR) on my website
- YouTube video
Host system requirements
Before getting down to business, I'll give you a quick reminder of my hardware configuration:
- MOTHERBOARD: ASRock 970 Pro3 R2.0
- CPU: AMD FX 4300 Quad-Core Processor
- GPU: SAPPHIRE Pulse Radeon RX 580 8 GB GDDR5
Unfortunately my CPU, does not meet the hardware requirements imposed by Apple from macOS Ventura onwards (i.e. AVX2 support). I'm therefore going to fall back on an earlier version of macOS, Monterey in this case, which will pose fewer compatibility problems.
Incidentally, your hardware compatibility is undoubtedly the first thing to check if you want to virtualize a macOS system, as Apple limits the amount of hardware supported. You should take a look at this page 'Hardware limitations - OpenCore' to make sure your hardware is supported.
Build an installation image, for macOS Monterey (under Linux)
Let's start by installing the dependencies:
Code:
apt install -y p7zip-full make dmg2img gitI retrieve the OSX-KVM git project, then execute fetch-macOS-v2 to retrieve the macOS installation DMG:
Code:
git clone https://github.com/thenickdude/OSX-KVM
cd OSX-KVM
$ ./fetch-macOS-v2.py
1. High Sierra (10.13)
2. Mojave (10.14)
3. Catalina (10.15)
4. Big Sur (11.7) - RECOMMENDED
5. Monterey (12.6)
6. Ventura (13)

Choose a product to download (1-6): 5
Then all I have to do is convert the DMG image to ISO, and move the converted image to your dedicated ISO storage directory.
Code:
dmg2img BaseSystem.dmg monterey-basesystem.iso
mv monterey-basesystem.iso /mnt/pve/PVE1/template/iso/I also retrieve the OpenCore ISO and place it in the same directory:
Code:
wget https://github.com/thenickdude/KVM-Opencore/releases/download/v20/OpenCore-v20.iso.gz && gzip -d OpenCore-v20.iso.gz
mv OpenCore-v20.iso /mnt/pve/PVE1/template/iso/
[Creating our macOS VM[/b]
Let's move on to the creation of our VM.
Code:
 qm create 102
    --name mac-102
    --vga vmware
    --memory 8192
    --bios ovmf
    --machine q35 \
    --sockets 1 --cores 4 \
    --cpu Penryn
    --numa 1
    --cpuunits 1024 \
    --net0 virtio,bridge=vmbr0 \
    --scsihw virtio-scsi-pci \
    --boot order='ide2;ide0;virtio0' \
    --ostype other \
    --efidisk0 local-lvm:0 \
    --virtio0 local-lvm:150,cache=unsafe,discard=on, \
    --ide0 PVE1:iso/monterey-basesystem.iso,cache=unsafe \
    --ide2 PVE1:iso/OpenCore-v20.iso,cache=unsafe
Here are some explanations of the key points of this command:
- ide0 PVE1:iso/monterey-basesystem.iso,cache=unsafe: ide0 contains our macos monterey disk image.
- ide2 PVE1:iso/OpenCore-v20.iso,cache=unsafe: in ide2 the opencore iso image.
- boot order='ide2;ide0;virtio0': the opencore image, must be in first position in the boot order.
- vga vmware: we'll use vmware for the duration of the installation, before letting the GPU manage the display on its own.
We'll need to add a few extra lines to the QEMU configuration, depending on your CPU:
CPU INTEL
Code:
qm set 102 --cpu "host,kvm=on,vendor=GenuineIntel,+kvm_pv_unhalt,+kvm_pv_eoi,+hypervisor,+invtsc -device isa-applesmc,osk='ourhardworkbythesewordsguardedpleasedontsteal(c)AppleComputerInc' -smbios type=2 -device usb-kbd,bus=ehci. 0, port=2 -global nec-usb-xhci.msi=off -global ICH9-LPC.acpi-pci-hotplug-with-bridge-support=off"CPU AMD
Code:
qm set 102 --cpu "Penryn,kvm=on,vendor=GenuineIntel,+kvm_pv_unhalt,+kvm_pv_eoi,+hypervisor,+invtsc,+pcid,+ssse3,+sse4. 2,+popcnt,+avx,+avx2,+aes,+fma,+fma4,+bmi1,+bmi2,+xsave,+xsaveopt,+rdrand,check -device isa-applesmc,osk='ourhardworkbythesewordsguardedpleasedontsteal(c)AppleComputerInc' -smbios type=2 -device usb-kbd,bus=ehci.0, port=2 -global nec-usb-xhci.msi=off -global ICH9-LPC.acpi-pci-hotplug-with-bridge-support=off"This makes your AMD CPU look like a Penryn-generation Intel, and adds several features (both required and optional). Features that your host CPU doesn't support will simply be ignored - only SSE4.2 is required and must be supported by your host CPU. To check which features your CPU supports, enter the following command from Proxmox:
Code:
lscpu | grep -o "^Flags: .*"Installing macOS
Now let's start our virtual machine:
Code:
qm start 102From the Proxmox console (noVNC), press "MacOS Base System".

Our destination hard disk must be formatted before we can install the system


After quitting the Disk Utility, launch the macOS Monterey restore and select the destination disk, and wait (the installation process will be quite long).

During system installation, the virtual machine will reboot 2 or 3 times in succession, so you'll need to manually select the "macOS Installer" entry each time to continue the process. After the umpteenth reboot, the "macOS Installer" entry disappears, so select the name of your destination disk

Finally, proceed with the classic post-installation process

OpenCore customization and EFI partition
As things stand, when booting up the system we necessarily use the OpenCore image.
import it into the EFI partition of macOS
From your macOS session, open the terminal and run "diskutil list":
Code:
% diskutil list
/dev/disk0 (internal):
   #: TYPE NAME SIZE IDENTIFIER
   0: GUID_partition_scheme 69.8 GB disk0
   1: EFI EFI 209.7 MB disk0s1 #Partition to overwrite
   2: Apple_APFS Container disk3 69.6 GB disk0s2

/dev/disk1 (internal, physical):
   #: TYPE NAME SIZE IDENTIFIER
   0: GUID_partition_scheme *2.1 GB disk1
   1: Apple_HFS macOS Base System 2.0 GB disk1s1

/dev/disk2 (internal, physical):
   #: TYPE NAME SIZE IDENTIFIER
   0: GUID_partition_scheme *157.3 MB disk2
   1: EFI EFI 157.2 MB disk2s1 #Partition to import

/dev/disk3 (synthesized):
   #: TYPE NAME SIZE IDENTIFIER
   0: APFS Container Scheme - +69.6 GB disk3
                                 Physical Store disk0s2
   1: APFS Volume macOS - Data 2.3 GB disk3s1
   2: APFS Volume Preboot 284.6 MB disk3s2
   3: APFS Volume Recovery 623.4 MB disk3s3
   4: APFS Volume VM 1.1 MB disk3s4
   5: APFS Volume macOS 15.3 GB disk3s5
   6: APFS Snapshot com.apple.os.update-... 15.3 GB disk3s5s1
Next, we'll use dd to replace the EFI partition on the hard disk with that of the OpenCore image. OpenCore is the small disk (~ 150 MB) which contains only one EFI partition, and the main hard disk is the one with the "Apple_APFS Container" partition (160 GB). In my case, these EFI partitions are designated disk2s1 and disk0s1 :
Code:
% sudo dd if=/dev/disk2s1 of=/dev/disk0s1Next we will create a mount point to the EFI partition:
Code:
sudo mkdir /Volumes/EFI
sudo mount -t msdos /dev/disk0s1 /Volumes/EFI
Finally, we will edit the following file "config.plist", to configure a timeout for an automatic boot on the "macOS" disk:
Code:
vim /Volumes/EFI/EFI/OC/config.plistIn the file, search for the value "BlessOverride" and change the value of the Timeout key from 0 to 5
Code:
<key>Misc</key>
(...)
    <key>BlessOverride</key>
    (...)
    <key>Boot</key>
    (...)
        <key>Timeout</key>
        <integer>5</integer>
Before shutting down your VM, set automatic login for your main user, from "System Preferences/Users & Groups". Once the VM is shut down, we can delete the OpenCore and Monterey disks, and make sure that virtio0 is the first disk in the boot order.
Code:
qm set 102 --delete ide2
qm set 102 --delete ide0
qm set 102 --boot order='virtio0'
As I have a KVM Switch to share my mouse and keyboard between my thinkpad and the VMs hosted on the hypervisor, I add the IDs of both devices to my VM :
On the Proxmox host, I search the available USB devices:
Code:
lsusb | grep -E "Logitech|Lite-On"
Bus 001 Device 019: ID 046d:c08b Logitech, Inc. G502 SE HERO Gaming Mouse
Bus 001 Device 018: ID 04ca:007d Lite-On Technology Corp. USB wired keyboard
All that's left is to add the two IDs to my VM:
Code:
qm set 102 --usb0 046d:c08b,usb3=1
qm set 102 --usb1 04ca:007d,usb3=1
Finally I add the graphics card, which I define as the primary GPU, enabling all its features:
Code:
qm set 102 --hostpci0 0000:01:00,pci=1,x-vga=1If all went well, when the VM is restarted, you should see the OpenCore menu displayed and automatically booted on your macOS disk. I haven't yet found a "clean" way of getting the display to pass through the graphics card alone, as disabling the "VMWare display" prevents the VM from booting. That's why I have to manually define a mirroring between my "real" screen (don't forget to define the latter as the new main screen) and the VMware virtual screen.
Resources:
Last edited:


